Feedback
Create a Jira Button
Published Date: 09-07-2026
Read Time:
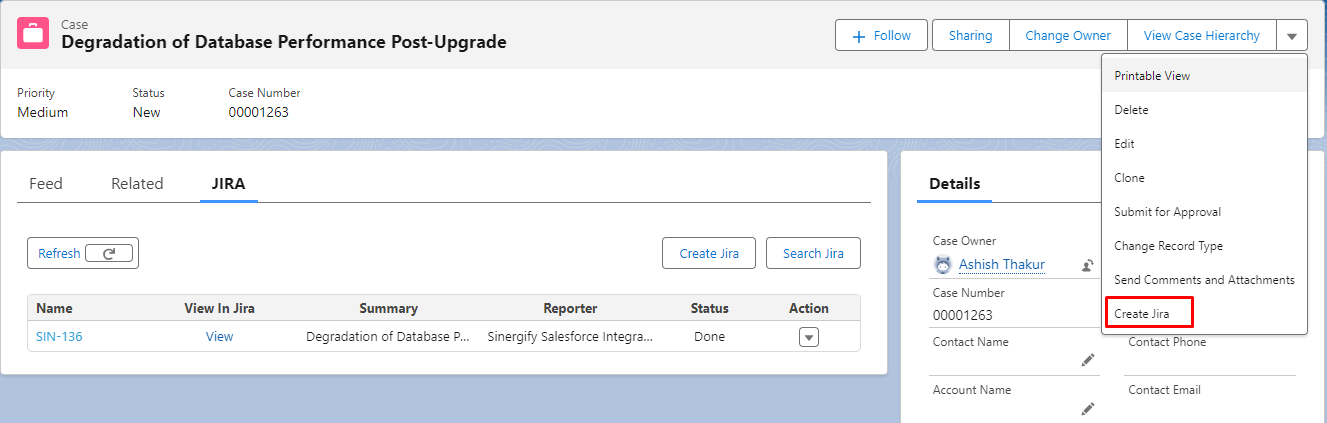
Sinergify offers two ways to create Jira tickets:
-
Using the ‘Create Jira’ button present on the object detail page.
-
Using the ‘Create Jira’ button present on the related Jira tab on the object detail page.
Using the ‘Create Jira’ button present on the object detail page.
Using the ‘Create Jira’ button present on the related Jira tab on the object detail page.
Creating Jira Ticket Using the ‘Create Jira’ Button from the Object Detail Page
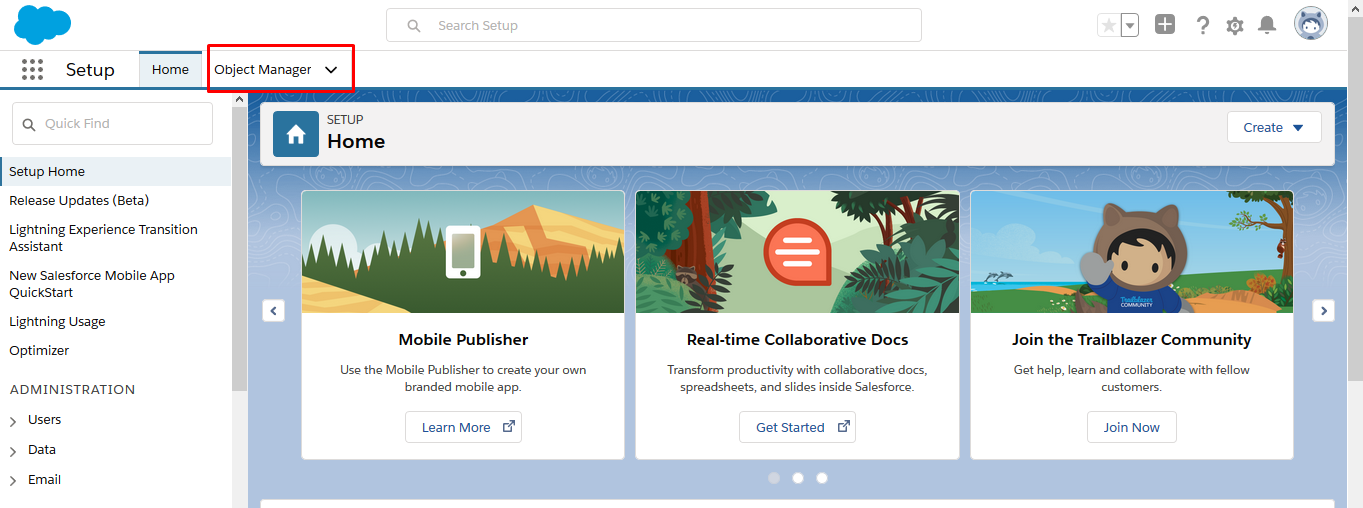
To start with, a ‘Create Jira’ button needs to be created and added to the object layout. Follow the below steps to create a ‘CreateJira’ LWC button on the object details page. We have used the Case Object as an illustration. Likewise, you can apply the same approach for the other Salesforce Objects.
-
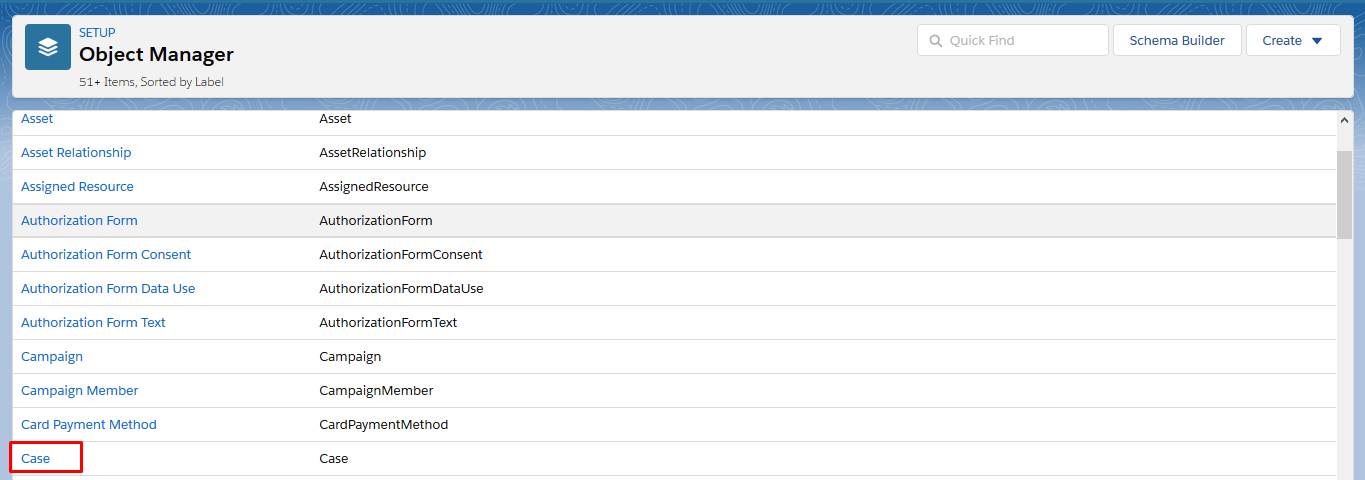
From the Setup homepage, click Object Manager.

-
Select and click the object for which you want to create a CreateJira button. We have used the case object as an illustration.

-
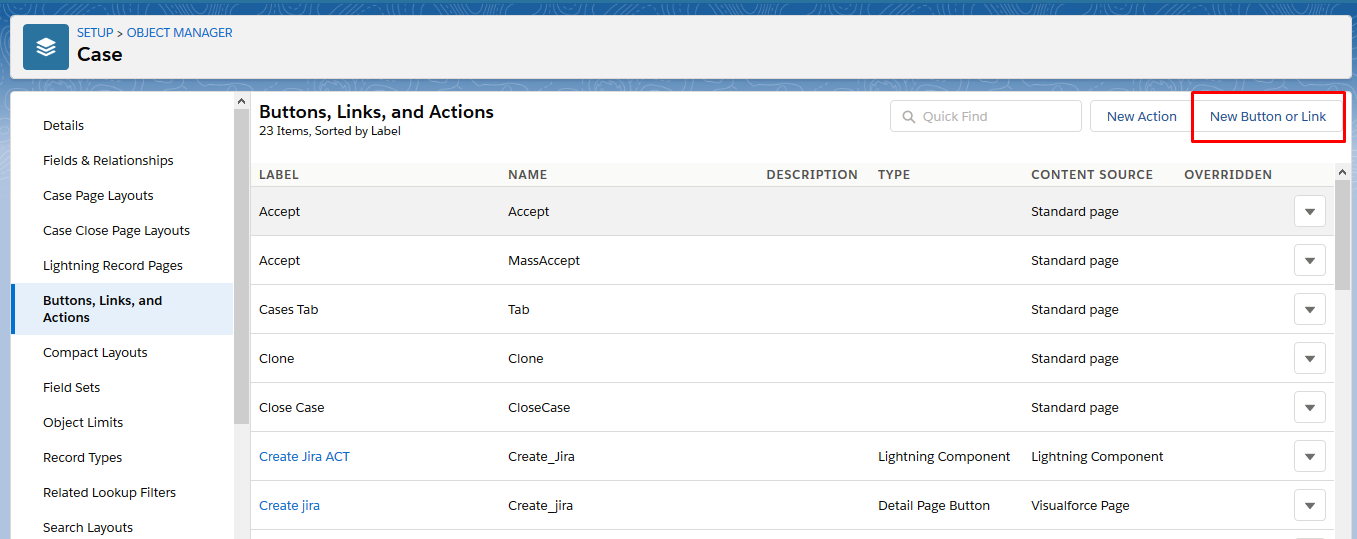
From the list of menu sub-tab, click Buttons, Links, and Actions.


-
From the extreme right on the top, click New Button or Link.

-
Enter CreateJira in the Label field and the Name field will be auto-populated.
-
Select the Detail Page Button for Display Type.
-
For Behavior, select Display in the new window from the drop-down options.
-
For Content Source, select URL from the drop-down options.
-
Enter the following code in the highlighted field as in the screenshot below.
/lightning/r/{!Case.Id}/view?Grz_Sf__ws=createjira{!MILLISECOND(TIMENOW())}
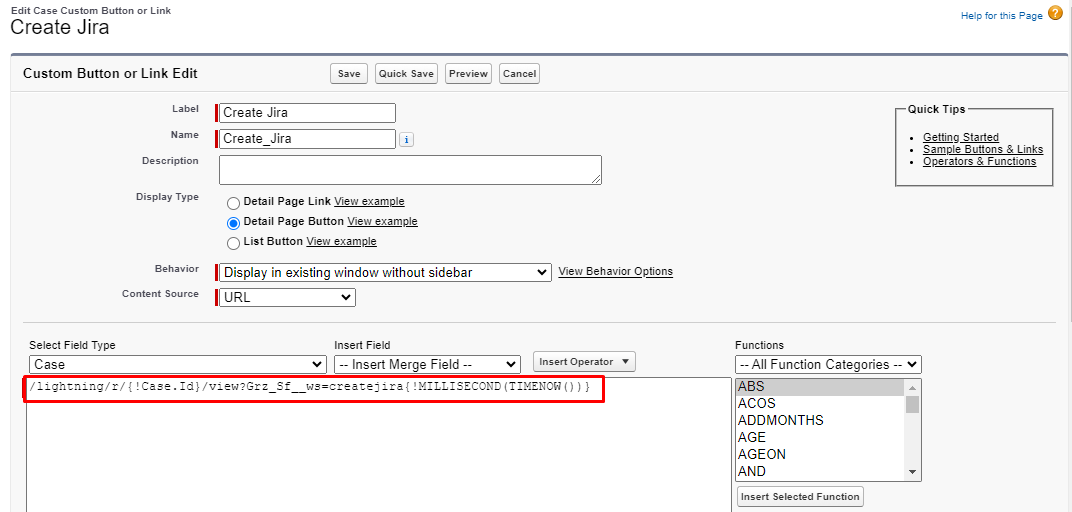
Note: {!Case.Id} here would vary from object to object. Since here we are creating a button for the Cases object, we have used Case Id in the code.
Make sure the field details look like in the above screenshot.
-
Click Save.
-
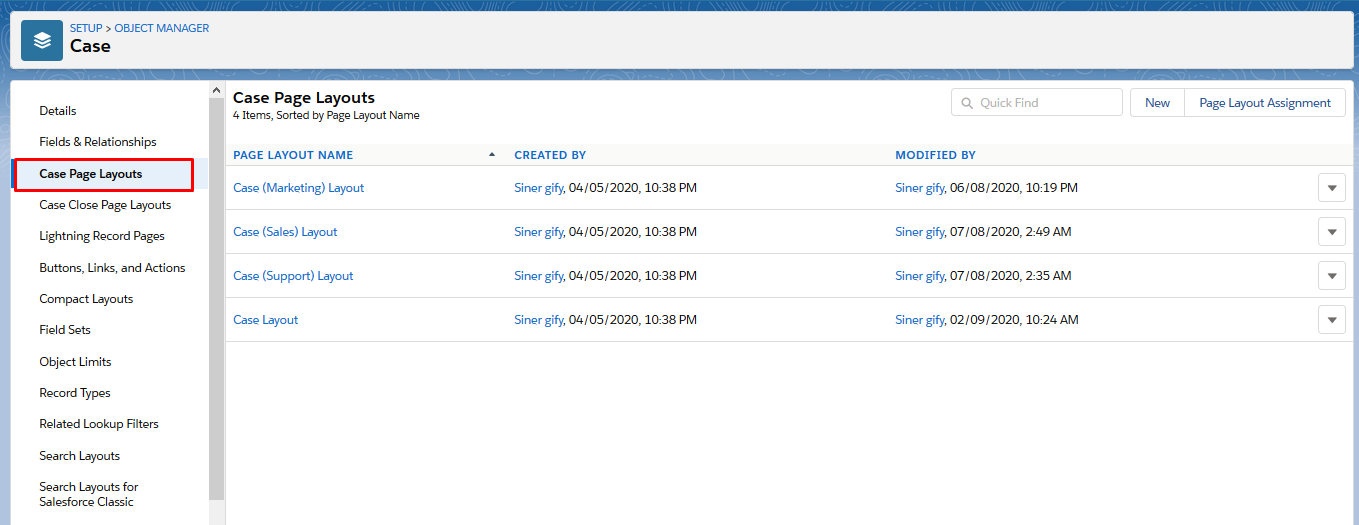
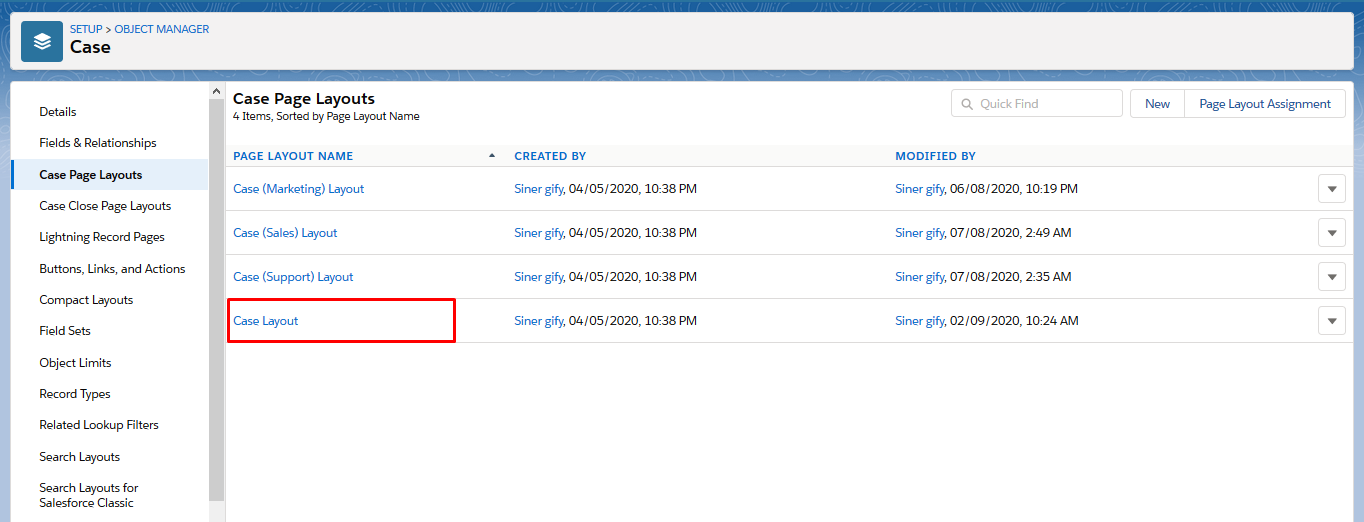
Click Case Page Layout from the menu sub-tab.

-
Click Case Layout.

-
Click Mobile & Lightning Actions from the Palette.

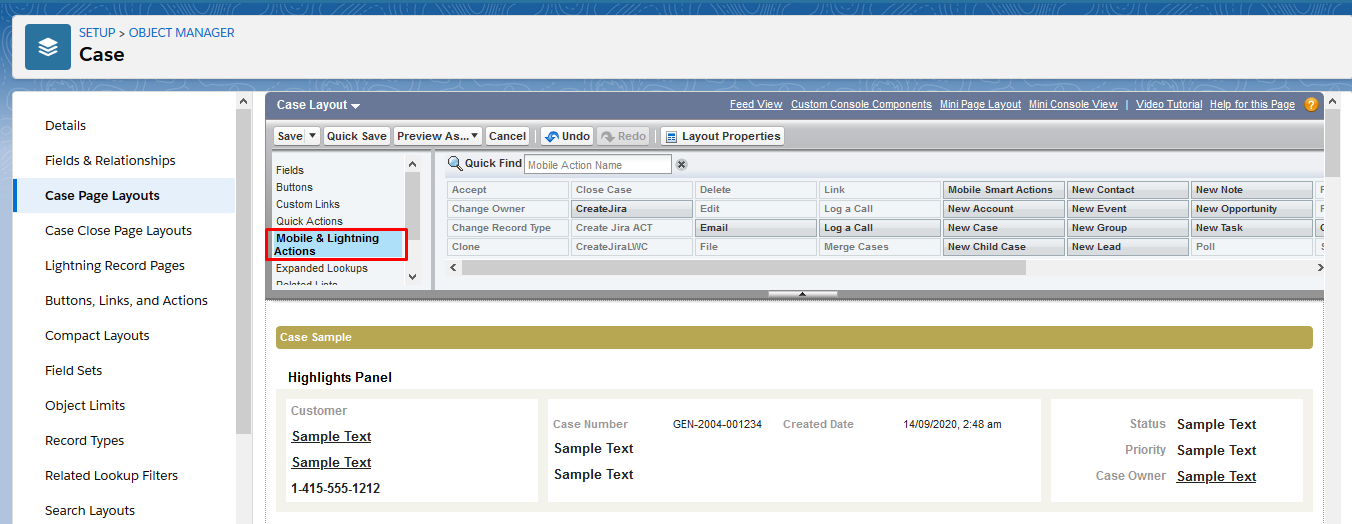
-
Select CreateJira and drag it to the Salesforce Mobile and Lightning Experience Actions section and drop it there.

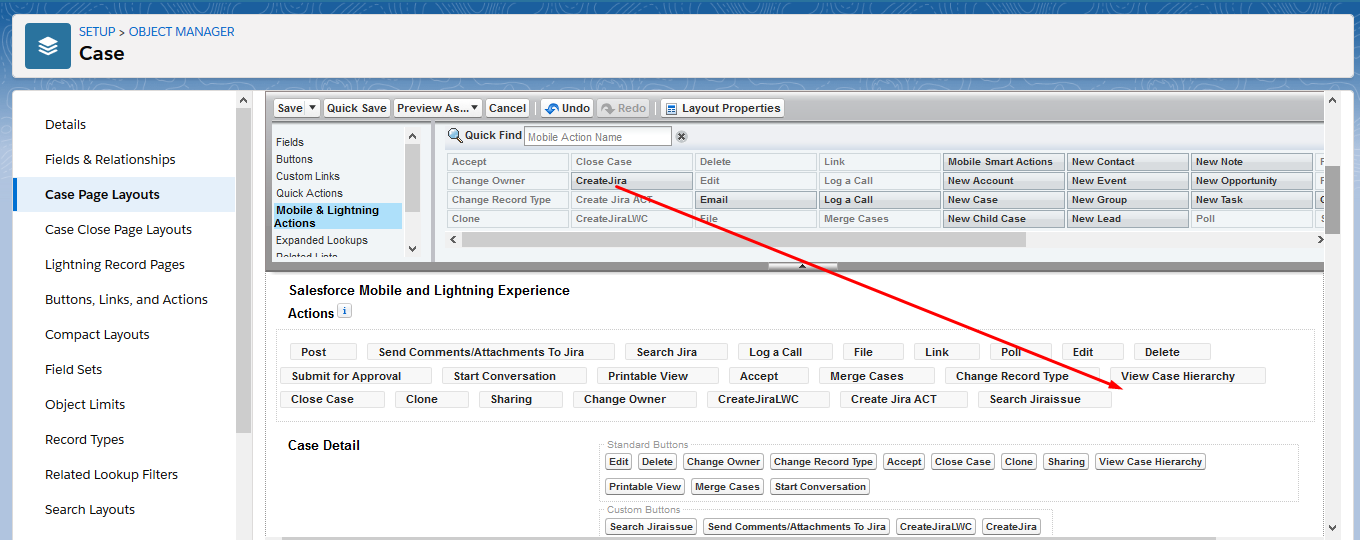
-
Click Save.
-
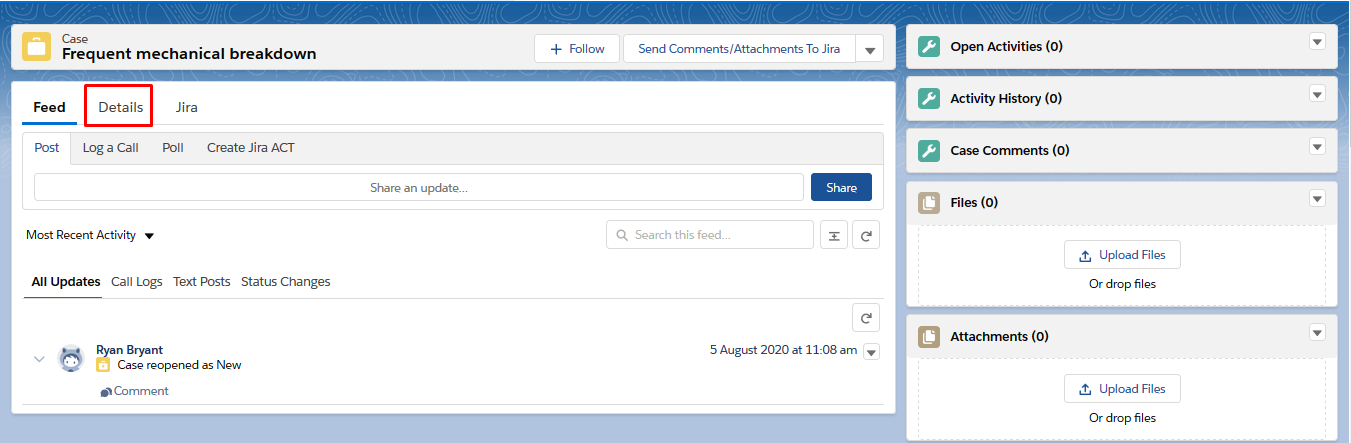
Now, visit the Cases page and click on any case.
-
Click on the Details tab on the case detail page.

-
From the Setup tab, click Edit Page.

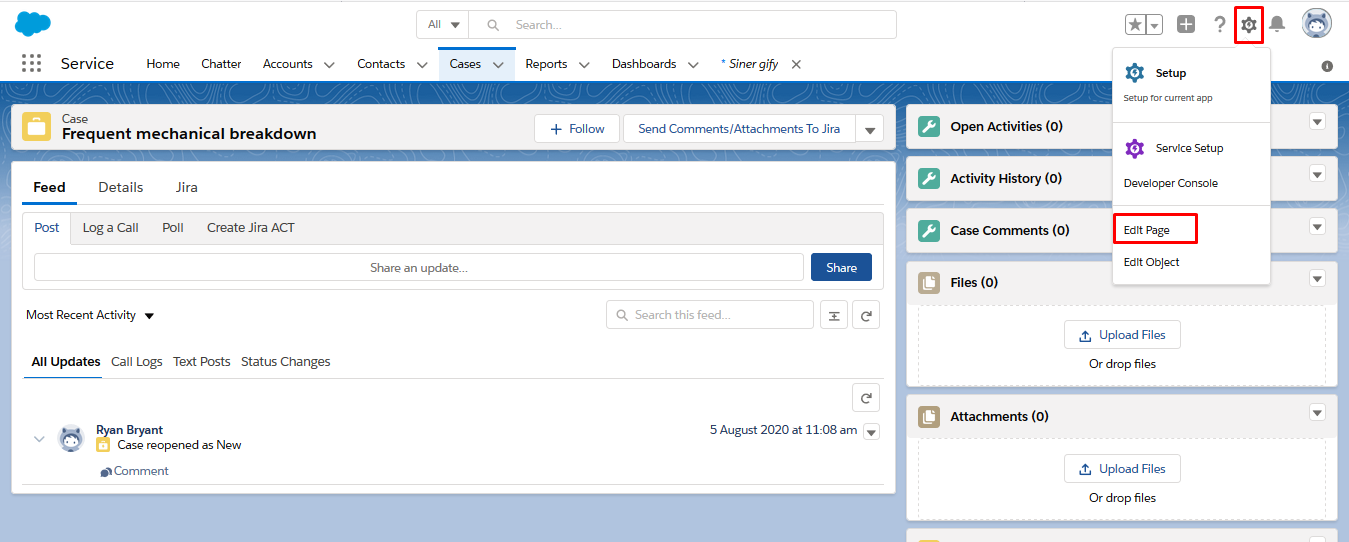
-
Scroll down on the left and drag CreateJiraLighting to the bottom of the Details tab. Add the Create Jira Action button.

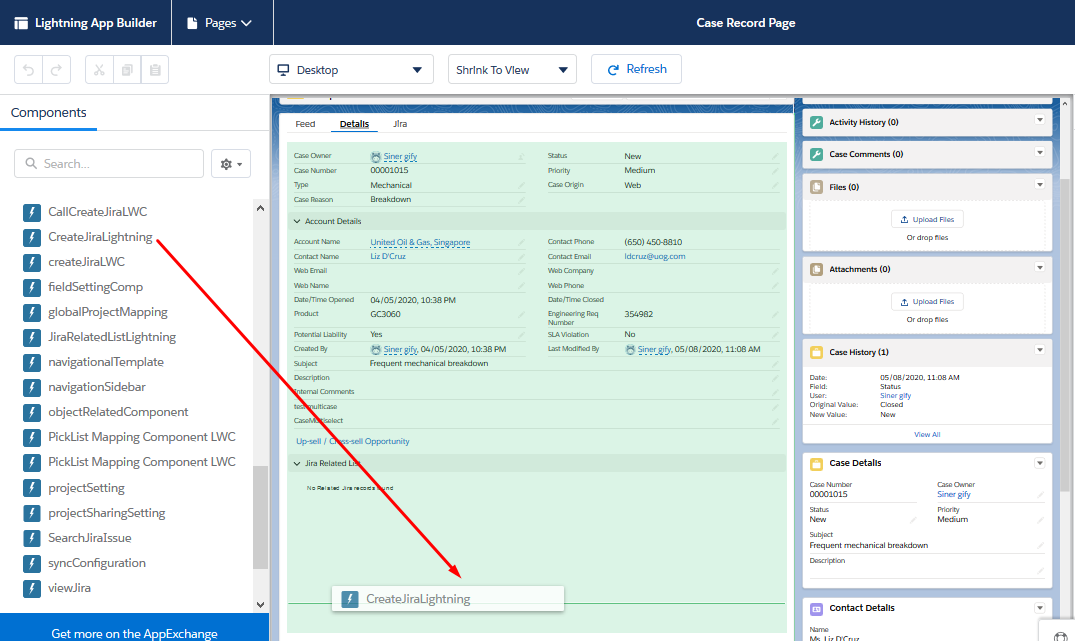
-
Once done click Save and then Back.
-
This is how it will look on the Case object page.

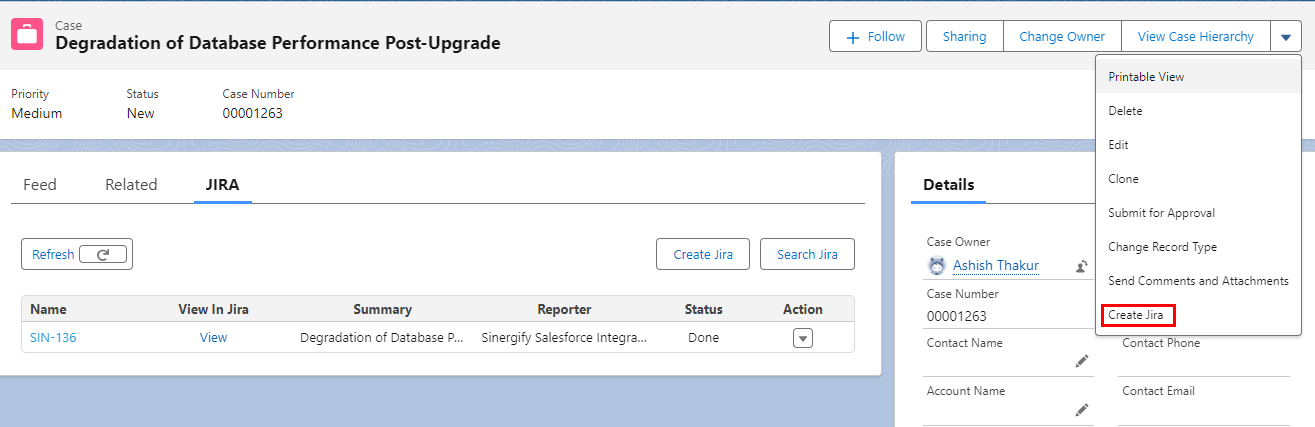
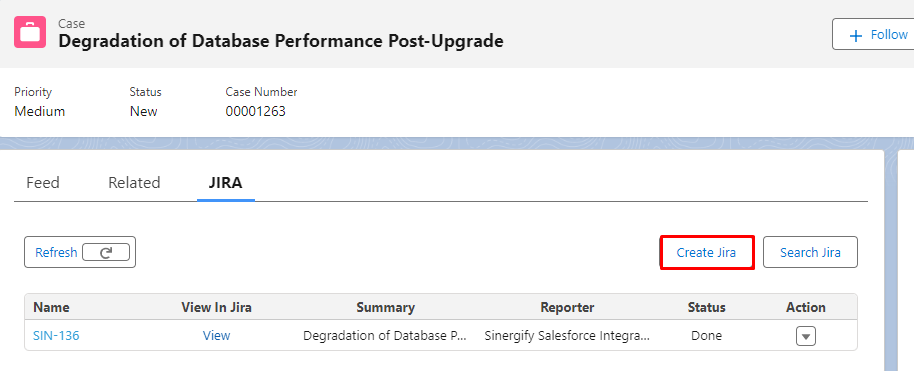
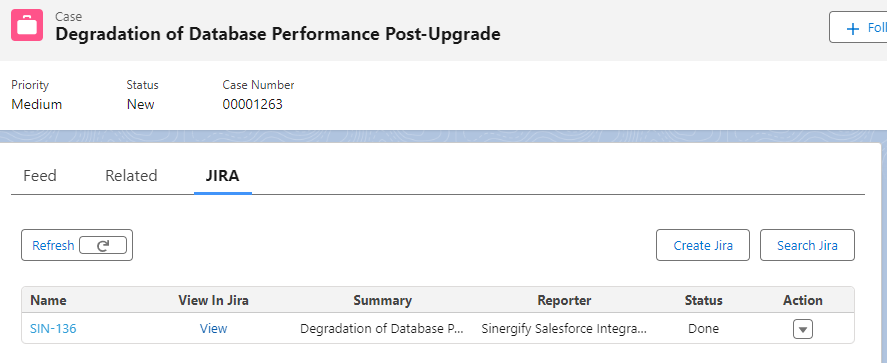
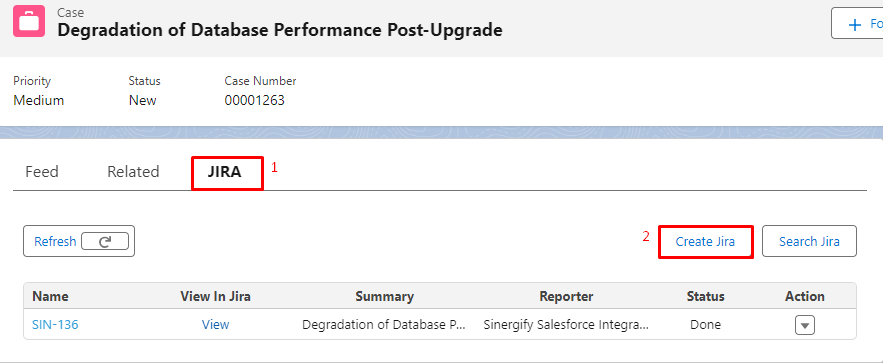
Creating Jira Tickets Using the ‘Create Jira’ Button on the Related Jira tab on the Object Detail Page
To set up a ‘Related List’, refer to the Document. This is how it will look like on the related tab.
Follow the given steps to create a Jira ticket:
-
Click on the Create Jira Button from the Related list.

-
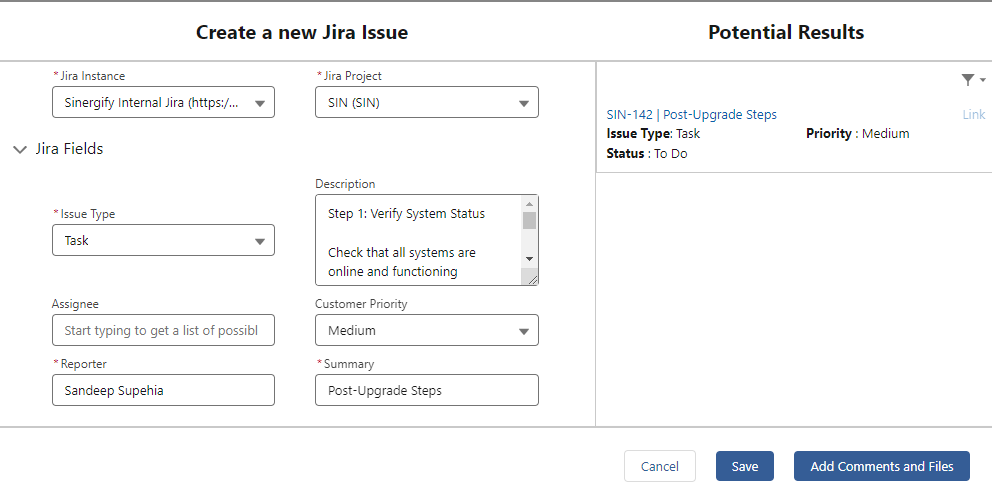
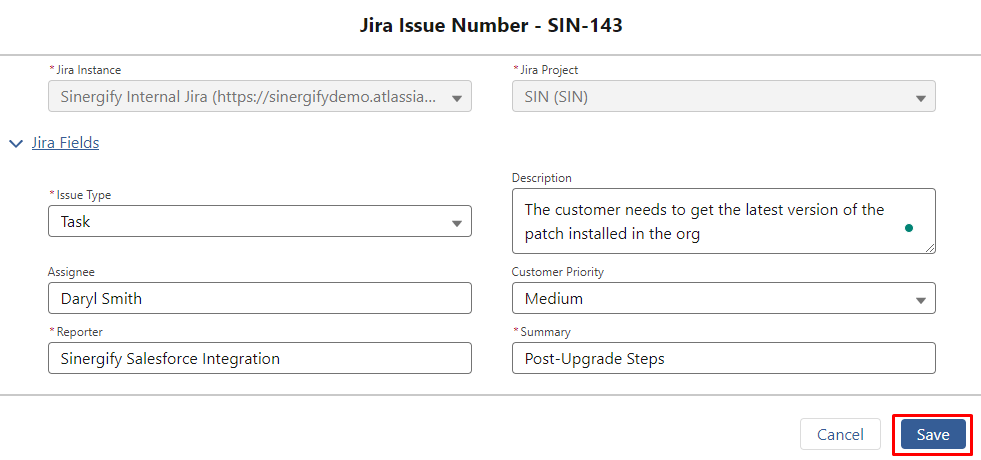
A new screen will appear asking for the required details for creating a Jira ticket. See the reference screenshot below. Fill in the details as per the business requirements.
-
Jira Instance: Select the appropriate Jira instance if you have multiple instances configured.
-
Jira Project: Choose the Jira Project under which you want the Jira ticket to be created.
-
Jira Fields: You will see the Jira fields like Summary, etc here. These fields are auto-populated per the Salesforce Case record details.
-
Issue Type: Select the right issue type for the Jira ticket to be created. For example Task, Bug, Epic, etc.
-
Potential Results: On the right side of the screen, users can view the Potential Results section. Salesforce Admins have the ability to enable or disable the ‘Potential Results’ feature from the Sinergify Admin Setting, allowing them to show or hide this section on the Create Jira screen. This will search for already existing Jira Tickets in real time based on ‘Selected Project’, ‘Summary’, and ‘Issue Type’. This will help you prevent duplication and save time.

-
-
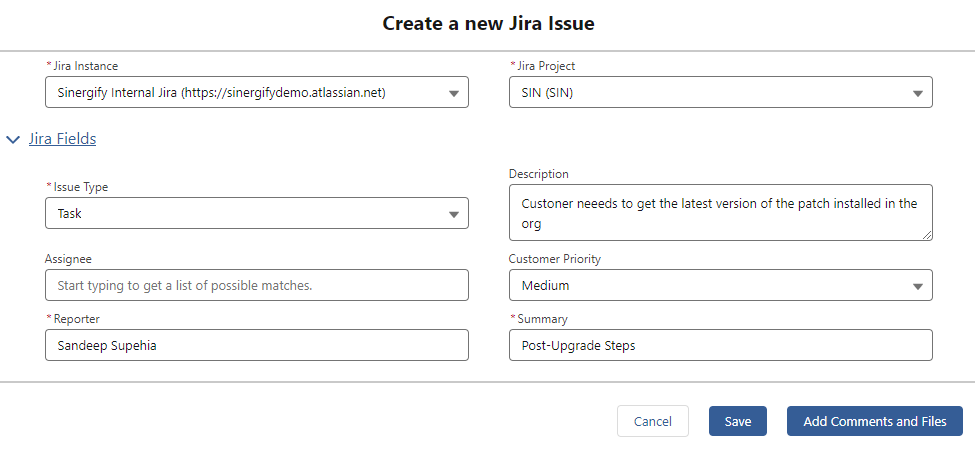
This is how the Create screen will look like after disabling the potential results.

-
Once done click ‘Save’.
Steps to View Jira Issue Details
Sinergify offers two ways to view Jira issue details. Follow the steps below to view the Jira issues.
A. Jira Issue Details in a Separate Tab
-
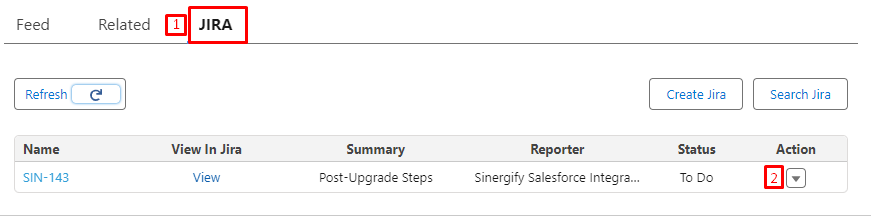
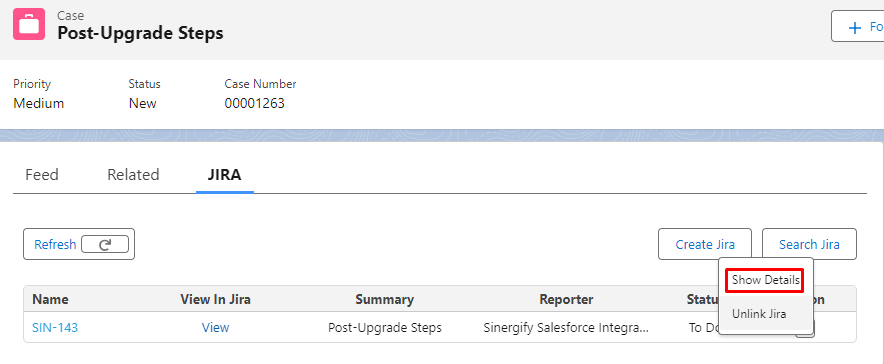
Navigate to the JIRA tab of the case details page where you can see the linked Jira issues. Click on the button under the Action column as highlighted in the screenshot below.

-
Then, click Show Details.

-
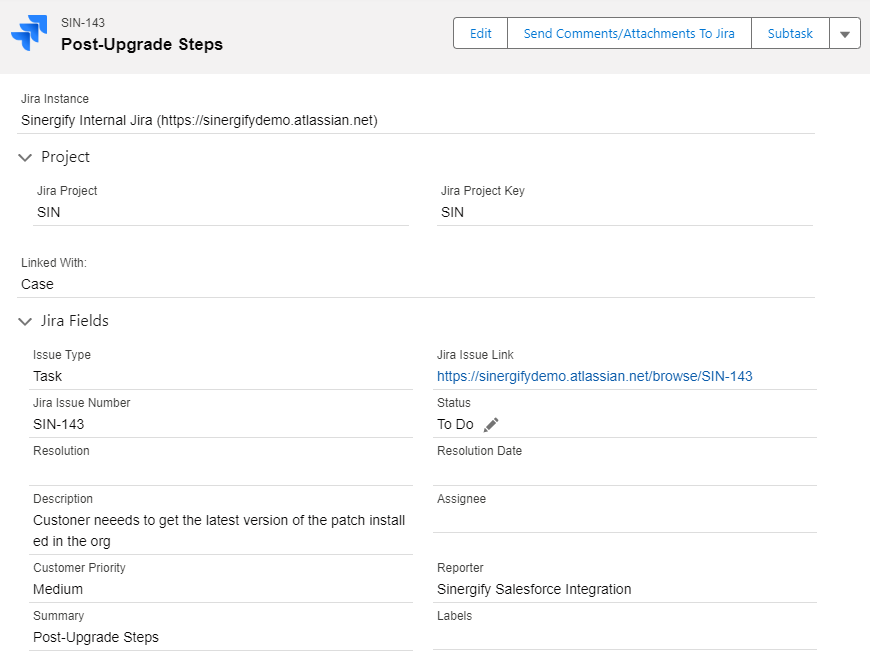
A new window will open displaying the details of the Jira issue.

Jira issue details in the Same Window
-
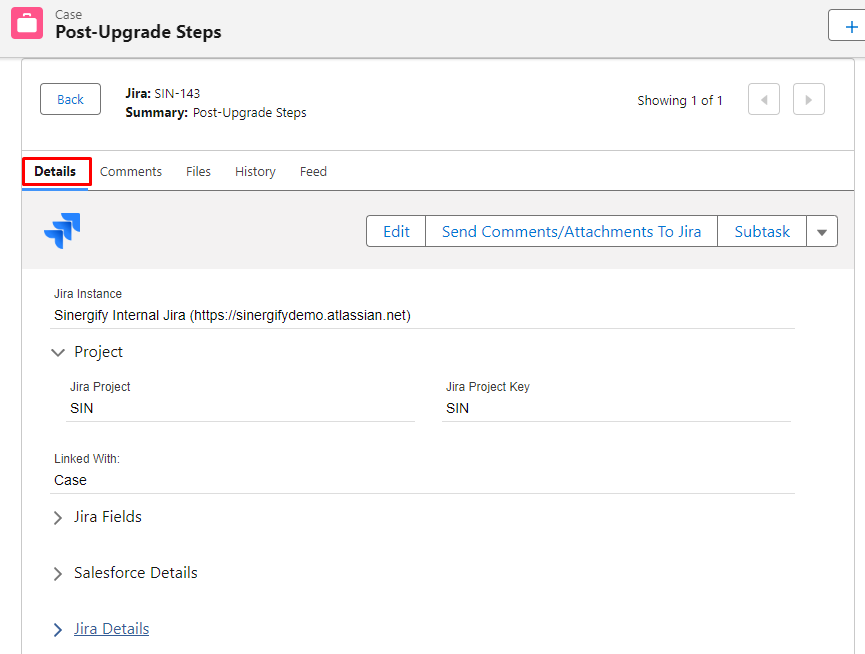
Navigate to the JIRA tab of the case details page where you can see the linked Jira issues. Click on the Jira issue key hyperlink highlighted in the screenshot below.


-
Select the Jira Issue Key to expand the details.


-
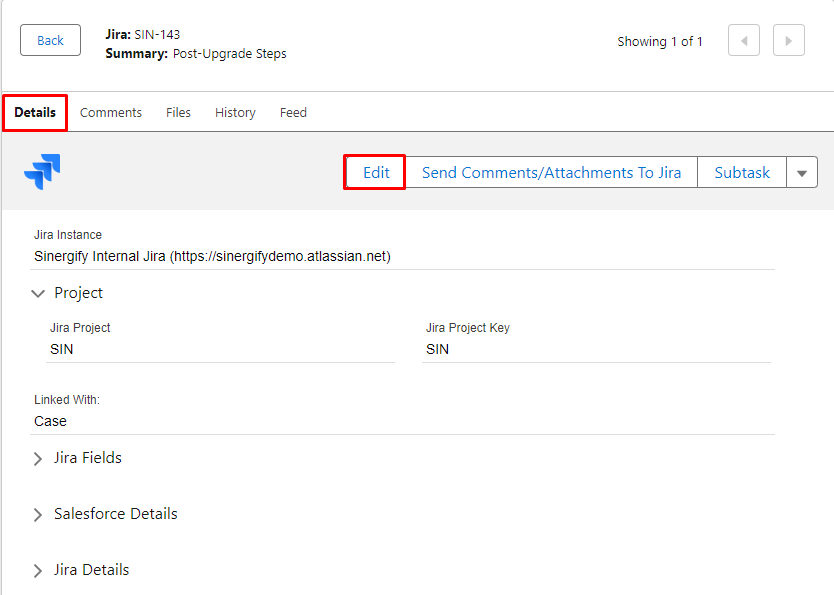
Details: The ability for users to see the details of the Jira issue. For eg. Users can see the details about ‘Jira fields’, ‘Project key’, ‘Summary’ etc.
-
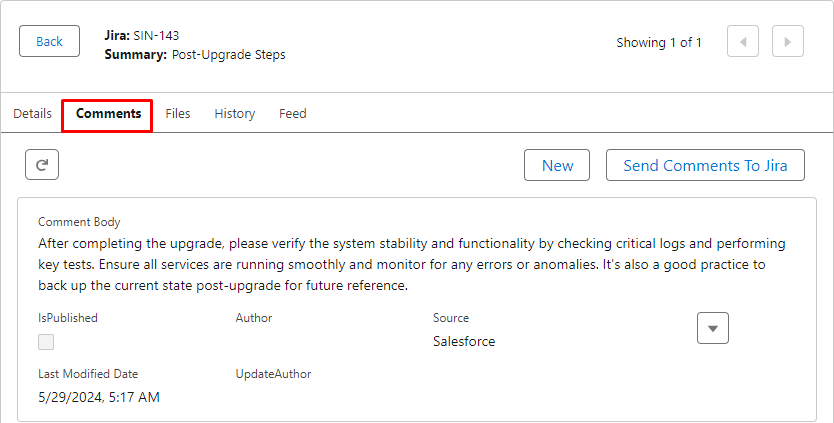
Comments: Comments sent to Jira issue will appear here. Users can also add comments by clicking on the “Send comments to Jira “ button.

-
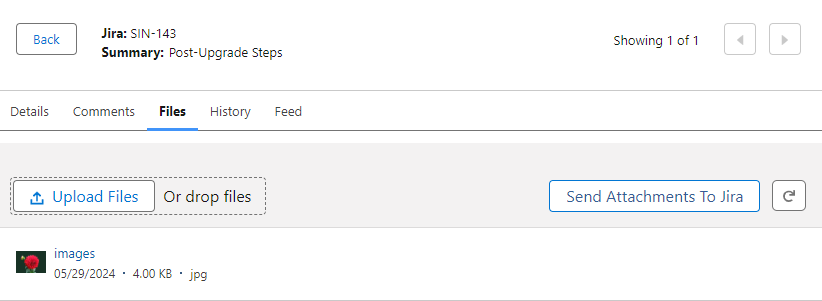
Files: All the Files that were sent to the Jira issue will appear here. Users can sync the files to Jira by clicking on the ‘Send Attachments to Jira’ button.
-
History: Users can keep track of historical data. For eg. When someone changes the Status and the Support team wants to know who did it, they can easily track it by using History tracking. Follow the reference doc for History Tracking.


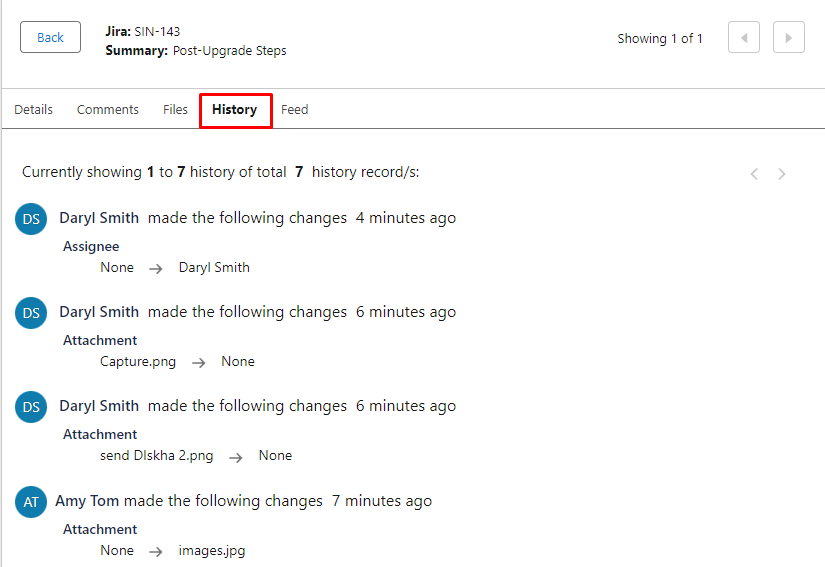
Note: The pagination buttons will be enabled automatically when the History exceeds 20
-
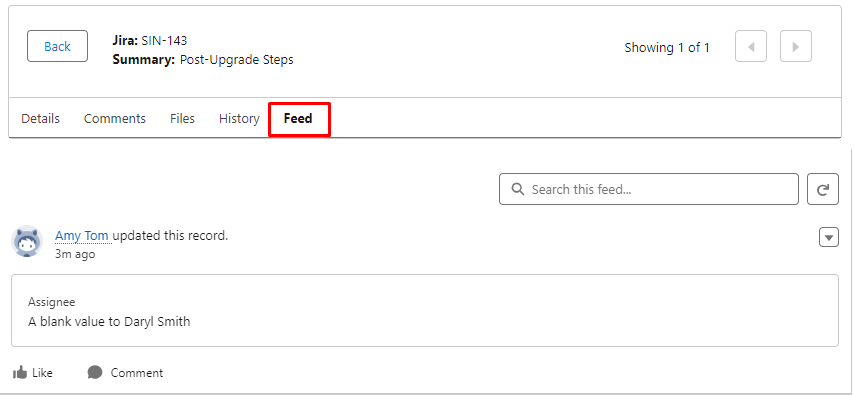
Feed: The feed is used to keep track of updates of the Jira Issue field except for comments and attachments. Follow the reference doc for Feed.

Steps to Edit Jira Issue
-
Open the Jira issue details and click on the ‘Edit’ button. A pop-up screen will appear.

-
Edit the details and click Save.

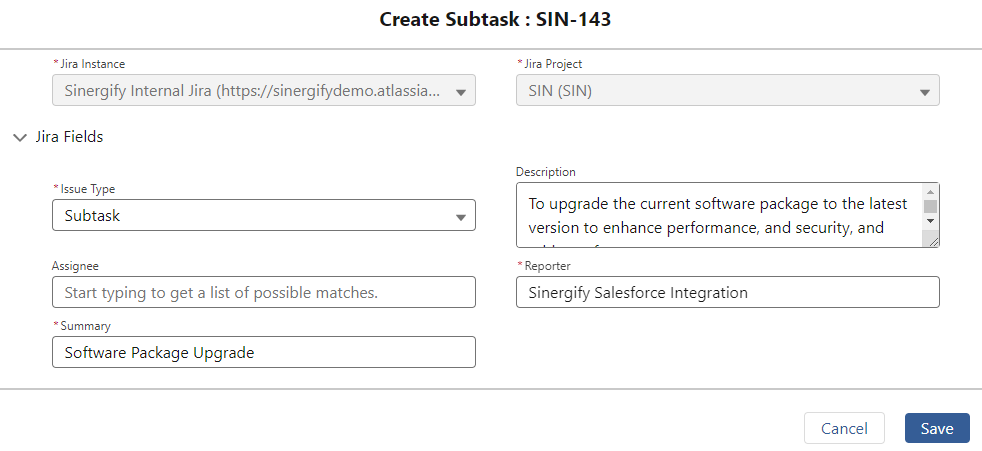
Steps to Create Subtask
If you need to create a subtask under the main Jira ticket, Sinergify offers a Subtask feature. The subtask will be listed under the related list tab of the object once it is created.
-
Open the Jira issue details and click on the ‘Subtask’ button. A pop-up screen will appear.


-
A pop-up screen will appear. Enter the required details and click Save.