Feedback
Feed Tracking
Published Date: 09-07-2026
Read Time:
Jira Issue Feed Tracking
Sinergify Feed Tracking feature can help keep a track of updates of the Jira issue fields (Comments and Attachments excluded). This feature is Configurable from Sinergify Admin Settings and a maximum of 20 fields can be tracked. Eg. who changed the Status when it was changed.
Configure Feed Tracking In Salesforce
Step 1: Login to your Salesforce instance as an Admin user.
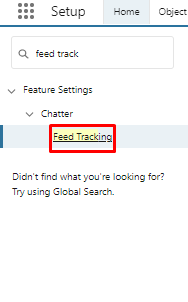
Step 2: In Setup, enter Feed Tracking in the Quick Find box.
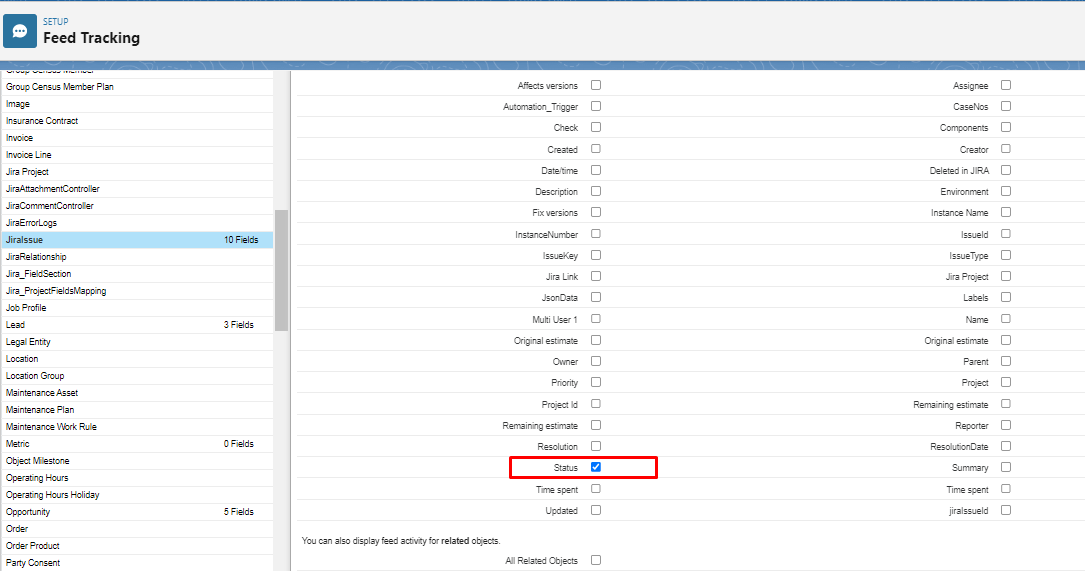
Step 3: From the list of objects, select “Jira issue”. Select the checkbox to “Enable Feed Tracking” and click Save.
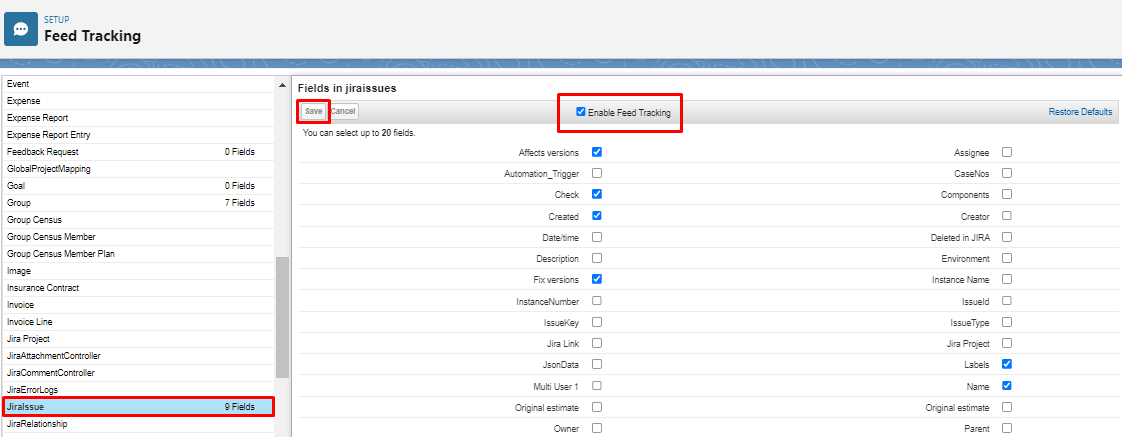
Step 4: Select Enable Feed Tracking. If Enable Feed Tracking is already selected then you can modify the fields as per requirement.
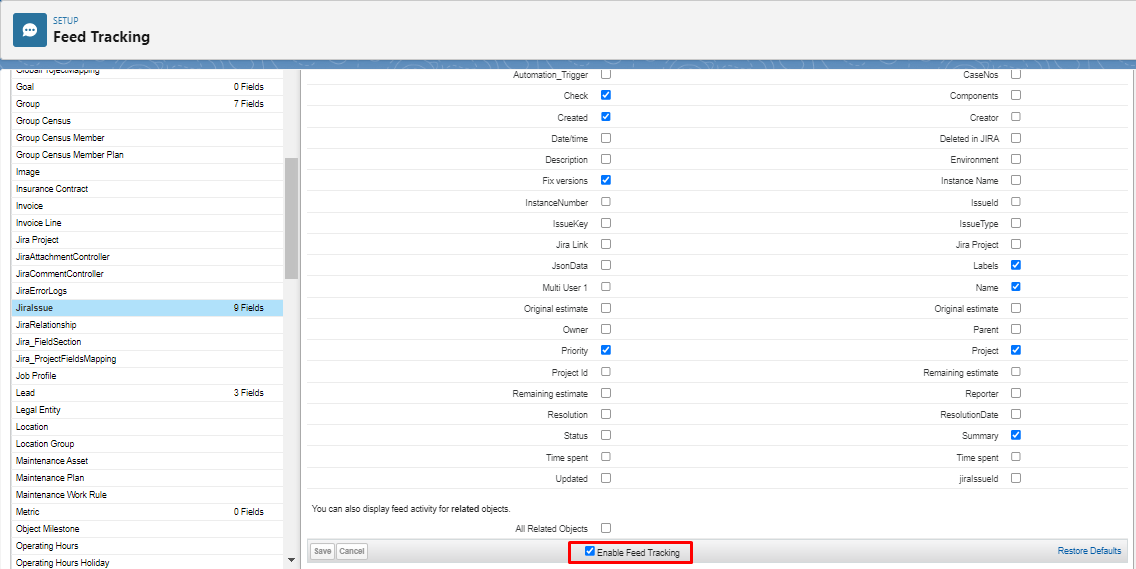
Step 5: Select up to 20 fields to track.
Step 6: Click Save. After you save your changes, the number of tracked fields appears in the Feed Tracking tab.
Step 7: To enable feed tracking for related records select All Related Objects located at the bottom of each object's feed tracking settings page. When 'All Related Objects' is enabled any newly created related records will be included in the associated record's feed.
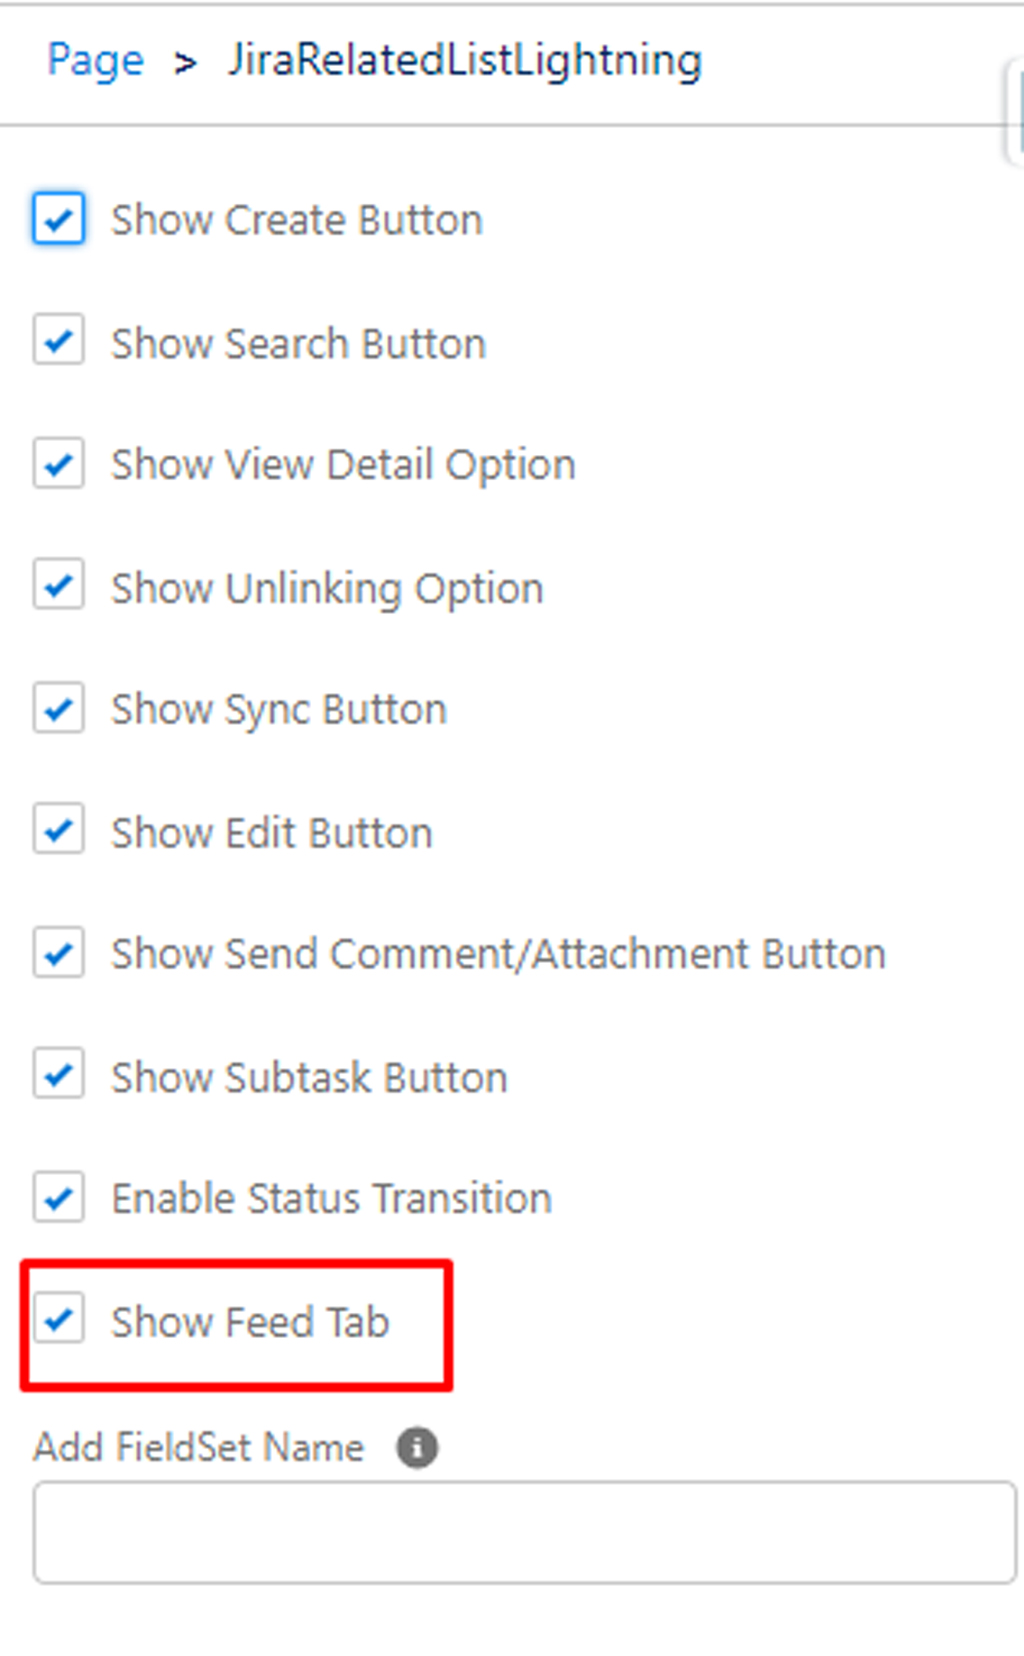
Step 8: To make sure users are able to see the feed tab, Go to the specific record page and then Click on the “Edit page”.
Step 9: Go to the “JiraRelatedListLightining” and Enable the “Show Feed Tab” Design attribute.
Note: Feed tracking is the Standard Salesforce feature and Salesforce only allows keeping the history for 45 days at most. Reference doc
Feature Illustration
Sinergify “Feed tracking” allows support teams to track selective fields, e.g. who changed the Status when it was changed.
Step 1: Login to your Salesforce >Setup>Feed Tracking.
Step 2: From the list of objects, select “JiraIssue” and Select the “Status” field.
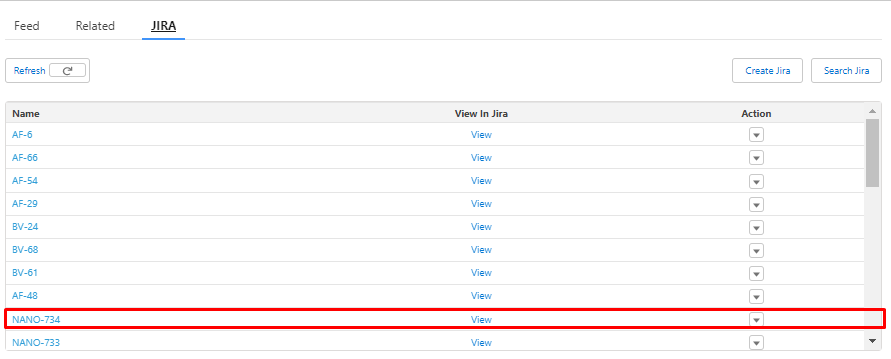
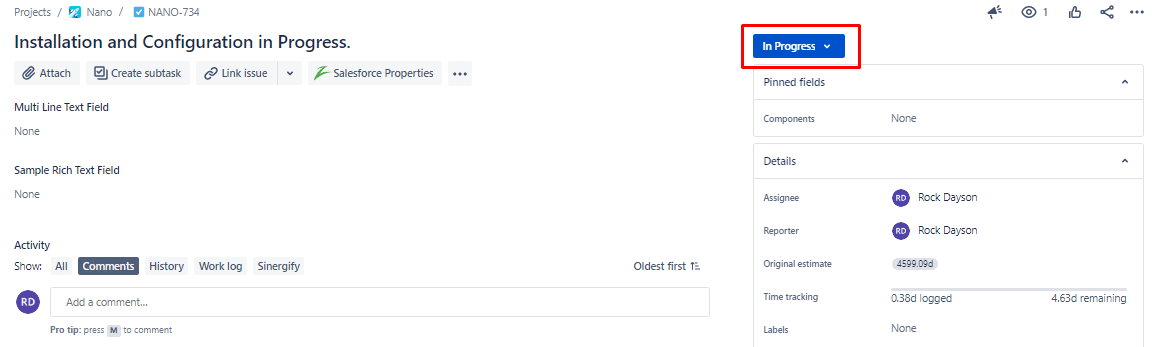
Step 3: Login into Jira instance/environment. Open a Jira Project followed by a Jira issue. We are using Jira Issue ‘NANO-734’ in the below image to test this functionality. Make an update on the Jira Issue ’Status’. For e.g. We have changed the Status Value from ‘In Progress’ to ‘Done’.
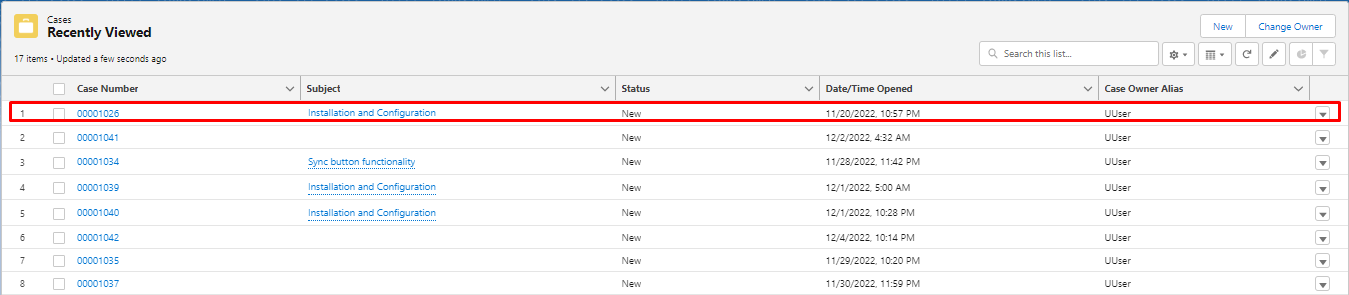
Step 4: Open your Salesforce environment. Open the Salesforce record for which the Jira is tied to. For e.g. We have mapped it with the Case#100026.
Step 5: Now, Open the Jira Related list. For e.g. We have set up the component on a new related List named ‘Jira’. Select the record ‘Nano-734’. It will open up the Jira Issue on the same page. On the Jira issue detail page, go to the Feed tab to Track fields history. For eg. Status was changed from (“In Progress” to “Done”) as shown in the below image.