
 Feedback
Project Mapping
Published Date: 14-07-2026
Read Time:
The Project Mapping feature helps users map Jira fields for each Jira project separately.
-
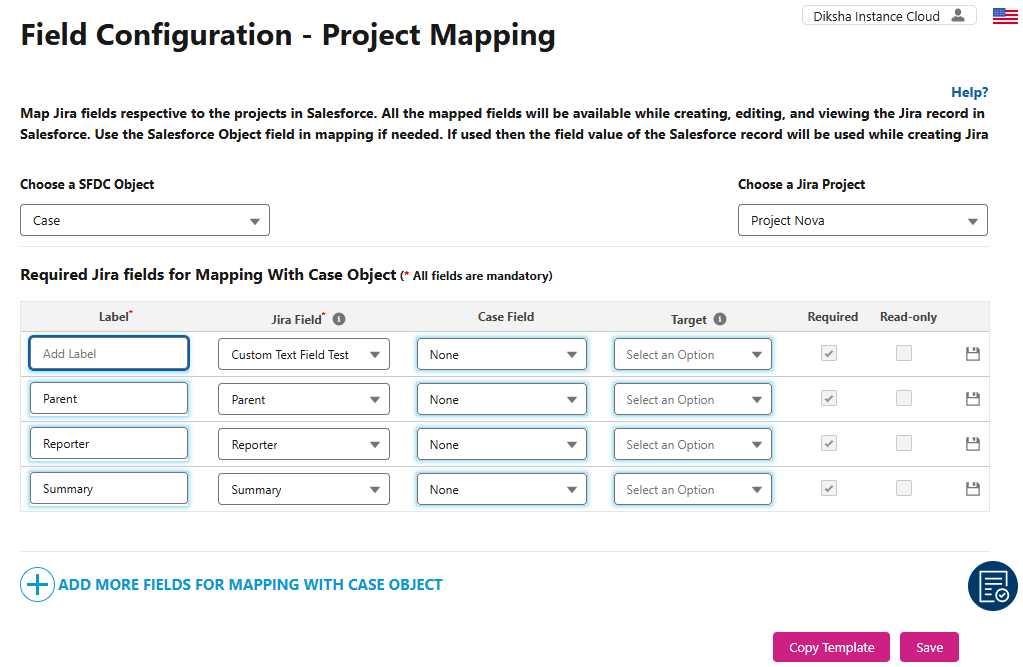
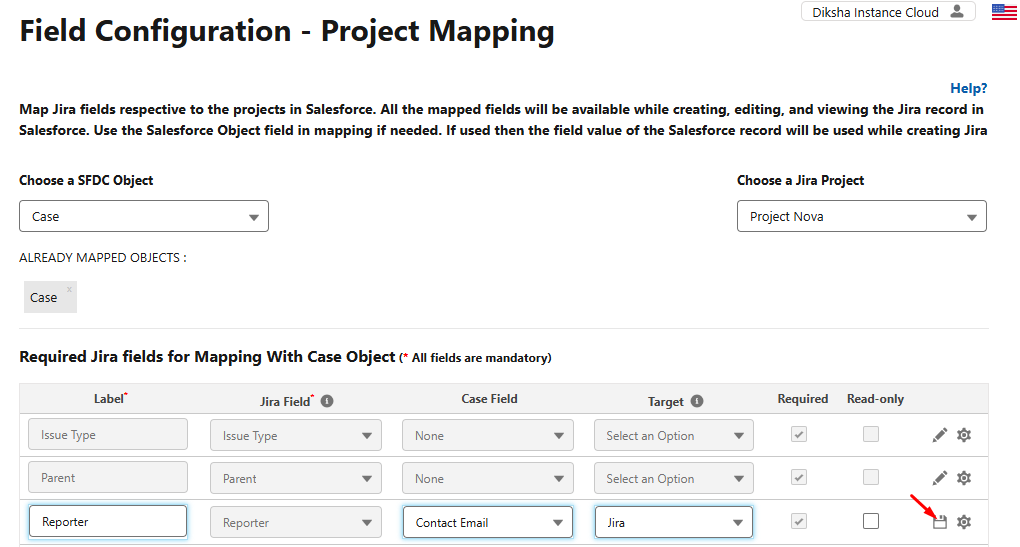
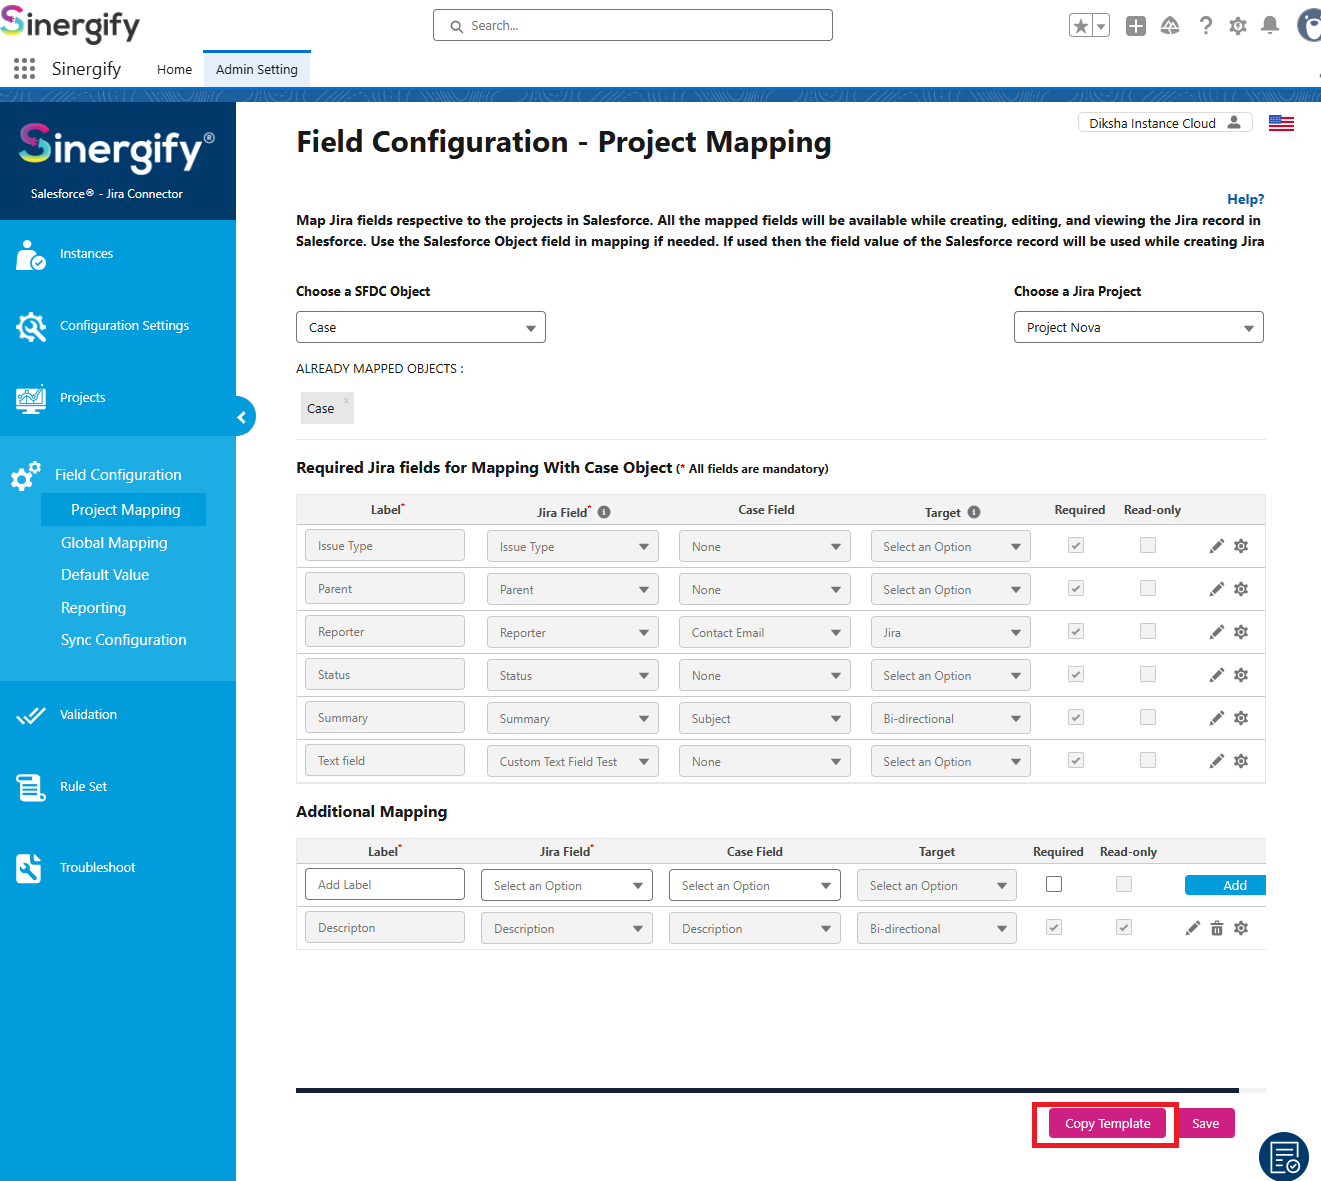
From ‘Admin Settings’, click ‘Field Configuration’ and subsequently click ‘Project Mapping’.


-
Select a Salesforce object from the list, including all standard and custom objects.
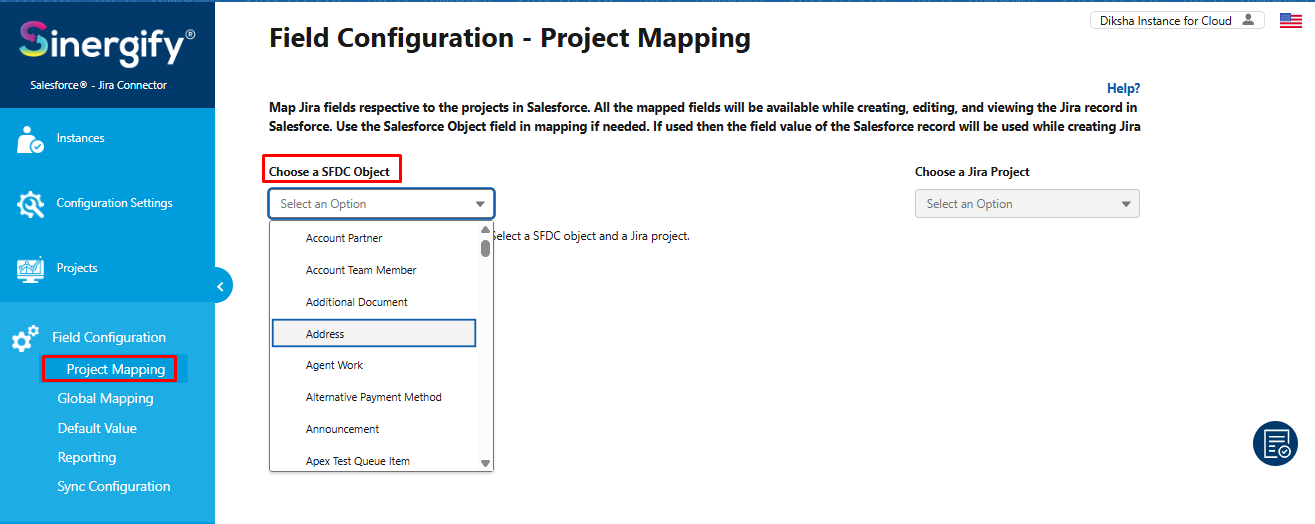

Note: The standard license allows for 1 Salesforce object. In case you need to map and configure multiple Salesforce objects reach out to your Account Executive or drop an email at [email protected]
-
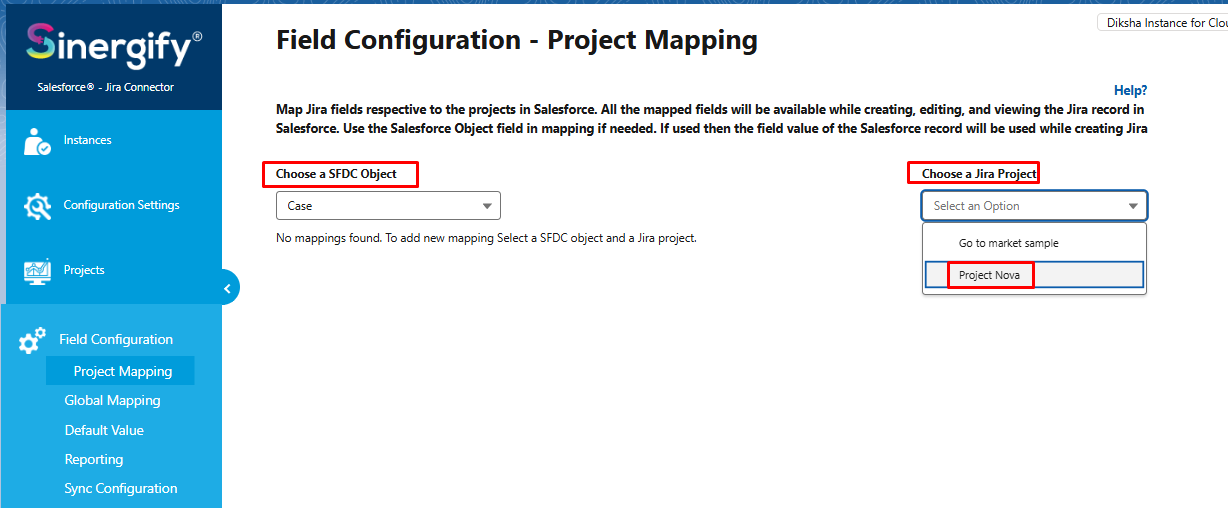
Select a Jira Project from the dropdown list.

Note: If a Jira project is renamed or deleted in Jira, the updated status will automatically reflect on the Salesforce side.

-
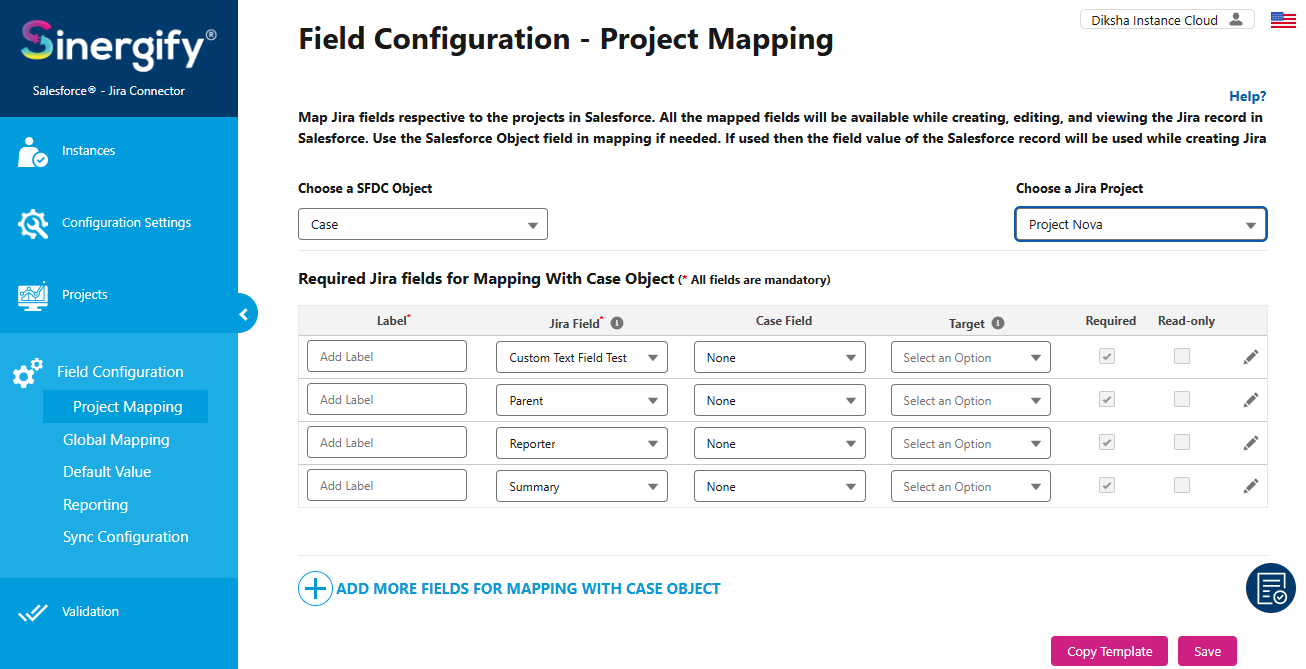
Based on the selected Jira project, a list of mandatory Jira fields will appear.

-
You can edit the labels of the Jira fields. Only the names used in the labels for Jira fields will appear on the Jira Creation Page in Salesforce.
-
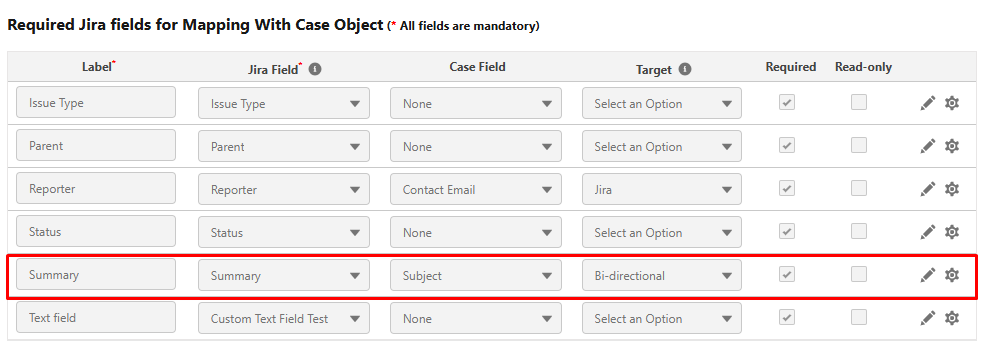
After configuring the required Jira fields, save at least one field mapping to proceed further. Once the first mapping is saved, Sinergify enables additional configurations, including Issue Type, Status for the selected Salesforce object and Jira project.
Note: Features like Issue Type, field configurations, and Copy Mapping Template are available starting from version 6.55 and are not supported in earlier package versions.


-
You can also map the Jira fields with the Salesforce Object fields (optional). In case a Jira field is mapped with an object field, then the Jira field will be pre-populated with the value of the object field while creating a Jira ticket.
-
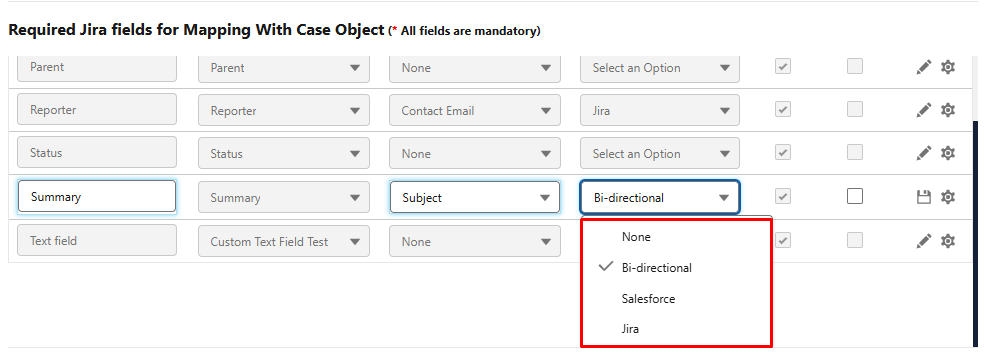
Target: It enables you to sync updates directly from mapped Salesforce Object to Jira tickets and vice versa. Users have to decide the type of syncing:
-
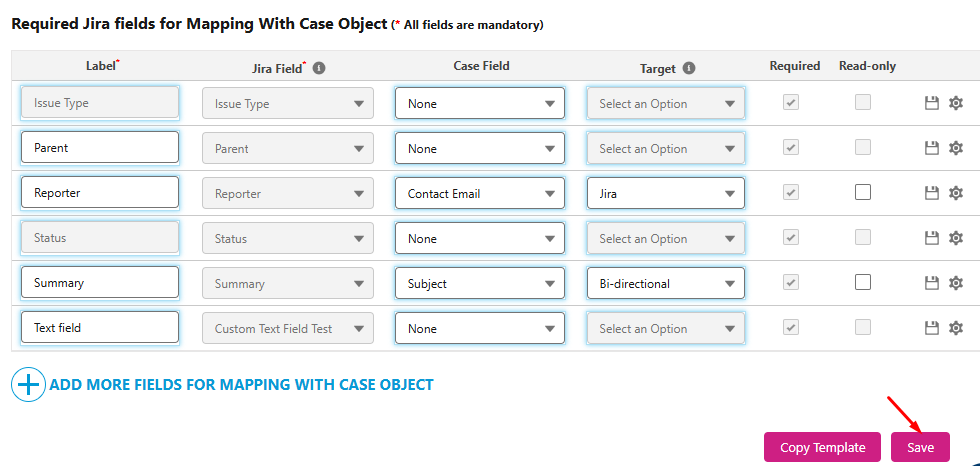
Bi-Directional: If selected, then any update done on Salesforce fields will be synced to Jira ticket fields and Vice versa.
-
Salesforce: If selected, any change/update in Jira ticket fields will be synced to the Salesforce fields.
-
Jira: If selected, then any change/update in Salesforce fields will be synced to the related Jira ticket fields.
-
None: If None is selected, the basic syncing between Salesforce and Jira will always be there.
-
-
Read-only - Fields for which read-only is enabled cannot be edited in the Salesforce. Users can only view these fields.


-
You can map additional Jira fields available in a selected Jira project and also have the option to mark the fields mandatory/required by checking the ‘Required’ box on the fields. The marked fields would require a value while creating a Jira ticket from Salesforce.


-
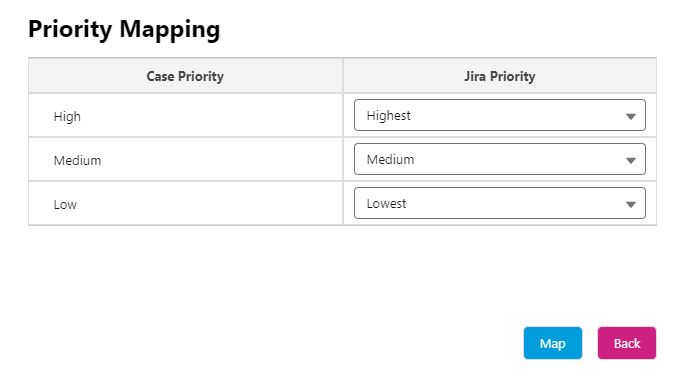
You can also decide the mapping of picklist values between Jira and Salesforce, which is applicable only for picklist-type fields. To do this, click the option boxed in green as shown in the screenshot below.


-
You can decide which Jira value should be selected on a particular Salesforce field value selection.

-
To add a new mapping for a Jira field, click on the ‘Add’ button by giving a unique label to the mapping.

-
You can update the basic details of mapping through the inline edit button and change the label or choose another Salesforce field to map with the Jira field. Click on the inline save button.


-
Users can also use the common save button to save multiple edited mapped fields.

-
Click on the gear icon, to unlock further settings for respective fields.


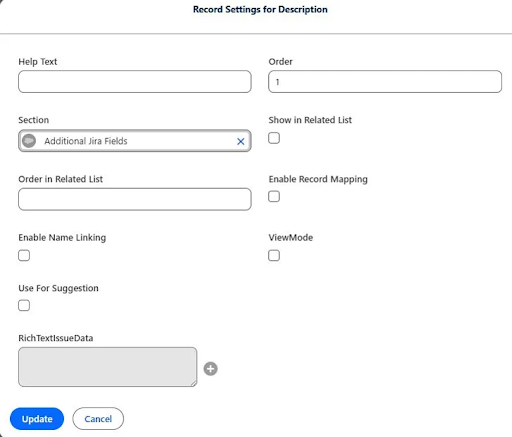
Click on the gear icon to unlock further settings for the respective field. The following options are available:
- Help Text: Type in a small description for the respective field to help end users better understand what this field is about. For more details refer to the Document.
- Order: You can set the order in which the field appears on the Jira Creation Page in Salesforce
- Section: You can group multiple fields into a section to organize the Jira Creation Page. If a section already exists, you can search and select it. To create a new section, type the name and click New "Jira_FieldSection". For more details refer to the Document.
- Show in Related List: If this option is enabled, then the respective field will be visible under the Jira Related List.
- Order in Related List: You can set the order of the Jira Related List from this option.
- Enable Name Linking: Once configured and enabled, Jira users can view the details about the Salesforce records linked to Jira. For more details refer to the Related Document.
- ViewMode: If this option is enabled, then the respective field will not be visible to the agents at the time of creating a Jira ticket. Once a Jira ticket is created, that field can be viewed on the detail page of the Jira issue.
- RichTextIssueData: This option is available for rich text area type Jira fields. Enter the issue types (e.g., Task, Sub-task) for which rich text rendering should be enabled. Once configured, the field content will be displayed in rich text format in Salesforce.
Copy Mapping Template
The Copy Mapping Template feature allows users to copy an entire project mapping template from one project to another when the same field configuration and mapping setup needs to be reused. This helps reduce manual configuration, saves time, and ensures consistency across projects.
Step-by-Step Instructions
-
Click on the Copy Template icon.

-
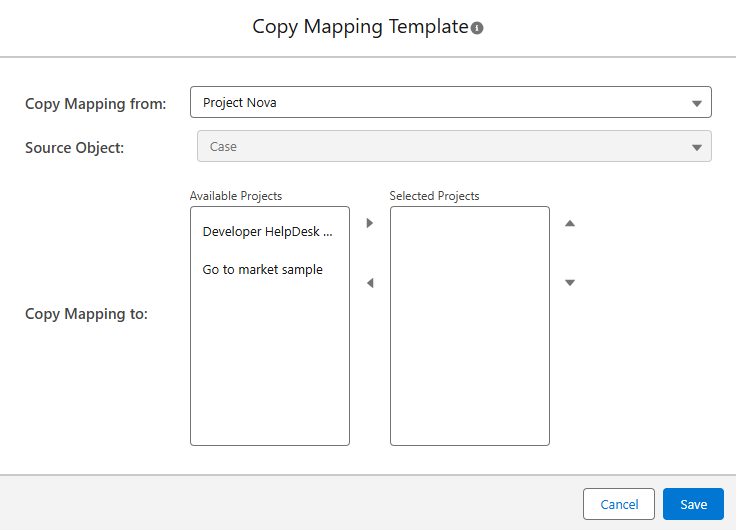
The Copy Mapping Template screen is displayed.From Copy Mapping from, select the source project from which the mapping template will be copied (for example, Project Nova). Select the Source Object (for example, Case).
-
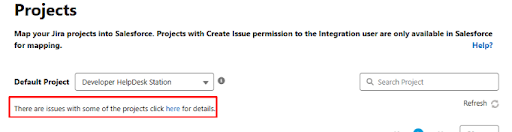
Under Available Projects, select the target project(s) into which the template will be copied (for example, Developer HelpDesk). Move the selected project(s) to the Selected Projects section.

-
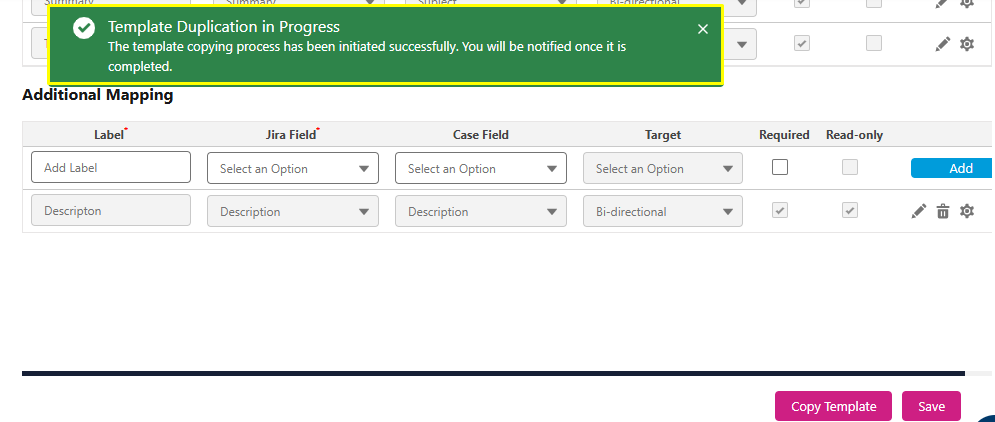
Click Save to initiate the copy process. A confirmation message appears indicating that the template duplication is in progress.

-
Once completed, the mapping template from Project Nova is successfully copied to Developer HelpDesk (or the selected project(s)).


For Other Salesforce Objects
In order to sync updates from Salesforce objects (other than case) to Jira, Jira To Salesforce, or Bi-Directional, please follow the below steps as a pre-requisite.
Note: We have used the Account as an illustration. Likewise, you can apply the same approach for the other Salesforce Objects.
-
Create a Custom setting Record
-
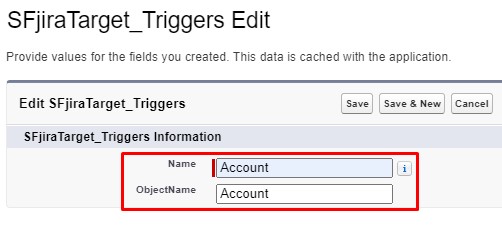
From ‘Setup’, enter ‘custom settings’ in the ‘Quick Find’ box and click on it from the search results. Then click ‘SFjiraTarget_Triggers’.
-
Click ‘Manage’.
-
Click ‘New’ to add a new Record of Custom Setting.

-
-
Create a Trigger
-
In the Developer Console, click File | New | Apex Trigger. The New Apex Trigger window opens.

-
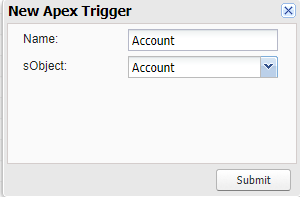
-
Click Submit.
-
Please make sure to update the event From Before Insert to After update.
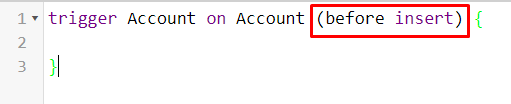

To

-
Click Debug and then open Anonymous window and Copy the code.
Copytrigger AccountTrigger on Account (before insert, After update) {
Grz_Sf__Sinergify_Trigger__c Metdata = Grz_Sf__Sinergify_Trigger__c.getValues('AccountTrigger');
if(Metdata!=null && Metdata.Grz_Sf__IsActive__c && Grz_Sf.CheckRecursive.caseFlag){
Grz_Sf.TriggerFactory.createHandler(Account.sObjectType);
}
- Once done Click on the Execute Highlighted Checkbox.
- Copy the code in Trigger which is already created.
-
Once done click Save.
Copytrigger AccountTrigger on Account (before insert, After update) {
Grz_Sf__Sinergify_Trigger__c Metdata = Grz_Sf__Sinergify_Trigger__c.getValues('AccountTrigger');
if(Metdata!=null && Metdata.Grz_Sf__IsActive__c && Grz_Sf.CheckRecursive.caseFlag){
Grz_Sf.TriggerFactory.createHandler(Account.sObjectType);
}
Test Class
@isTest
                public class AccountTrigger_Test {
                @testSetup
                static void testData(){
                Grz_Sf__SFjiraTarget_Triggers__c sinergifyTriggers = new Grz_Sf__SFjiraTarget_Triggers__c(Name='AccountTrigger', Grz_Sf__ObjectName__c='Account');
                insert sinergifyTriggers;
                Grz_Sf__Sinergify_Trigger__c stc = new Grz_Sf__Sinergify_Trigger__c(Name='AccountTrigger', Grz_Sf__IsActive__c = true);
                insert stc;
                Account testAccount = new Account(
                Name = 'Test Account',
                Industry = 'Technology',
                Type = 'Customer'
                );
                insert testAccount;
                }
                @isTest
                static void testMethod1(){
                Account accData = [SELECT Id, Name FROM Account LIMIT 1];
                accData.Name = 'Test New Account';
                update accData;
                }
                }


