Feedback
Sinergify Jira Plugin
Published Date: 10-12-2025
Read Time:
 Important!
This documentation is related to Jira Plugin Version 3.0. In order to Install & Setup the Plugin on your respective Cloud/Server Instance, kindly make sure your Salesforce side package requirements are met. i.e. Sinergify Package on Salesforce should be updated to Version 4.x or above from AppExchange.
Post Update: In Some Instances Sinergify Application panel might not be visible post update. To Resolve this, Simply go to Manage Apps > Sinergify > Configuration and then click Save to save the settings.
For Queries drop us an email at [email protected].
Sinergify plugin allows Jira users to sync Jira updates to Salesforce. With configurable syncing, the admin can decide what updates to be synced from Jira to Salesforce. Along with controlled syncing, the Jira plugin now also offers additional capabilities for Jira Users. Refer to the below use-cases for an overview.
Jira Plugin Use Cases
A. Search and Link Salesforce Records
Step 1: Find your Sinergify Application on the Jira Record Panel.
-
Sinergify Application Panel on Right Side: Right Side Compact view will show upto 5 fields of the mapped Salesforce Object for a quick glance.

- Sinergify Application Panel on Left Side: Left Side List View can show upto ‘n’ Number of fields of the mapped Salesforce Object for a detailed view.

Step 2: Select the link button as shown below, to link an existing Salesforce record.


Step 3: A new window will open.
Step 4: Search Salesforce records by typing the appropriate keywords in the search field.
Step 5: Select the records that you want to link from available search results.

Step 6: Select Link. The specific record will now be linked to the Jira ticket.
B. View Linked Salesforce record details
Step 7: You will see the linked records within the Sinergify App Under the Specific Object. For. eg. Case, as shown below.

Step 8: To see a more detailed view of the linked Salesforce record, click the Pop Put Icon as shown in the images below.


Step 9: A new window will pop up, and you will see the three tabs:
- Details
- Comments
- Feed posts

-
Details: This tab is used to show all the fields which are selected under the configuration screen for the current object.

-
Comments: The comment tab will show all the comments commented on the current record. All the case comments will appear in the Case tab and also we can post the Case comments from Jira. The Tab visibility can be controlled by a Jira Admin.

-
Feed Post: The feed post will display all the Feed items of the current record and we can also create posts from Jira.


Points to remember:
Feed post tab will also have support for Rich Text .
The feed post tab will be available for only those Salesforce objects whose feed is enabled under Salesforce. Jira Admin can further control tab visibility as explained below under ‘Install and Setup Plugin in Jira’.
C. Search and Unlink Salesforce records
Step 10: If in case multiple records need to be unlinked, you can do it with the help of below steps. Jira Admin can control this feature set from Sinergify Configuration.


In Order to achieve the use cases, as shown above, Please follow the steps below for configuration Inside Salesforce and Jira respectively.
Setup Plugin in Salesforce
Before we install the application in Jira, we need to create and set up a Connected App within Salesforce.
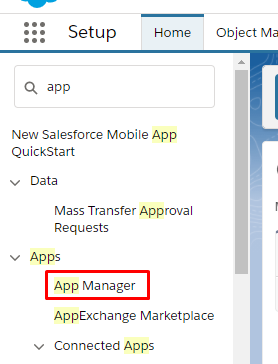
Step 1: From the Setup page in your Salesforce Org, enter ‘App Manager’ in the Quick Find box and click on it from the search results.
Step 2: Click New Connected App to create the app.

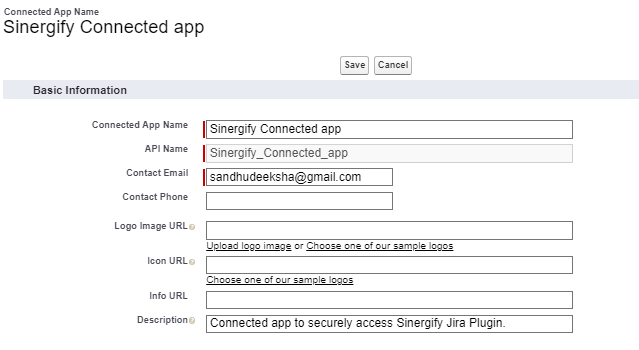
Step 3: Basic Information
In the Basic Information area of the page, specify the following information to describe the connected app:
- For the Connected app’s name, enter a name. For example, you can use Sinergify Jira.
- For the Connected app’s API name, which is a unique identifier used when referring to the app programmatically, just press Tab. The API name defaults to the connected app’s name, replacing spaces with underscores.
- For the Contact email, enter your email. Salesforce uses this contact information if they need to contact you about the connected app.
- For the Logo image URL, leave it blank.
- For the Icon URL, leave it blank.
- For the Info URL, leave it blank.
- For the Connected app’s description, enter Connected app to securely access Sinergify Jira Plugin.
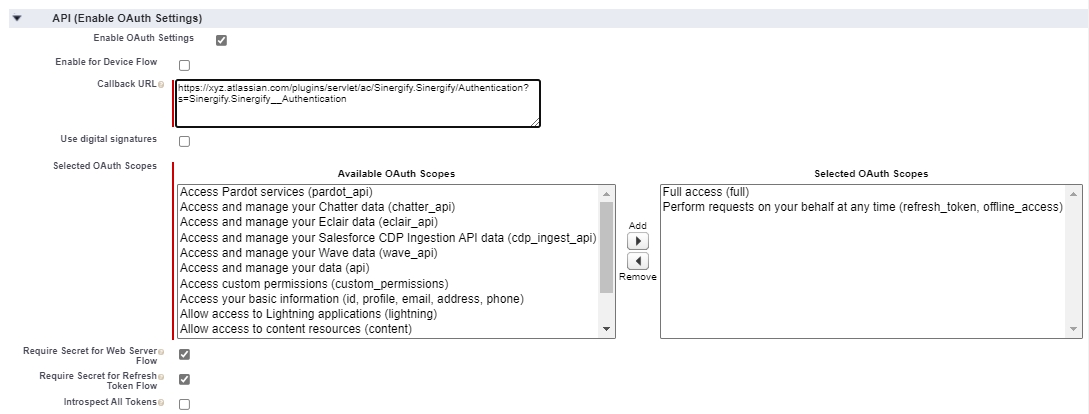
Step 4: API (Enable OAuth Settings).
- In the API (Enable OAuth Settings) area of the page, select Enable OAuth Settings.
- Enter the callback URL that will be: JiraInstanceURL/plugins/servlet/ac/Sinergify.Sinergify/Authentication?s=Sinergify.Sinergify__Authentication
- Move ‘Full access’ and ‘Perform requests on your behalf at any time’ options from ‘Available OAuth Scopes’ to ‘Selected OAuth Scopes’.
Step 5: Leave any other settings as default and select Save.
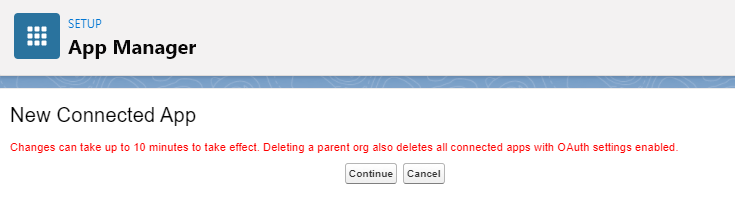
Step 6: If the below pop up is visible, select Continue.
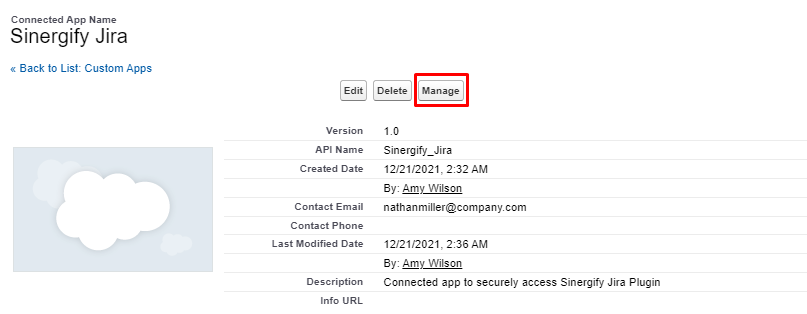
Step 7: Click Manage.
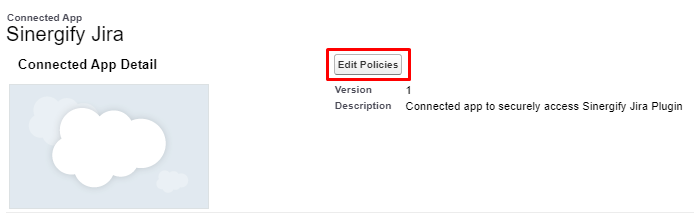
Step 8: Click Edit Policies.
Step 9: Under the OAuth Policies, select:
- Permitted Users - Admin approved users are pre-authorized.
- IP Relaxation - Relax IP restrictions.
- Refresh Token Policy - Refresh token is valid until revoked.

Step 10: Select Save.
Step 11: On the same page click Manage Profiles.
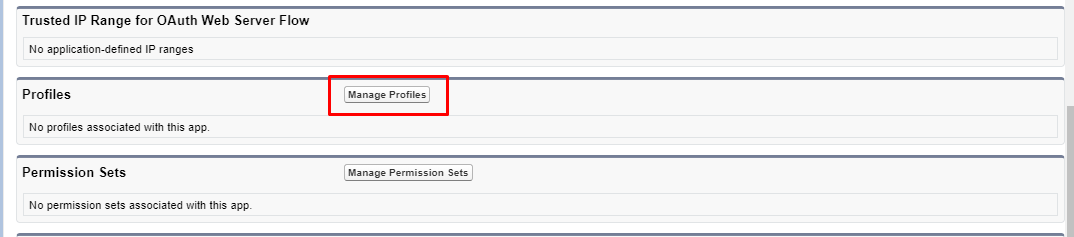
Step 12: Check the box(es) next to the profiles that you want to include and select Save.
.png)
Install and Setup Plugin in Jira
A. Installation
Step 1: Select Apps, under the drop-down menu select Find new apps in your Jira instance.

Step 2: Enter Sinergify in Search for apps input box and press enter.

Step 3: Select Sinergify under the results.

Step 4: Select Get App and the application will be installed in the background. Follow the below steps once the app is installed.
B. Authentication
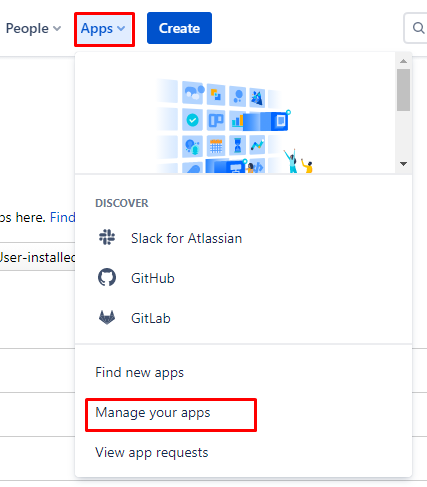
Step 1: Under the Apps drop-down, select Manage your apps.

Step 2: Select Authentication under the Sinergify sub-section on the left panel.

Step 3: Enter the Salesforce login instance URL along with the Client key(consumer key) and Client secret(consumer secret) of your connected app.
(You can now use the Consumer Key and Consumer Secret that you saved earlier in Connected App Setup, Step 6).
If it is a developer or production org then the URL will be https://login.salesforce.com, else the URL will be https://test.salesforce.com.

Step 4: Select Login to Salesforce. This will redirect you to the Salesforce login page. Type in your login credentials and Select Allow under Allow access pop up screen.

Step 5: If the authentication is successful Salesforce Status will change from "Not Connected" to "Connected".
Step 6: Select Next.

C. Configuration
Step1: Settings for panel on issue screen

- Show Panel on Issue Screen: Toggle this option to show or hide the Sinergify application completely from the Jira Issue Record.
- Panel Location: Select the location of Sinergify application, either Right Side or Left Side. By clicking on the icon [i], you can see a more detailed view about panel location and its use case.


-
Allow linking of records on the panel: Toggle this option to Enable or Disable the linking of Salesforce records.

-
Allow Unlinking of records on the panel: Toggle this option to Enable or Disable the unlinking of Salesforce records.

-
Salesforce Case Comments
-
Show Case Comments: Toggle the button to Enable or Disable the Case Comments Tab for Jira Users.
-
Post Case Comments: Toggle the button to Enable or Disable posting of new Case Comments for Jira Users and keep it to view only.

-
-
Salesforce Chatter Feed
-
Show Feed Posts: Toggle the button to Enable or Disable Feed Tab in Jira Records.
-
Create feed Posts: Toggle the button to Enable or Disable creation of new Feed Posts and keep it to Read only.

-


Step 2: Field Configuration
-
Already Mapped Objects: This will show you the Objects that have been mapped on the Salesforce side Administration Panel. If you donot see any Object, kindly complete the Project Mapping & Field Configuation on Salesforce.
-
Choose a Salesforce Object: Select the Salesforce object for which you want to Configure and then Select Configure Fields. If no Object is selected, the button will not be visible. Objects in the drop-down will appear with respect to what you have configured in the Salesforce Sinergify Admin setting.
-
Configure Fields: A new screen will pop up with 4 tabs - Search, Details, List View, Compact View.
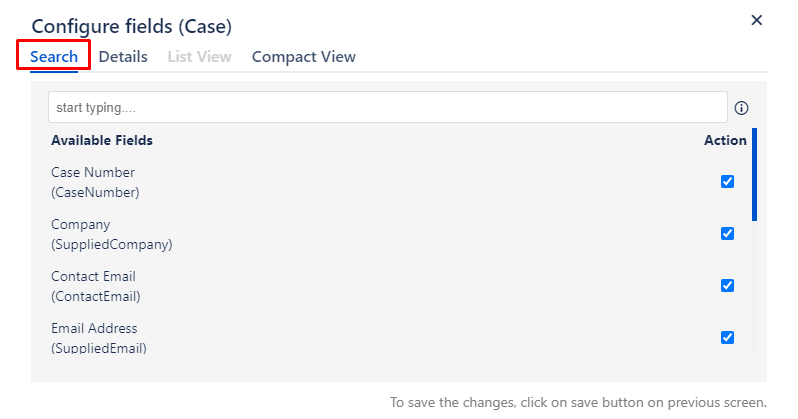
Step 3: Search
Search results will be pulled in Jira using the fields selected below. You can select upto a max of 5 fields. Search your Salesforce fields under Available Fields and then select the Checkbox. (Only Search Compatible fields are visible).
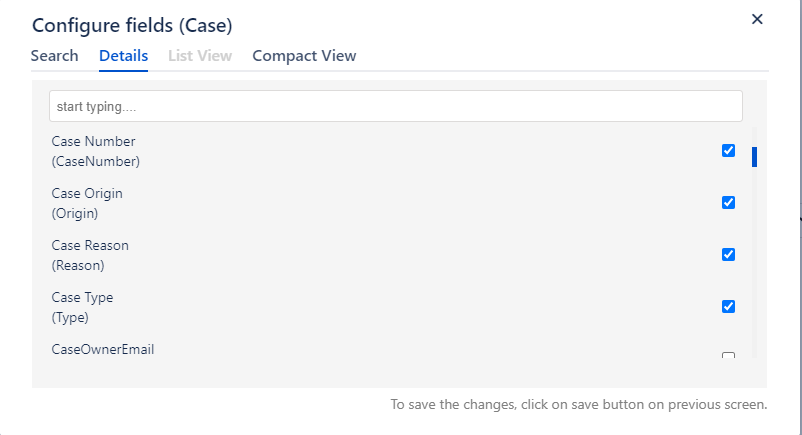
Step 4: Details
Salesforce object fields selected in this section will be used to show salesforce record details on the Jira issue page. Search your Salesforce fields under ‘Available Fields’ and then select the Checkbox. The order of the fields will be displayed on the Jira page as per the selection.
Step 5: List View
The list tab will contain only those fields whose maximum character length is less than 256 characters and the selected field will be displayed on the list view panel on Jira issue Page. For. E.g. For Objects like Case, Case Number will be auto selected. See the reference screenshot below.

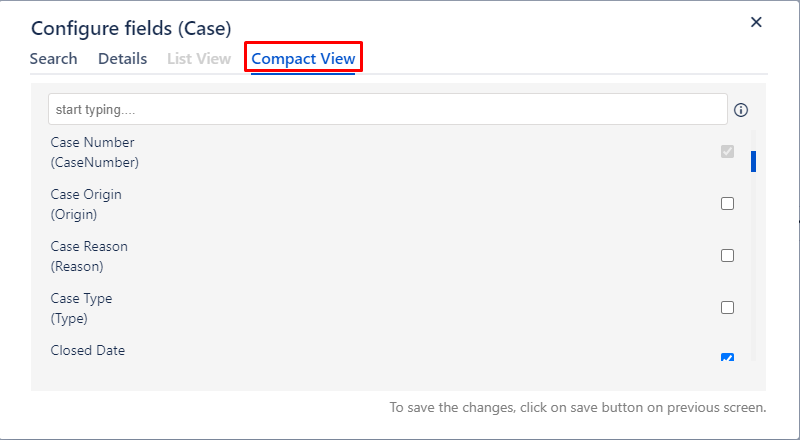
Step 6: Compact View
The Compact View will only display those fields whose maximum character length is less than 256 characters and at most 5 fields can be displayed in that view. Standard fields like Case Number (When Case Object is mapped) will be Pre-seleced and displayed by default.
Once you have selected all the desired fields under each section, close the pop up window from top right. Select Save and then Select Next.
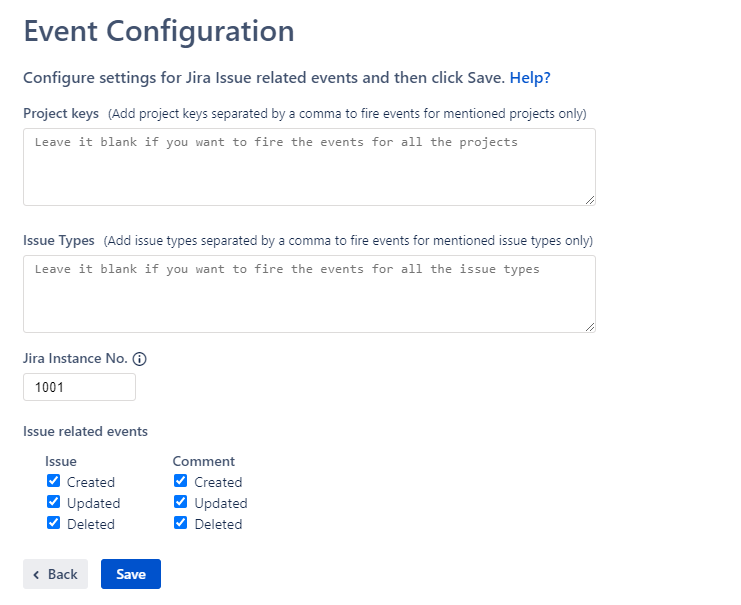
D. Event Configuration
-
Project Keys: Mention the Project keys, separated by commas, if you want the event listener to work only for particular Projects, else leave it blank if you want it to work for all the project keys.
-
Issue Types: Mention the Issue types, separated by commas, if you want the event listener to work only for particular Issue Types, else leave it blank if you want it to work for all the issue types.
-
Instance number: Enter the Instance Number that is mentioned on the Sinergify admin screen in Salesforce for your specific Jira Instance.

-
Issue-related events: Click the Issue-related events for which the event listener should work. Select all as a default. Select Save.
Plugin Uninstallation
Please follow the steps below if in case Plugin needs to be uninstalled from the Jira Instance.
Step 1: Click on the Apps tab, under the drop-down menu click Manage your apps.
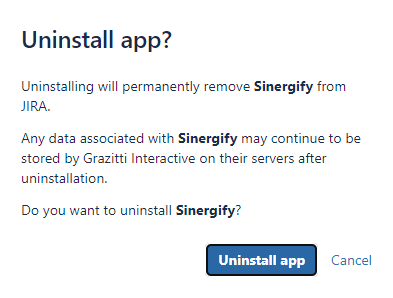
Step 2: Click on the Uninstall option under Sinergify app.

Step 3: Select Uninstall and the application will be uninstalled.