Feedback
Admin Settings
Published Date: 05-08-2024
Read Time:
After installation, the next step is setting up a Jira Remote Site in your Salesforce instance.
Adding Jira URL in Salesforce
Step 1: Go to the ‘Setup’ in your Salesforce instance. In the ‘Quick Find’ box, search ‘Remote Site Settings’.
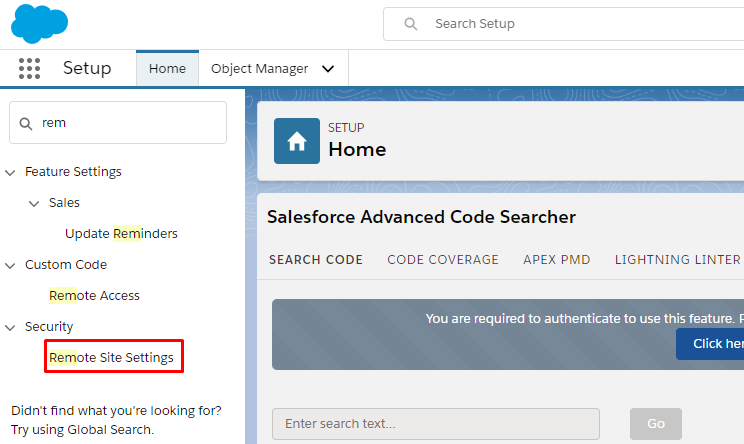
Step 2: Click ‘New Remote Site’ to add a Jira remote site.

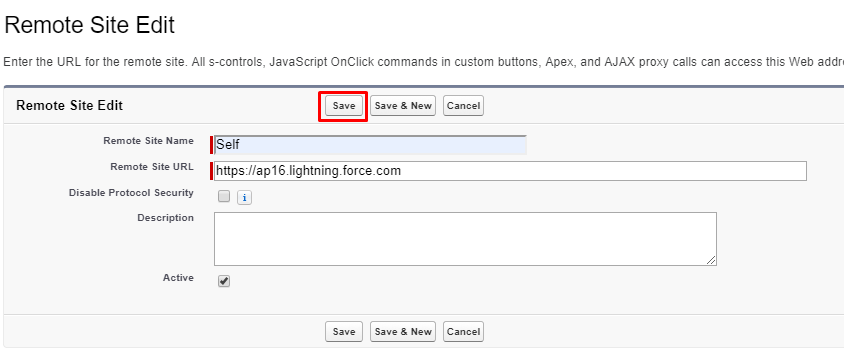
Step 3: Enter the value in fields like ‘Remote Site Name’ and ‘Remote Site URL’. In the ‘Remote Site URL’ field, enter the URL of your Jira instance. Click ‘Save and New’.

Step 4: Create another Remote Site for your Salesforce instance. Add the details like ‘Remote Site Name’ and enter your Salesforce instance URL in ‘Remote Site URL’. Click ‘Save’.
Step 5: After configuring the Remote Site, up next is the Authentication setup.
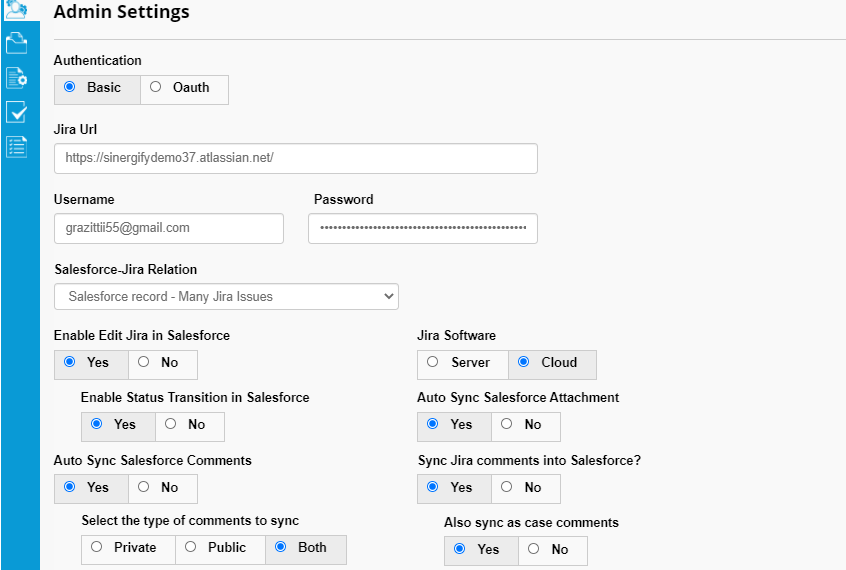
- Authentication: There are two authentication options available:
- Basic
- OAuth
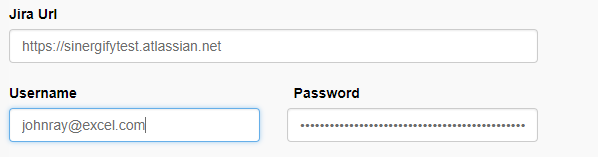
Basic Authentication: In this case, the users have to provide the Jira instance URL along with their Jira username and password.
If you have a cloud-based Jira instance then in the password field, the token generated from your Atlassian account is added.
Click on the link to access your Atlassian Account.

Token Generation
Step 1: Log into your Atlassian Account.
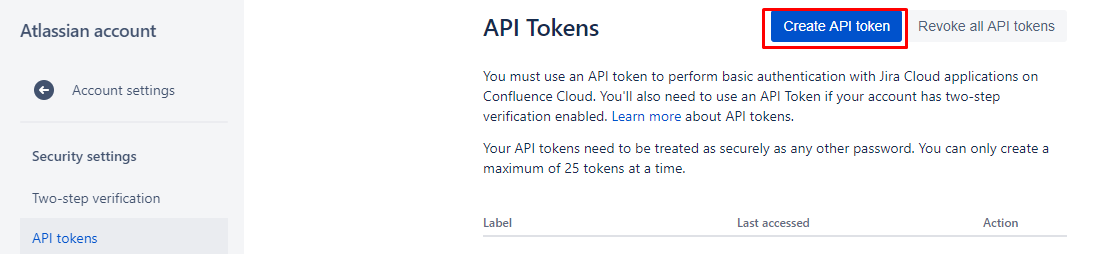
Step 2: Go to the Account Settings -> Security -> API Token -> Create and Manage API token.
Step 3: Click ‘Create and Manage API token’.
Step 4: A page will open and click ‘Create API token’ button present at the top of the page.
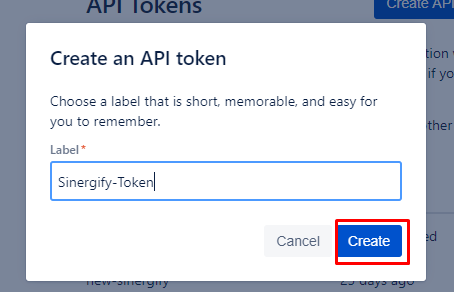
Step 5: A pop up appears on which Label is assigned to token. After entering the label name, click ‘Create’.
Step 6: A coupon is generated and make sure you copy it.
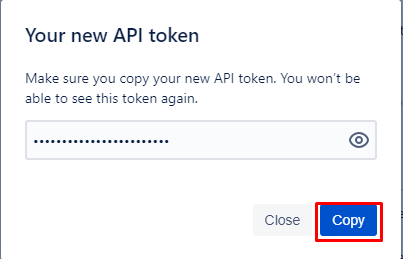
Step 7: Paste the token in the password field of the Admin Settings section.

OAuth Authentication: Refer to the doc (TBA).
Admin Configuration
Configuration settings for Salesforce as well as Jira instances are done under the Admin Settings section.
Jira Salesforce Relation: Users can select one of the two options from the dropdown list: Salesforce record-Many Jira issues and Salesforce record-One Jira issue.
- Salesforce record-Many Jira issues: Authorize to link many Jira issues with a salesforce record. For example, the agent can create multiple Jira issues for a single salesforce record.

- Salesforce records-One Jira issue: Authorize to link only one Jira issue to a salesforce record (however one Jira can be attached to multiple salesforce records). The best example here will be; a customer complaining about the product life and another customer has the same complaint. So, rather than creating 2 different Jira issues, different salesforce records can be linked to the same Jira issue.

Enable Edit Jira In Salesforce: Enable this feature to allow editing of Jira records from Salesforce.

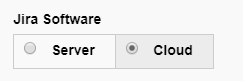
Jira Software: Choose the type of Jira Software you use: server-based or cloud-based.
Auto-Sync Salesforce Comments: This provides the ability to sync Salesforce case comments to Jira instance automatically. If this setting is disabled then the users can always sync the comments selectively.
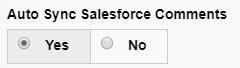
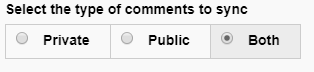
If ‘Auto-Sync Salesforce Comments’ is enabled then the users will have the choice to decide the type of comments to be synced i.e. public, private or both.
Auto-Sync Salesforce Attachments: This feature allows auto-syncing of Salesforce attachments to Jira. If disabled, the users can always manually sync the attachments.

Sync Jira Comments into Salesforce: This feature allows syncing of Jira comments to Salesforce. The synced comments from Jira are stored under ‘Jira comment’ custom object which in turn is the child of ‘Jira’ object in Salesforce.
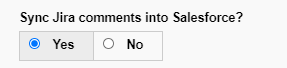
If ‘sync Jira comments into Salesforce’ is enabled then further comments can be saved into Salesforce in two ways:
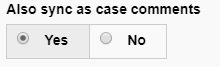
- Also, sync as case comments: Comments synced from Jira to Salesforce can also be synced as case comments along with syncing into Jira comment custom object.
- Comments to be saved as? This provides the choice to the users to save the Jira comments as private or public comments in the Salesforce instance.