Feedback
Sinergify Zendesk Jira Connector
Sinergify allows Bi-directional sync between Zendesk tickets and Jira issues. With configurable syncing, the admin can decide what updates to sync from Zendesk to Jira or vice-versa.
Installation in Zendesk
-
Log into your Zendesk account and navigate to Admin.
-
Locate the Marketplace under ‘Apps’ , and look for ‘Sinergify (Zendesk Jira Connector)’ App then click Install.
Authentication in Zendesk
Below are the steps that need to be performed when authorizing the Sinergify application on Zendesk via an authenticated Jira user.
Setting up Application Links
Step 1. Log into your Jira system as a user with 'Jira Administrator' permissions.
Step 2. Click on the ‘Gear’ (settings) icon.
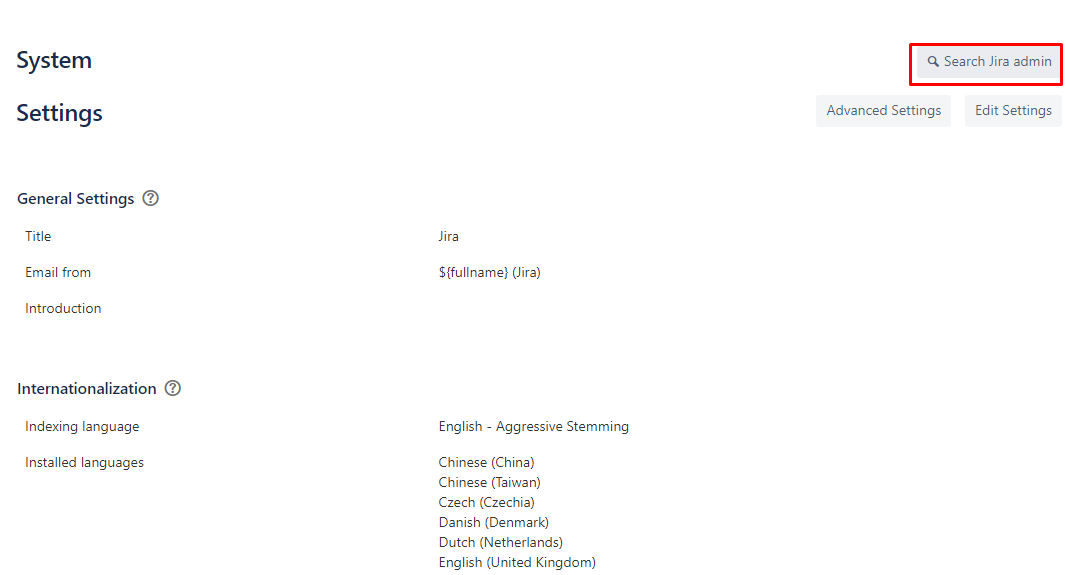
Step 3. Under the Settings drop-down menu, click ‘System’.
Step 4. Click ‘Search Jira admin’.
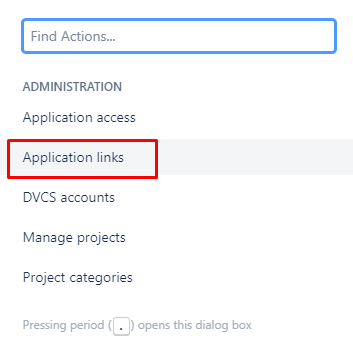
Step 5. Enter ‘Application’ in the search bar and click ‘Application links’ from the search results.
Step 6. Choose the type of link. Select ‘Direct Application Link’ and then enter the ‘Zendesk URL’ in the Application URL. Select ‘Continue’.
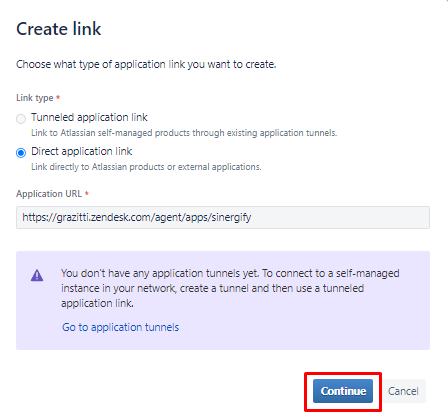
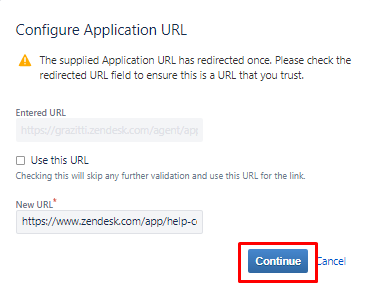
Step 7. A new screen will appear to configure the application URL. Select ‘Continue’ again to verify your application URL.
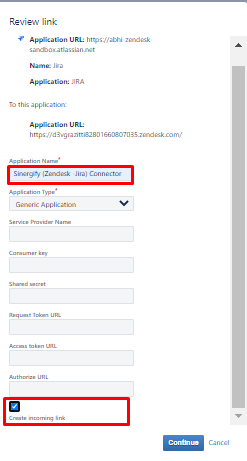
Step 8. Specify an ‘Application Name’ for reference. As an example, consider the ‘Sinergify (Zendesk-Jira) Connector’. Select ‘Generic Application’ as the Application Type. Enable the 'Create incoming link’ option. Select ‘Continue’ to save the settings.
Step 9. A fresh window will open. Review the data you've entered, then click "Continue" to confirm and preserve it. If it prompts you again, click "Continue."
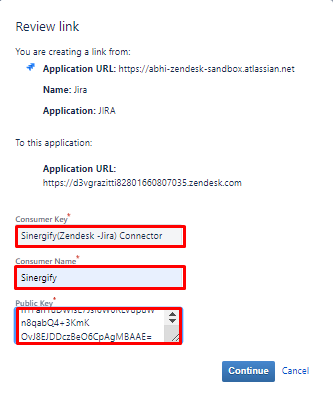
Document link: Public/Private Keys Generator for OAuth.
[In order to generate keys, make sure you choose the 2048 Bit size.]
Save the private key that will be used in the Zendesk Authentication Screen.
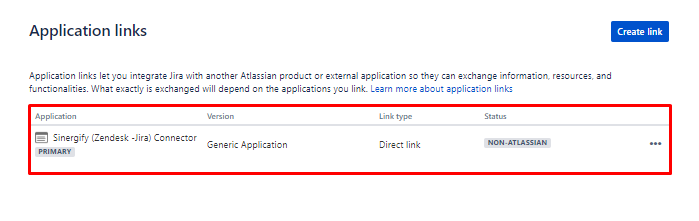
Step 10. Application Link will be created.
Zendesk Authentication Panel
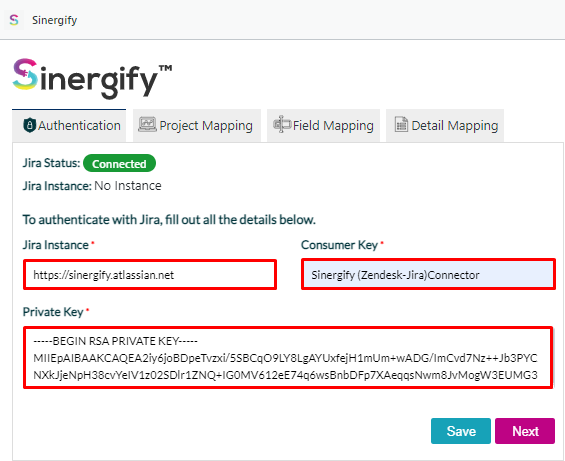
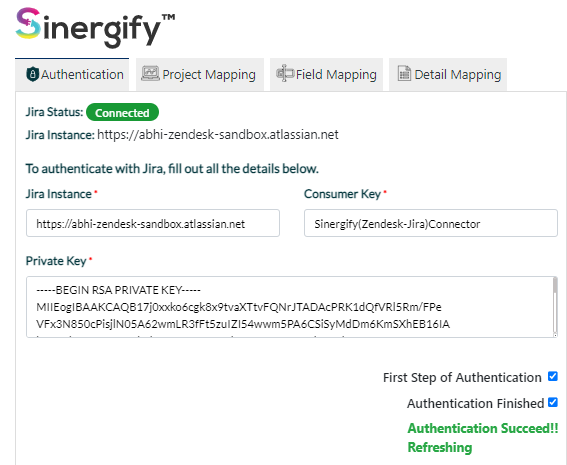
Step 11. To authenticate on Zendesk , enter the following information and Select ‘Save’ once done.
- Jira Instance: Url of Jira Instance.
- Consumer key: The same as what was entered in the application link, for example. ‘Sinergify Zendesk-Jira connector’ .
- Private key: Pair of Public Key entered in Application Link above.
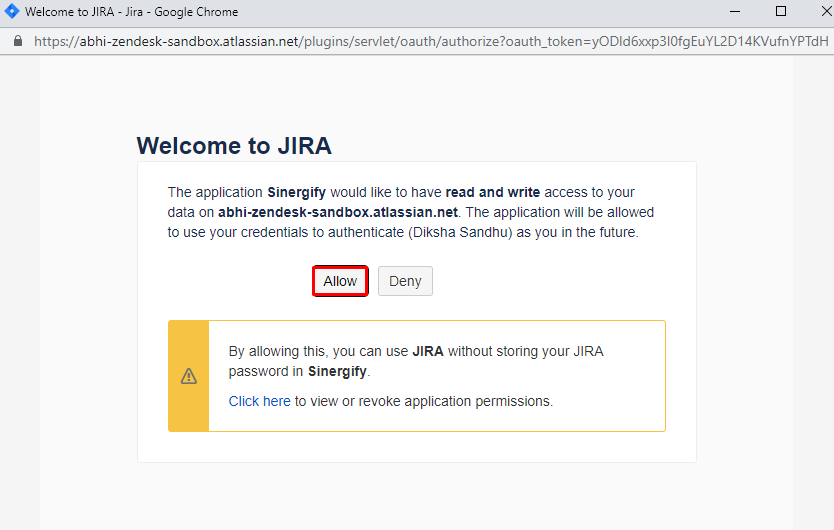
Step 12. A new screen will appear to login into your Jira instance. Once you are logged in, another window will appear asking for the ‘Read’ and ‘Write’ permissions. To share your access token, click ‘Allow’.
Note:
- If you are already logged in, it will show the logged-in user name. Ensure that the user with admin access is being used for integration.
- If you are not logged in, then you will have to enter your Jira credentials.
- Ensure that pop-ups are not blocked in your browser’s settings.
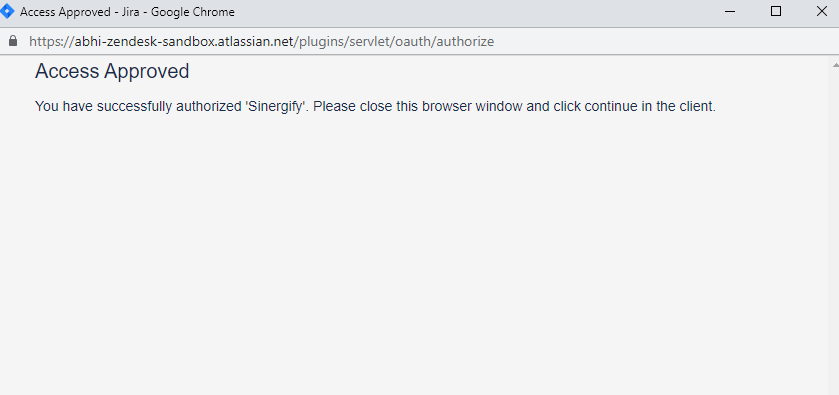
Step 13. As soon as you click ‘Allow’, a confirmation pop-up will appear stating that the access has been approved. Close the pop-up window.
Step 14. In order to complete the authentication process, click on the ‘Finish’ button.
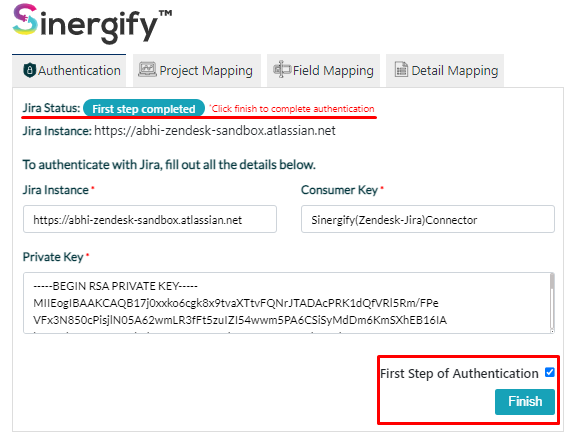
Step 15. As soon as you click the finish button, the authentication screen will appear with the Jira status of ‘Connected.’
Configuration (Zendesk Side)
Project Mapping
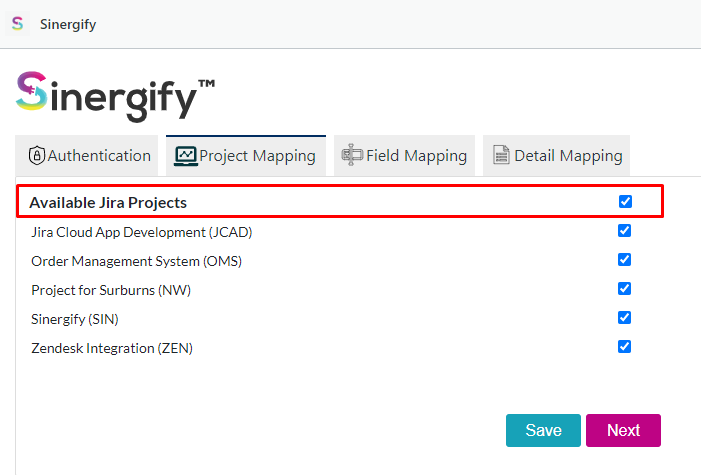
Step 1. Once authentication is done, the next step is to configure the Jira projects. Select ‘Next’ to go to the ‘Project Mapping’ screen. The projects on this screen are visible as per the project-level permissions to the specific Jira Integration User through which we did the authentication. If any Project is missing contact your Jira Administrator to assign the necessary project permissions or select the right user in the Authentication Screen.
Only the projects selected on the ‘Project screen’ will be available for Create, Search, Link, Unlink, etc Features .
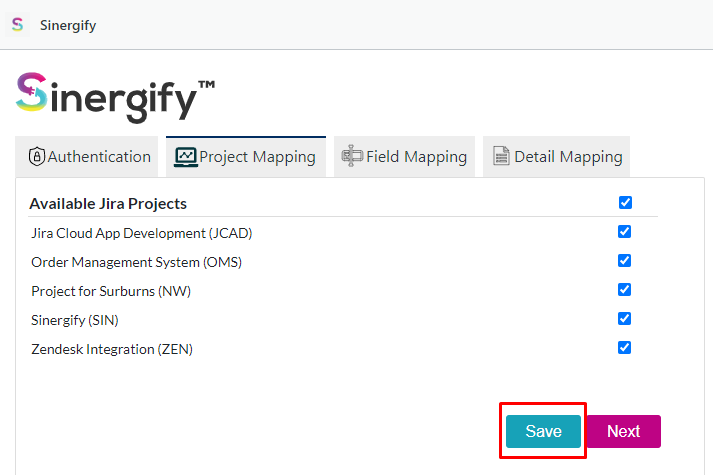
Step 2. Click ‘Save’ and then click ‘Next’ to configure Field mapping.
Field Mapping
This feature allows users to handle the mapping of Jira fields with Zendesk fields.
Step 1. Choose the desired Jira fields and click the ‘Add’ button. These fields will be available on the Create Jira screen. If you want to pre-populate the Jira field data with Zendesk ticket field data or set up a unidirectional or bidirectional sync between Zendesk and Jira fields, select the respective Zendesk field and set the Target type.
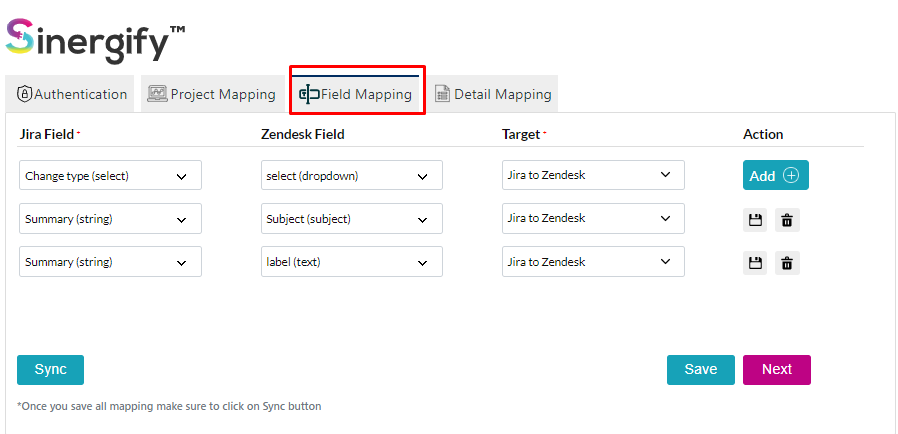
Step 2. Target: It enables you to sync updates directly from Zendesk to Jira or vice versa or both. It also pre-populates Jira fields with Zendesk ticket fields on the Create Jira screen. Users have to decide the type of sync.
- None
- Jira to Zendesk
- Zendesk to Jira
- Two way
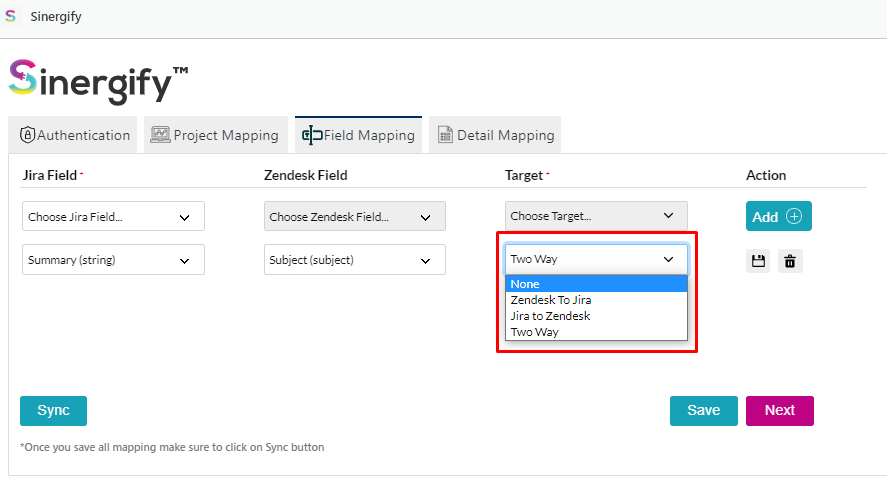
- None - If the target is selected as ‘None’, auto-syncing will not update the linked records.
- Jira to Zendesk - Whenever we update the fields of the Jira issue, linked Zendesk tickets are also updated.
- Zendesk to Jira - This will pre-populate the Jira field with Zendesk field data when we open the Create Jira screen in Zendesk, and whenever there is an update on the fields of Zendesk tickets, the fields of linked Jira issues are also updated.
- Two way - When the target is set to two-way, any update made on either side will update the linked record on the other side. This will pre-populate the Jira field with Zendesk field data when we open the Create Jira screen.
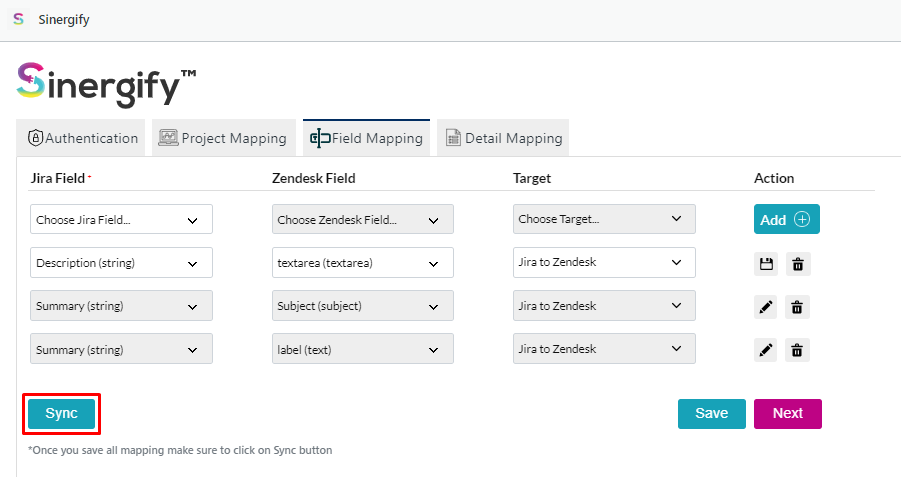
Step 3. Sync- With the help of sync, we can auto-sync the fields added to the target. It is mandatory to click the Sync button after making all the changes. Select ‘Save’.
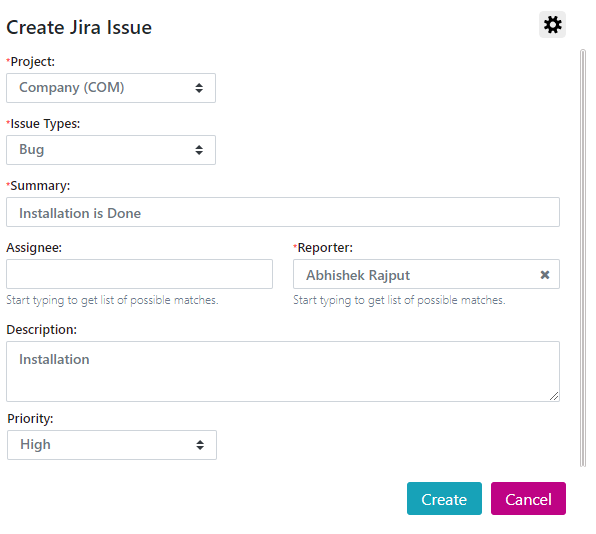
Step 4. The mapped fields will appear on the Create Jira Issue screen, as shown in the screenshot below.
Field type syncing compatibility
There are some restrictions on the field types that are compatible with syncing. See the reference below that shows the restricted field types for both platforms.
1. Restricted Jira Field Type
- multiuserpicker
- userpicker
- user
- status
- datetime
- cascadingselect
- issuelink
- issuetype
- gh-epic-link
2. Restricted Zendesk Field Type
- Status (Standard Zendesk Field)
- Assignee (Standard Zendesk Field)
- Group (Standard Zendesk Field)
- Credit card
- Regex
- Checkbox
- Description (Standard Zendesk Field)
- Lookup relationship
Key Points to Remember :
Users can create Jira issues even if the Zendesk field is not mapped and the target is set to ‘None’.
Target is always mandatory when choosing the Zendesk field.
When we map a picklist field, the Jira field values and the Zendesk field value API name must match.For eg. If the API Name of picklist value in Zendesk field is ‘most_ critical’ then the picklist value in Jira field should also be ‘Most Critical’.
Detail Mapping
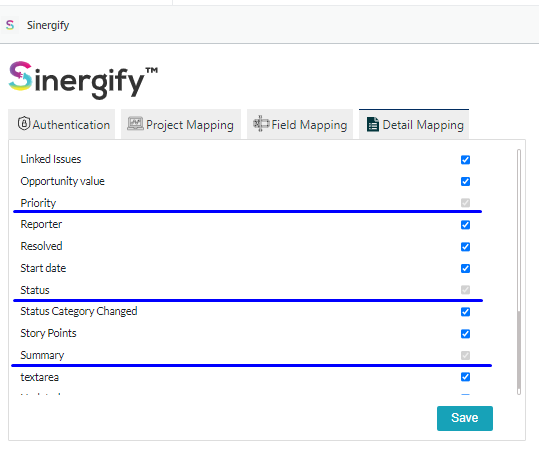
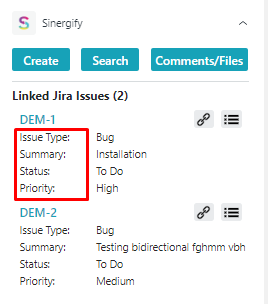
All the fields that are available in Jira are shown on this screen. Only the fields that are selected in the detail mapping section will be shown on the Jira issue detail screen. There are four types of fields that are shown by default on the Linked Jira issue detail page. These fields will be saved by default in the detail mapping section. See the screenshot below:
- Issue Type
- Summary
- Status
- Priority
Below is an example of the fields in Zendesk tickets.
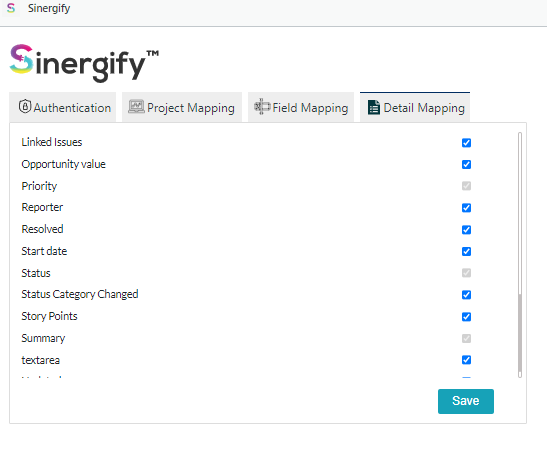
In the detail mapping section, the user can add more relevant fields per requirements to see details about the Jira issue. See the screenshot below:
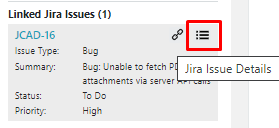
Once you click on save, the fields below will be available on the Jira issue detail page. To view these details, click on the detail icon as shown below.

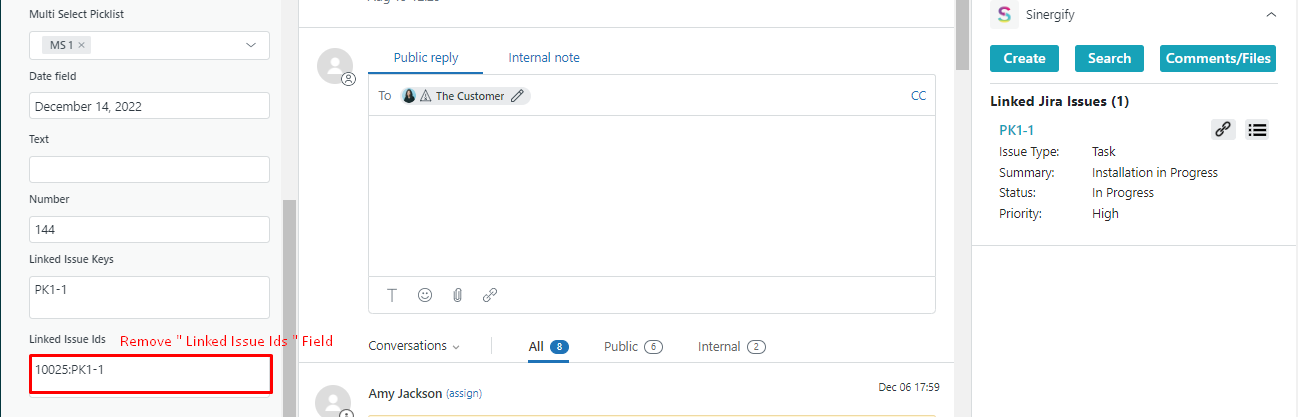
Note:
If in case you see the field ‘Linked Issue IDs' on the layout, please make sure to remove the field from Zendesk ticket page layout. This field is part of integration and should not be modified. Hence it needs to be removed from the layout to avoid any accidental issues.
Installation in Jira
- Select Apps, and under the drop-down menu, select Find new apps in your Jira instance.
- Enter Sinergify in the Search for Apps input box and press Enter.
- Select Get App, and the application will be installed in the background. Follow the below steps once the app is installed.
Authentication in Jira
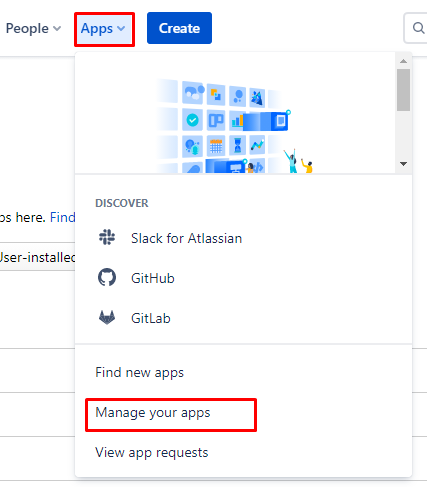
Step1. In the Apps drop-down, select Manage your apps.
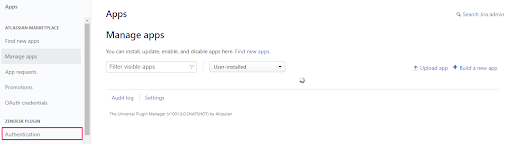
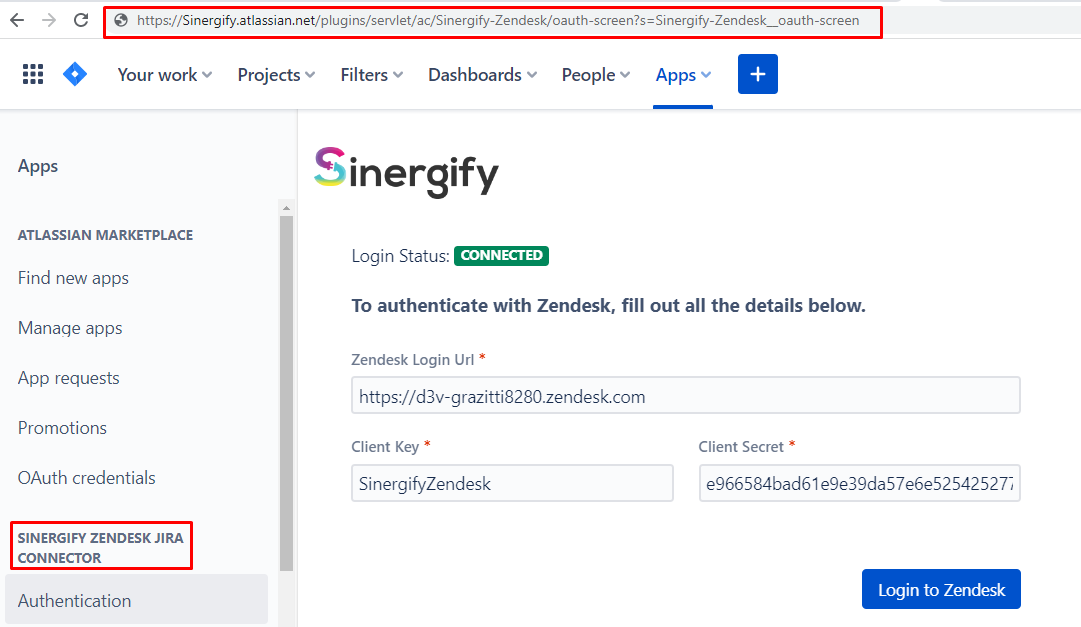
Step 2. In the left panel, click on Zendesk Plugin Authentication.
Step 3. Enter the Zendesk login instance URL along with the client key.
(consumer key) and Client secret (consumer secret) of your Zendesk app.
For the Client key and Client Secret
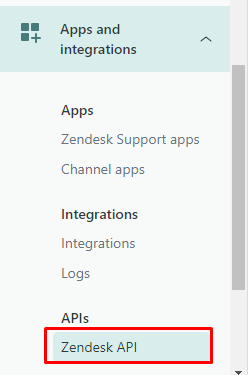
Step 4. In the Zendesk Admin Center, open the Apps and Integrations section in the sidebar or search for Zendesk API, then select APIs > Zendesk APIs.
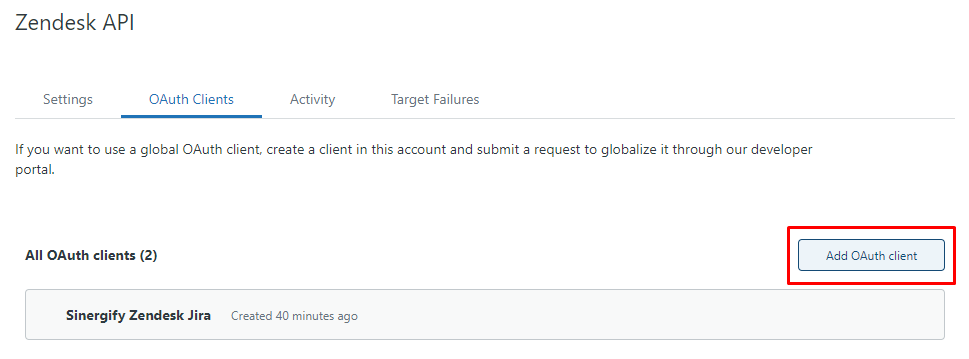
Step 5. Click the OAuth Clients tab on the Zendesk API page, and then click ‘Add OAuth client’ on the right side of the OAuth client list.
Step 6. To Add an Oauth client, fill out the following fields. See the reference screenshot below:
- Client Name: Enter a name for your app. For example, Sinergify Zendesk Integration.
- Description: Optional. This is a short description of your app .
- Company: Optional. You can add the company name for reference.
- Logo: Optional. This is the logo that users will see when asked to grant access to your application.
- Unique Identifier: The field is auto-populated with a reformatted version of the name you entered for your app. You can change it if you want.
- Redirect URLs: Enter the browser URL of the Jira plugin Authentication screen.
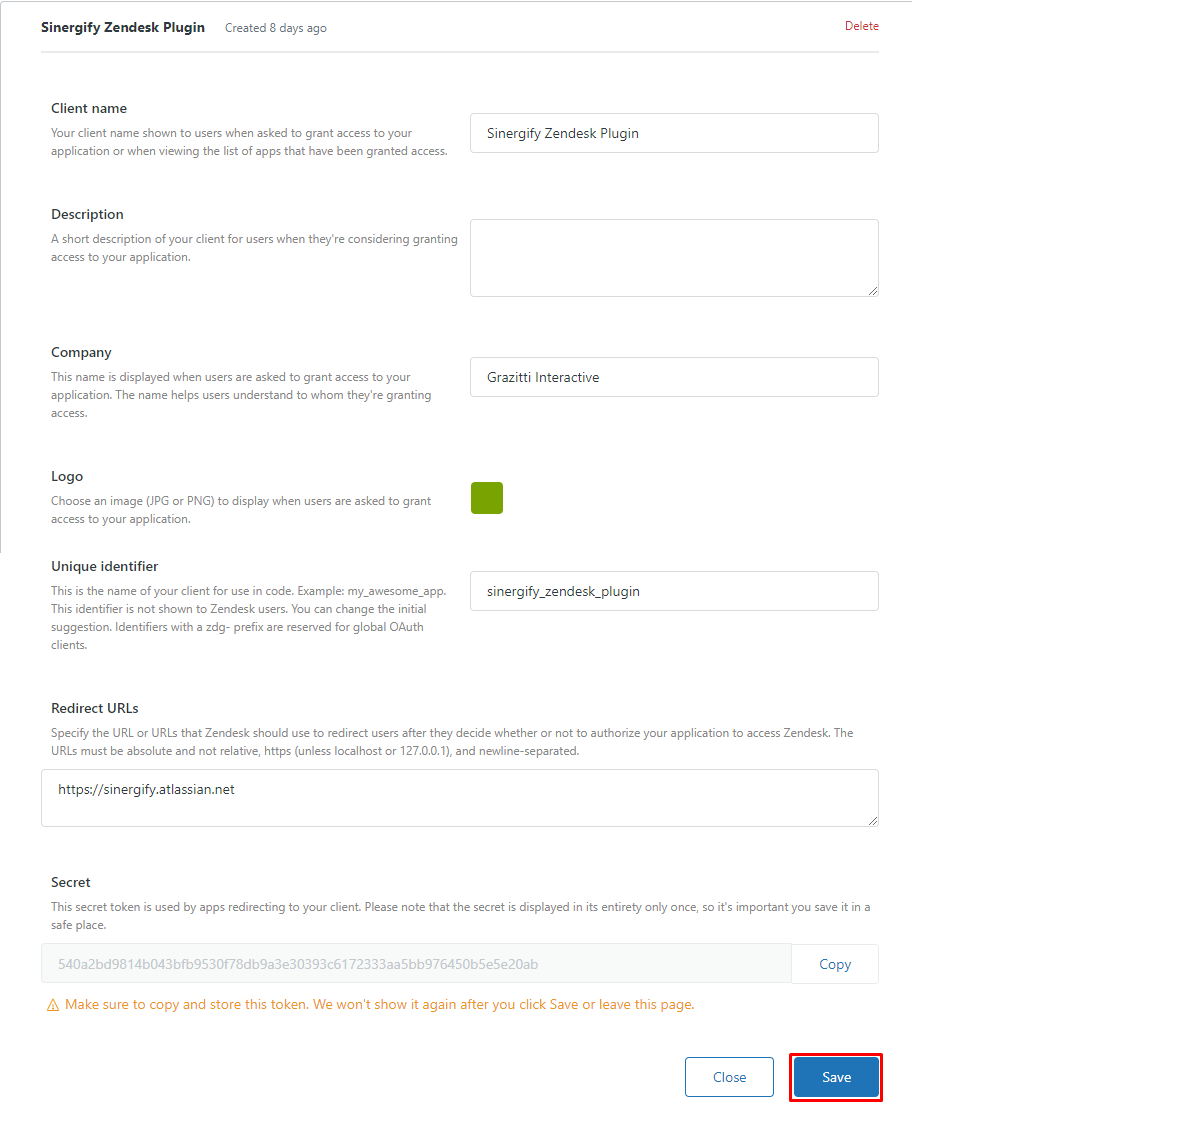
Step 7. After the page refreshes, a new pre-populated Secret field appears on the lower side. This is the ‘client_secret’.
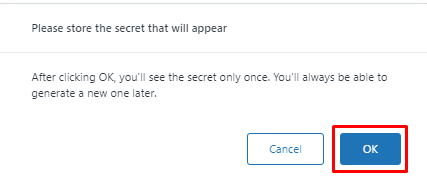
Step 8. Copy the Secret value to your clipboard and store it safely. Make sure to copy and store this token. It won’t be visible again after you click ‘Save’ or Leave this page.
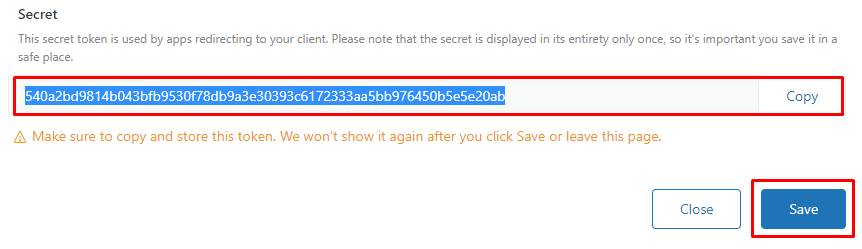
Step 9. Click ‘Save’.
Step 10. Use the unique identifier and the secret value in the authentication screen on Jira as the client key and client secret, respectively.
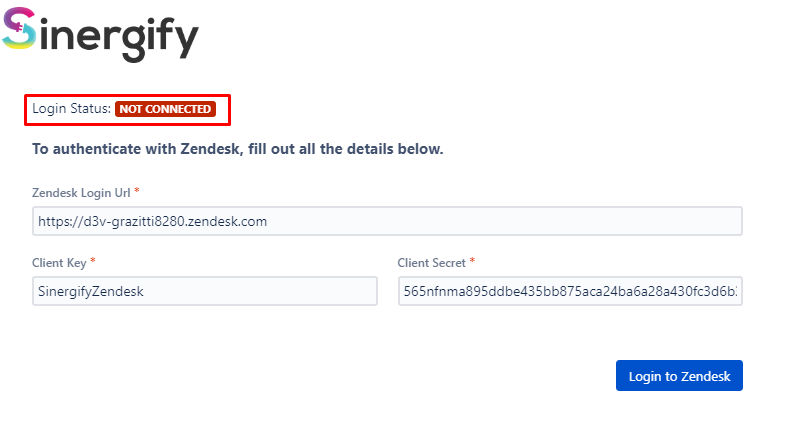
Step 11. Please login into ‘Zendesk’once you have filled out the details.
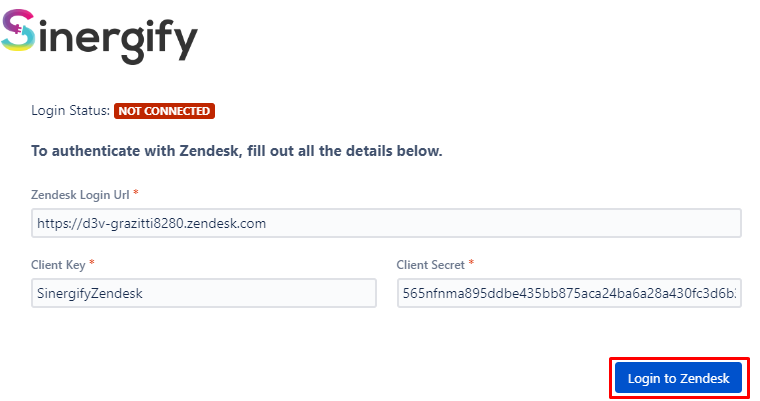
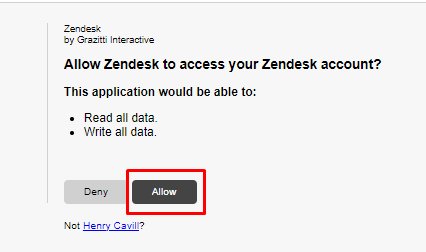
Step 12. This will open a new window for authorization .Click ‘Allow’.
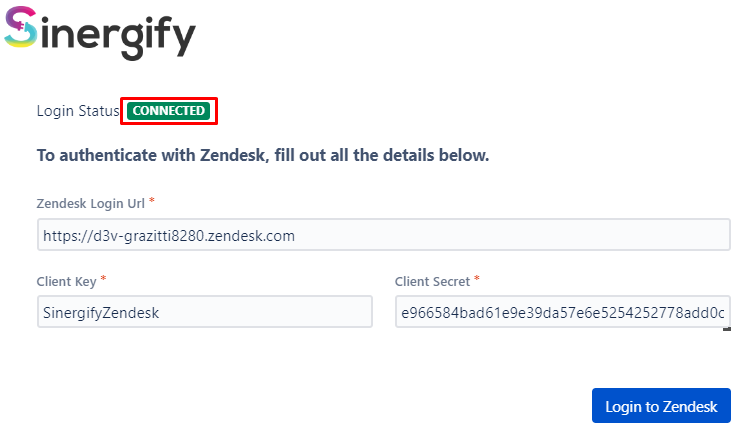
Step 13. A Jira authentication screen appears with the status ‘Connected’.
Uninstall Jira Side Application
Step 1. Click on the Apps tab, and under the drop-down menu, click ‘Manage your apps’.

Step 2. Click on the Uninstall option under the Sinergify app.
Step 3. Select Uninstall, and the application will be uninstalled.
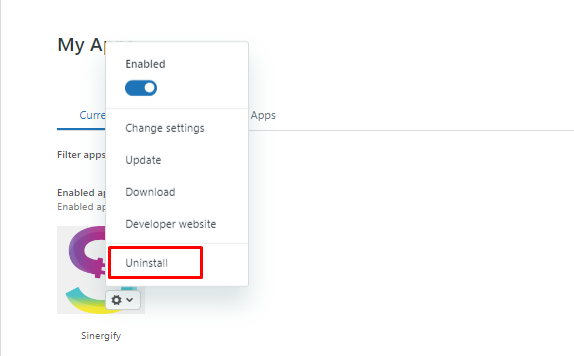
Uninstall Zendesk Side Application
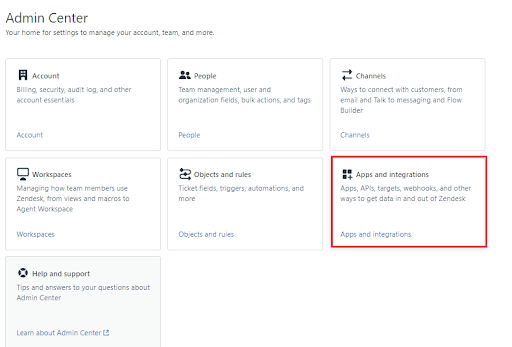
Step 1. In Zendesk Support, click the Admin icon ( ) in the sidebar, then select ‘Apps and Integration’ from the Admin Center.
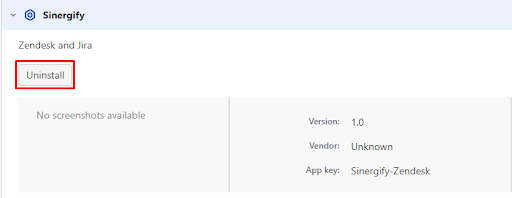
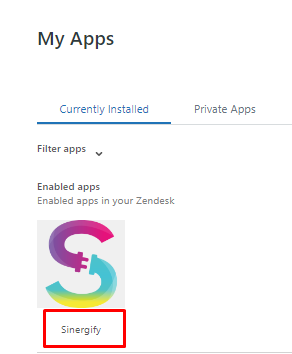
Step 2. Navigate to the currently installed apps and select the application ‘Sinergify Zendesk Jira’.
Step 3. Click on the Gear icon, and from the dropdown list, select ‘Uninstall’. The application will be successfully uninstalled.