Feedback
1. Installation Process
Published Date: 09-07-2026
Read Time:
Log in to your Salesforce instance using Admin credentials.
There are certain pre‑requisites that must be completed before installing the Sinergify package.
1.1 Pre‑Requisites
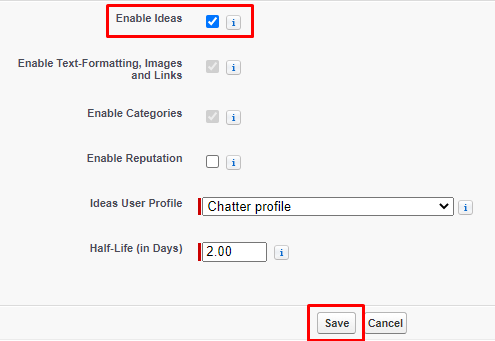
A. Enable Ideas
-
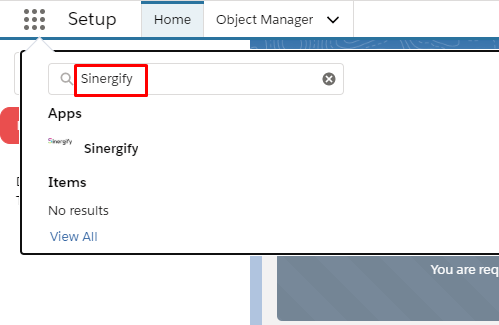
Login to the Salesforce instance.
-
Switch to Classic Experience and click on Setup.
-
In the Search box, enter Idea Settings.
-
Click Edit.
-
Select Enable Ideas.
-
Click Save.

B. Enable Incident Management
-
Go to Setup.
-
Search for Customer Service Incident Management.
-
Enable the toggle button.

Note: Sinergify is compatible with Salesforce Incident Management. It is mandatory to enable Incident Management during the installation. This setting can be disabled after the package installation is complete.
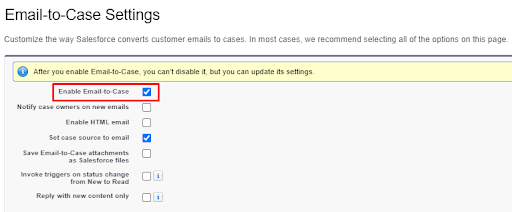
C. Enable Email‑to‑Case
-
Go to Setup.
-
Search for Email‑to‑Case.
-
Select Email‑to‑Case from the Service Setup results.
-
On the new screen, select Enable Email‑to‑Case.

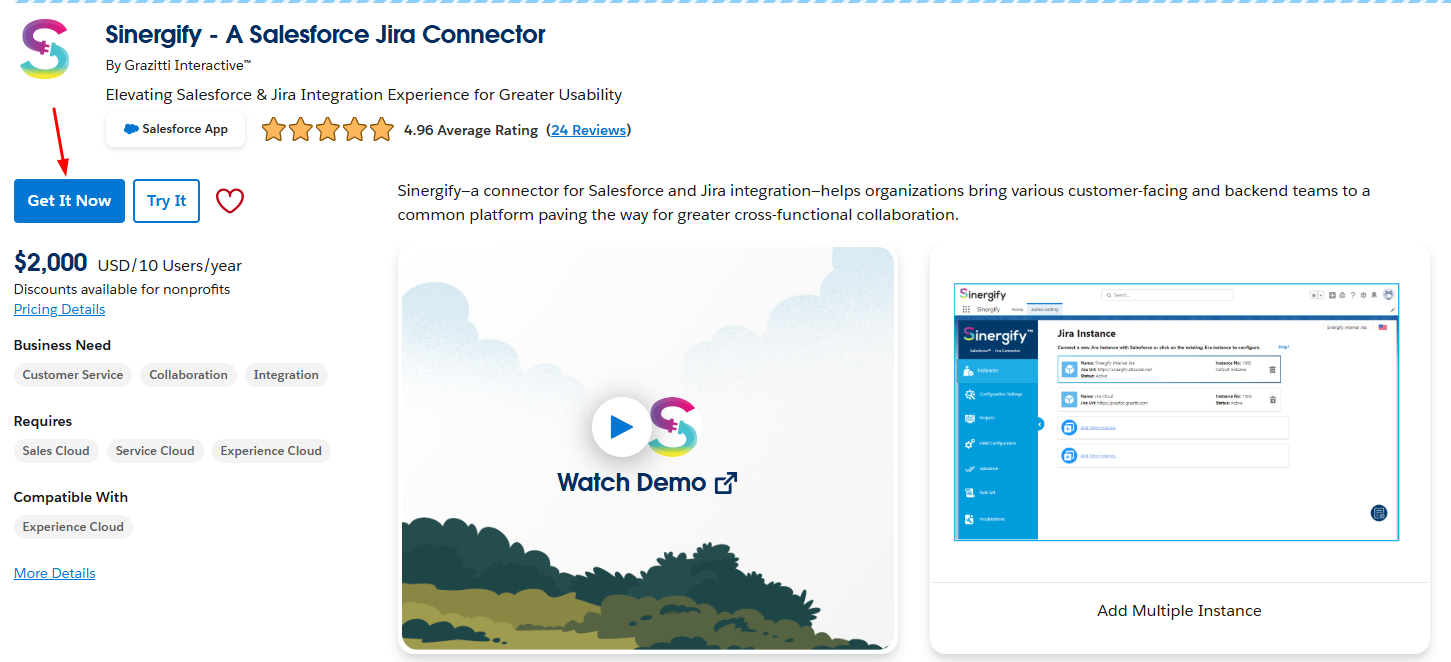
1.2 Package Installation from AppExchange
-
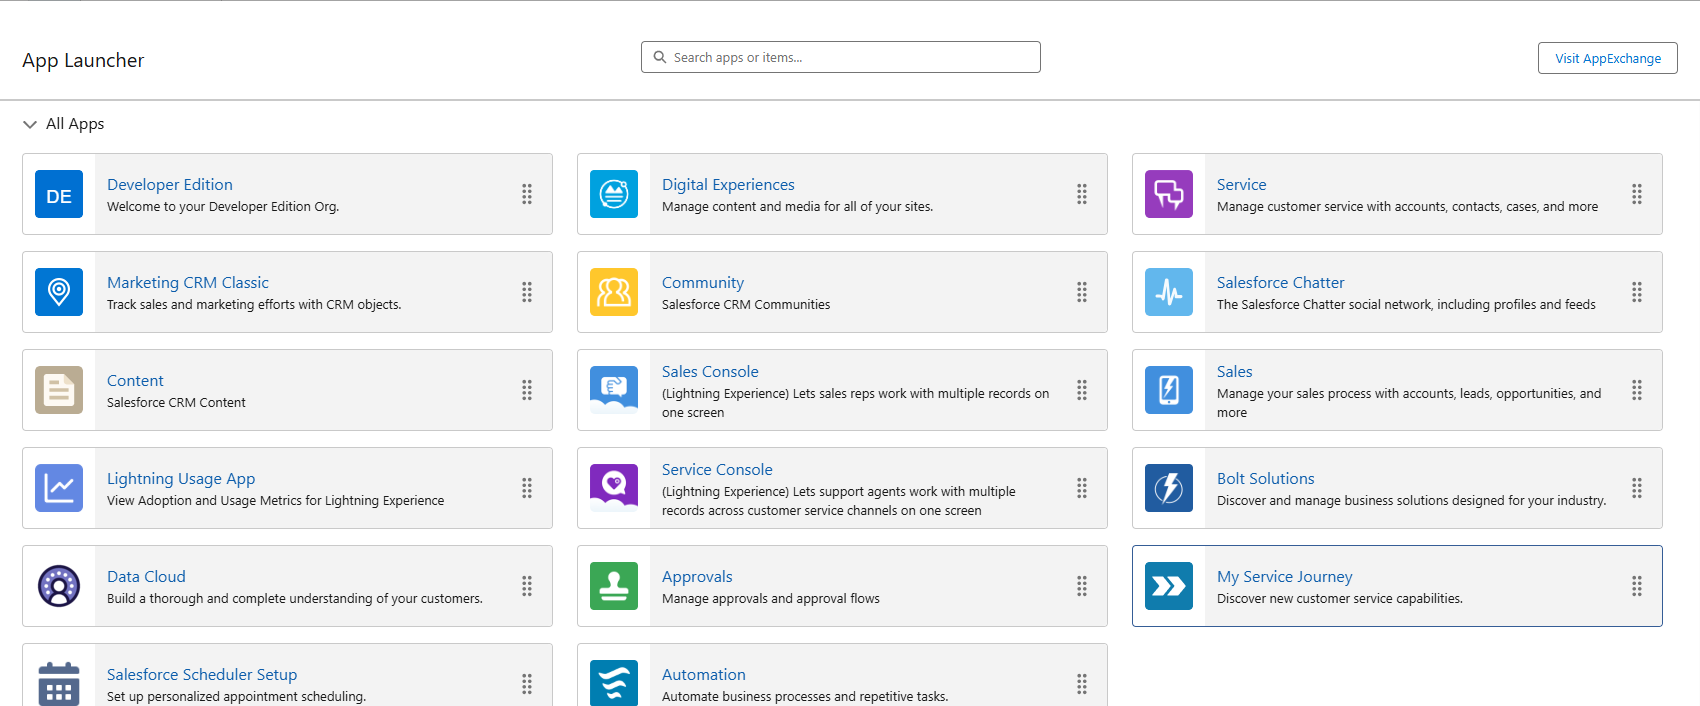
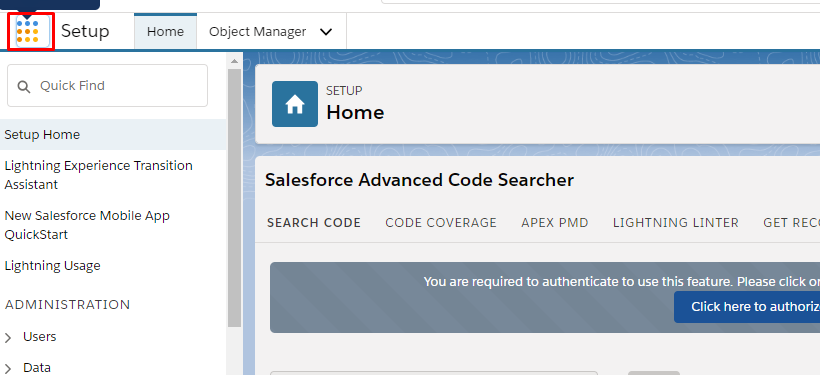
Click the App Launcher icon above the Quick Find search box.

-
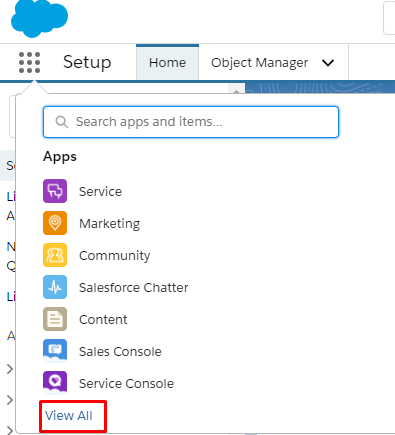
Click View All.

-
The All Apps page will open.

-
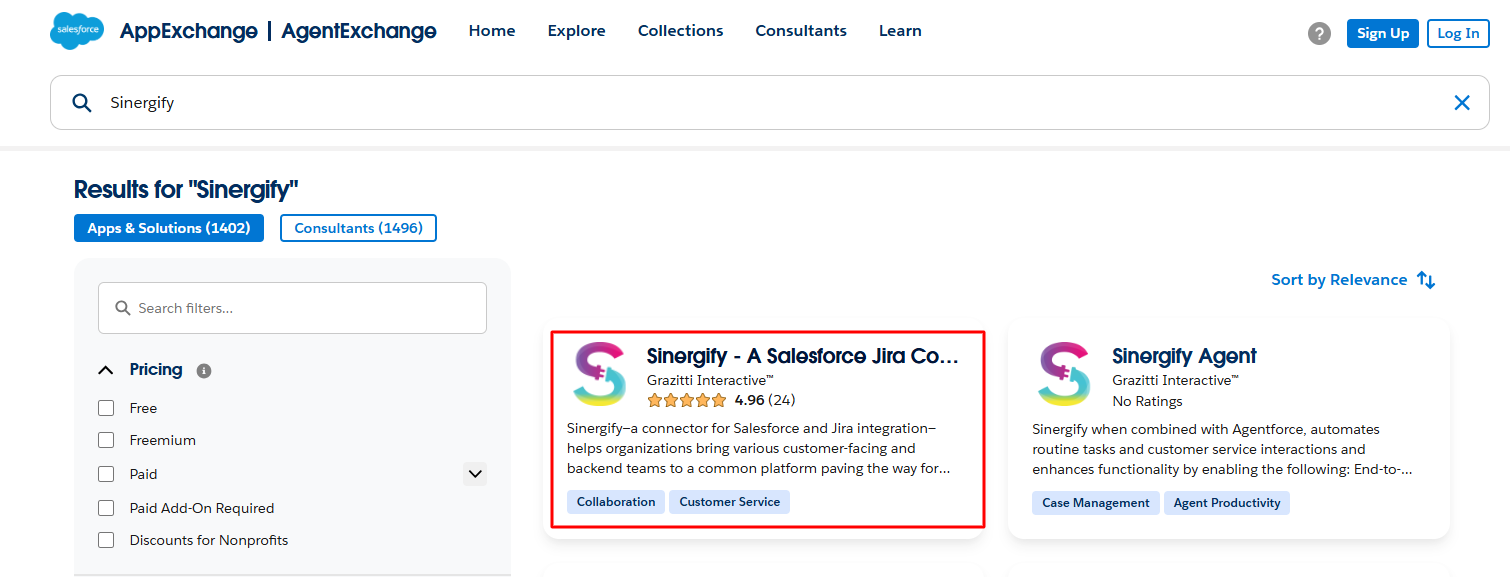
Click the Visit AppExchange button from the extreme right.
-
Search for Sinergify in AppExchange.

-
Click Get It Now.

-
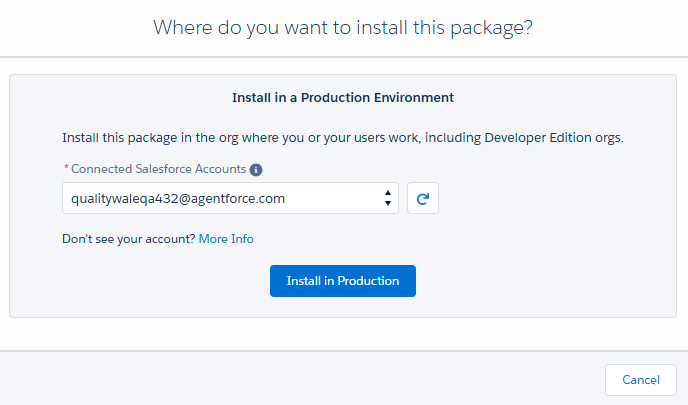
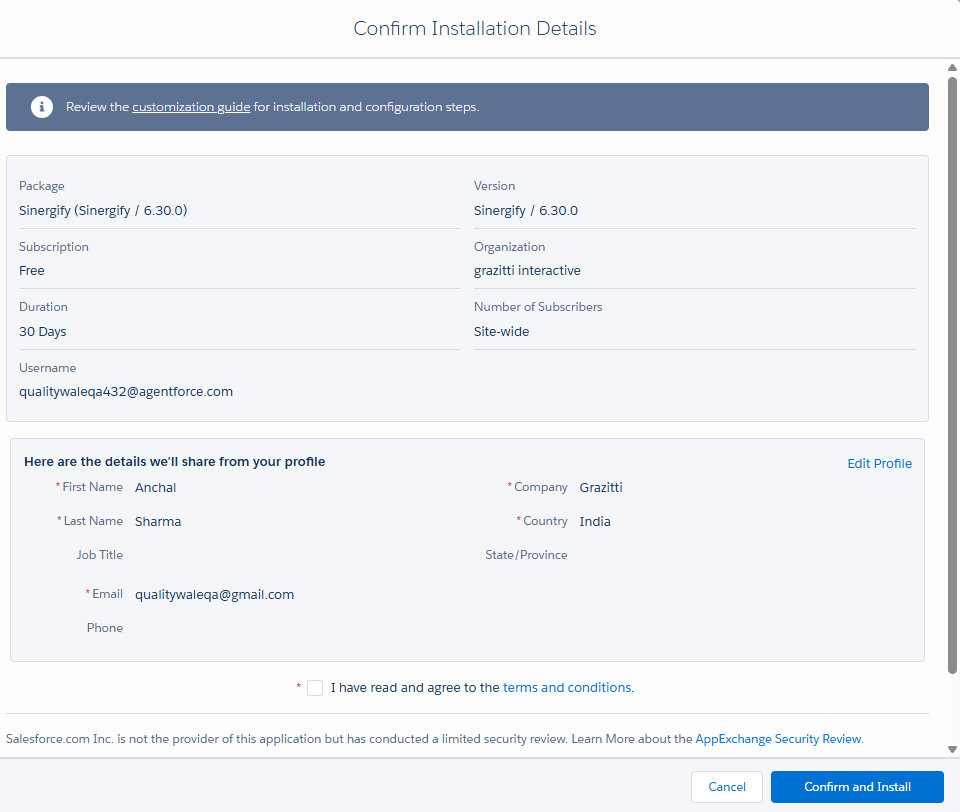
A new screen will appear where the user can proceed with installing the package in the selected Salesforce production org using the connected account.
-
Select the checkbox I have read all the terms and conditions.


-
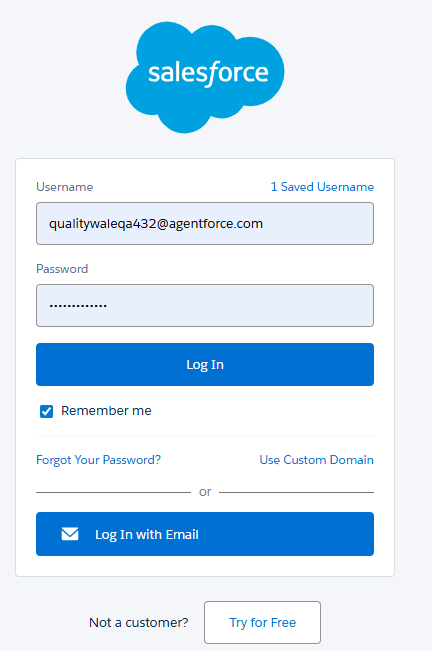
You will be redirected to the Salesforce login page. Verify and enter valid credentials.
-
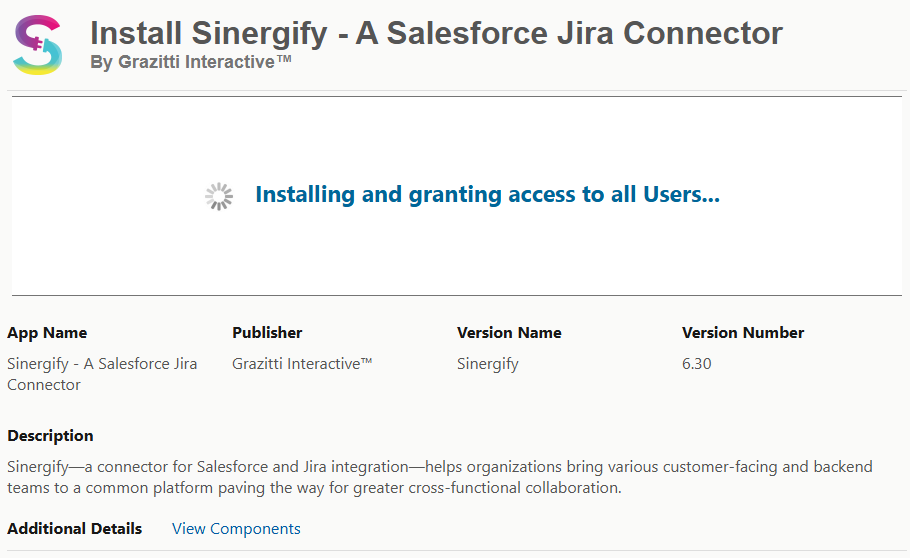
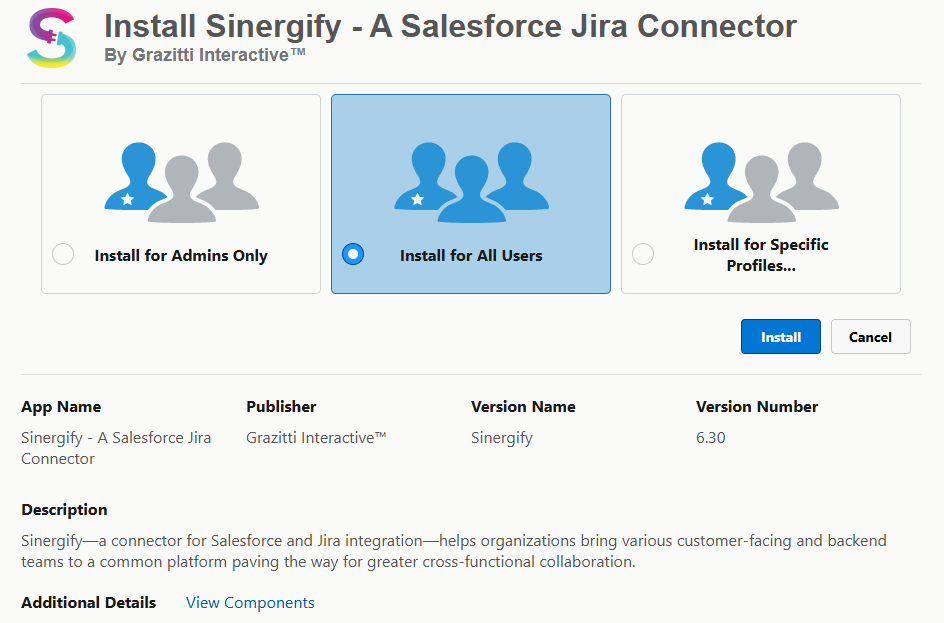
Specify the users for whom Sinergify should be installed.

-
Click Install.


1.3 Post‑Installation
-
The installation may take a few minutes to complete.
-
Users will receive an email notification once the installation is successful.
-
After successful installation, Sinergify will be visible in the App Launcher.