Feedback
Sinergify (Zendesk Jira Connector)
Published Date: 28-07-2026
Read Time:
The solution facilitates bi-directional synchronization between Zendesk Support tickets and Jira issues, providing configurable syncing options to control updates between the two platforms.
Installation (Zendesk)
Log into your Zendesk account and navigate to Admin.
Locate the Marketplace under ‘Apps’, and look for ‘Sinergify’ App then click Install.
Authentication (Zendesk)
Please follow the steps below to authenticate the Sinergify Zendesk application via your Jira integration user.
Setting up Application Links in Jira
-
Log into your Jira system as a user with 'Jira Administrator' permissions.
-
Click on the ‘Gear’ (settings) icon.
-
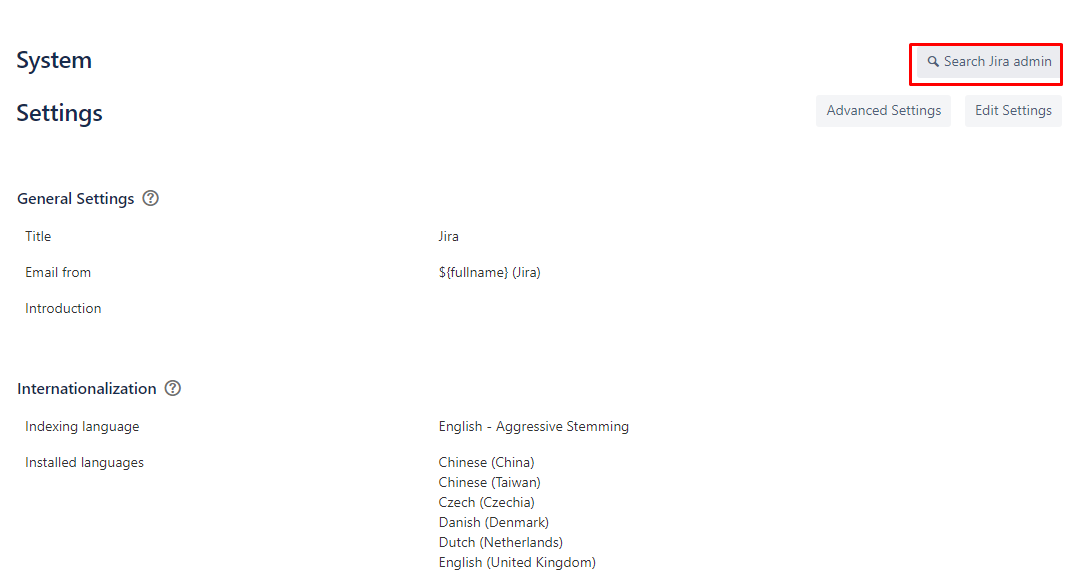
Under the Settings drop-down menu, click ‘System’.
-
Click on the ‘Search Jira admin’ button.
-
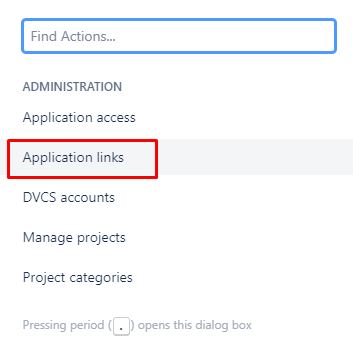
Enter ‘Application’ in the search bar and click ‘Application links’ from the search results.
-
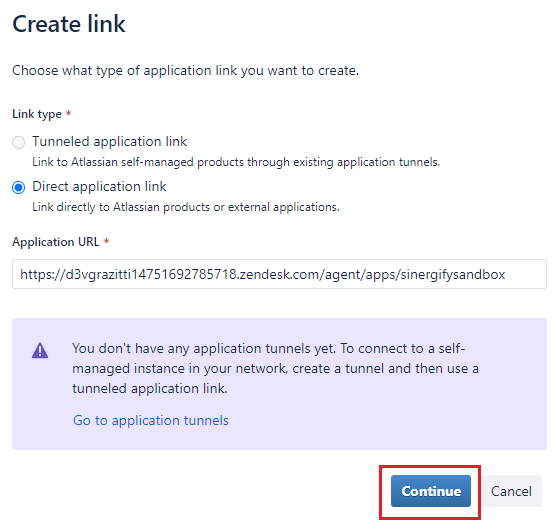
Choose the type of link. Select ‘Direct Application Link’ and then enter the ‘Zendesk URL’ in the Application URL. Select ‘Continue’.
-
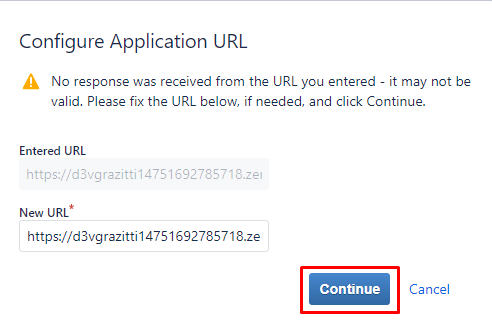
A new screen will appear to configure the application URL. Select ‘Continue’ again to verify your application URL. The Application URL is in the below format.
https://your_subdomain.zendesk.com
-
Specify an ‘Application Name’ for reference.
For example, consider the ‘SinergifyZendesk’. Select ‘Generic Application’ as the Application Type. Click on the 'Create incoming link’ checkbox and empty all other options on the form.

-
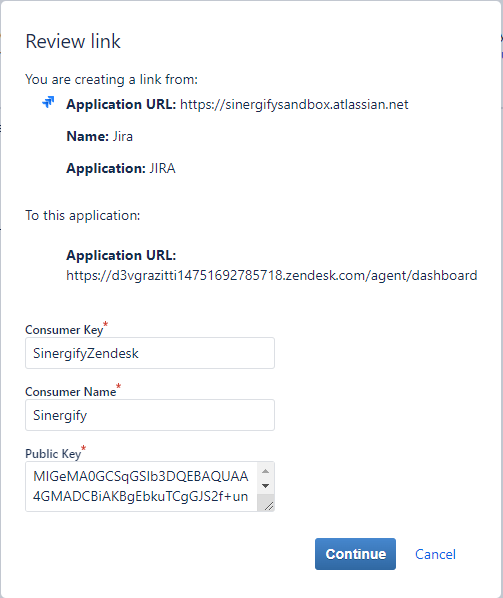
A fresh window will open. Enter the ‘Consumer key’, ‘Consumer Name’, Public Key’. Review the data you've entered, then select ‘Continue’ to confirm and preserve it. If it prompts again, select ‘Continue.’
-
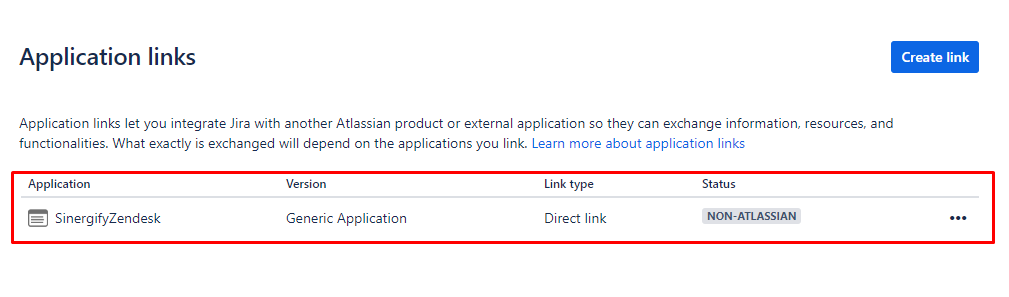
Application Link will be created.
Authentication Panel
-
Log in to your Zendesk account and access the ‘Sinergify’ app by navigating from the left panel.

-
A login screen will appear.

-
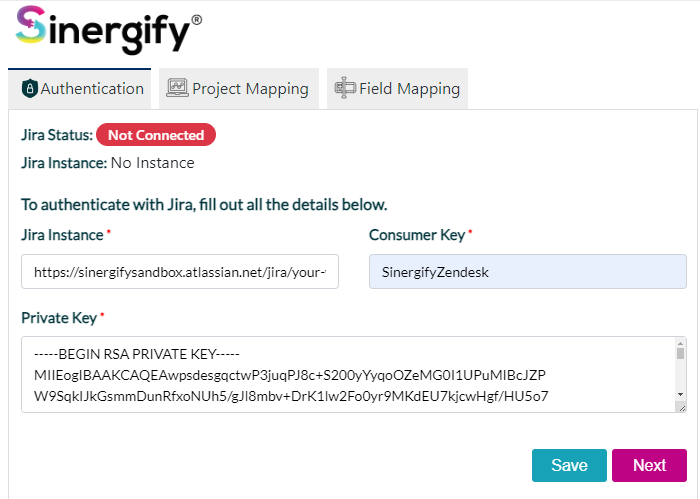
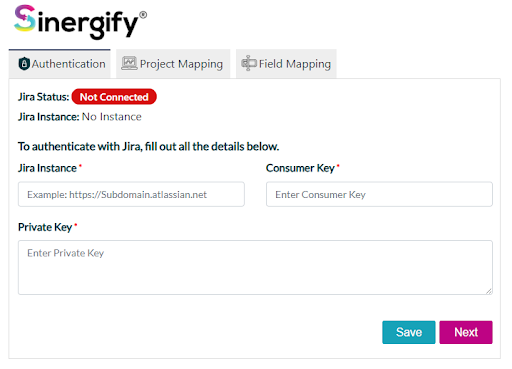
To authenticate on Zendesk, enter the following information and select ‘Save’ once done.
-
Jira Instance: Url of Jira Instance.
-
Consumer key: The same as what was entered in the application link, for example. ‘SinergifyZendesk’
-
Private key:Pair of Public Key entered in the Application Link.
-
A warning message appears saying ‘You will lose all the current configuration if it exists. Would you like to continue?.” Click on the ‘Yes’ button if it is your fresh installation.

-
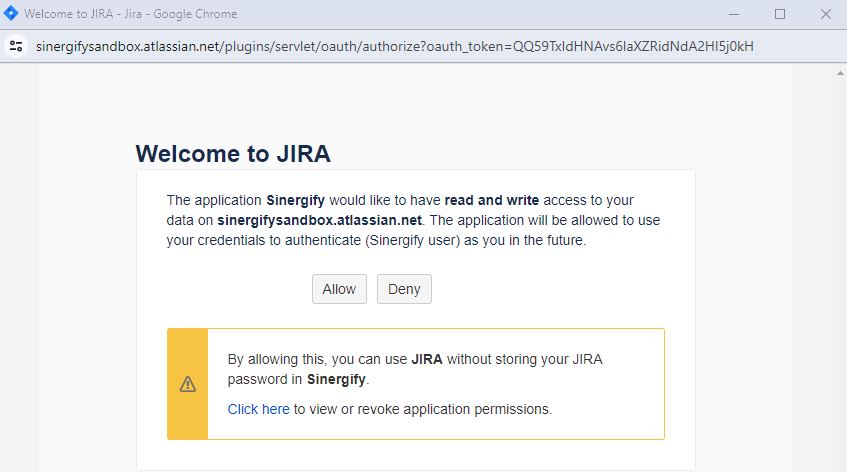
A new screen will appear to log into your Jira instance. Once you are logged in, another window will appear asking for the ‘Read’ and ‘Write’ permissions. Select ‘Allow’.
-
If you are already logged in, it will show the logged-in user name. Verify if it's the correct user via which you want to authenticate.
-
If you are not logged in, then you will have to enter your Jira credentials.
-
Ensure that pop-ups are not blocked in your browser’s settings.
-
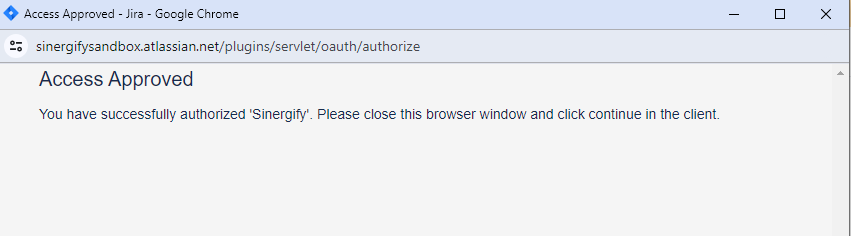
As soon as you click ‘Allow’, a confirmation pop-up will appear stating that the access has been approved. Close the pop-up window.
-
Complete the authentication process by clicking on the ‘Finish’ button.
-
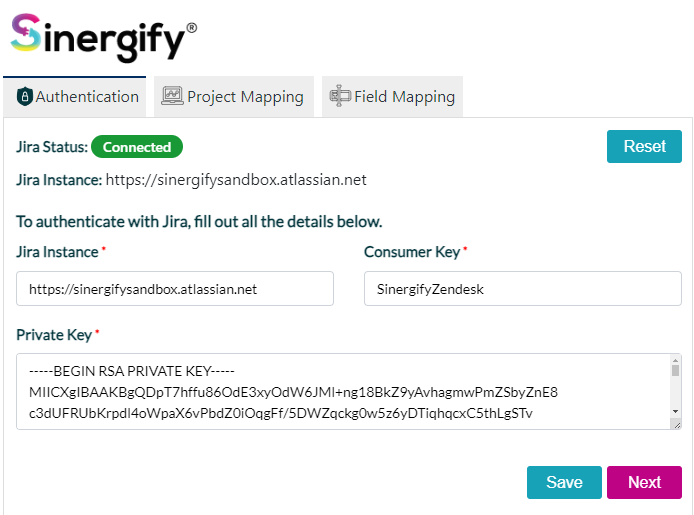
As soon as you click the finish button, the authentication screen will appear with the Jira status as ‘Connected.’
Project Mapping
Once authentication is done, configure Jira projects on the Zendesk side.
Click 'Next' to transition to the 'Project Mapping' screen or you can click on the Project Mapping tab.
Only those projects for which the integration user has Project-level permissions will be listed here.
Only projects chosen on the 'Project mapping screen' are available for key features such as Create, Search, Link, and Unlink. This ensures precise control over project-related actions.
The checkbox is used for the Syncing action for the particular project. 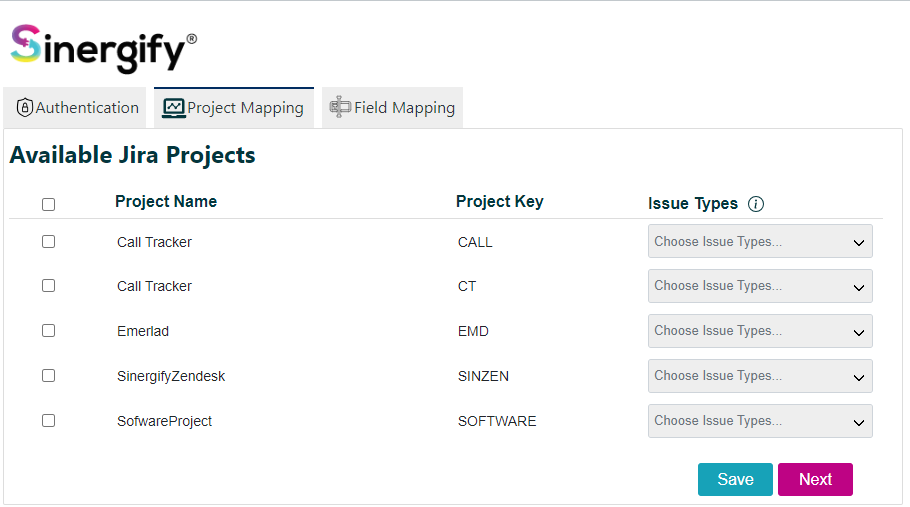
Once the Projects are decided, choose the specific ‘Issue Types’ for the respective Projects and then click ‘Save’.
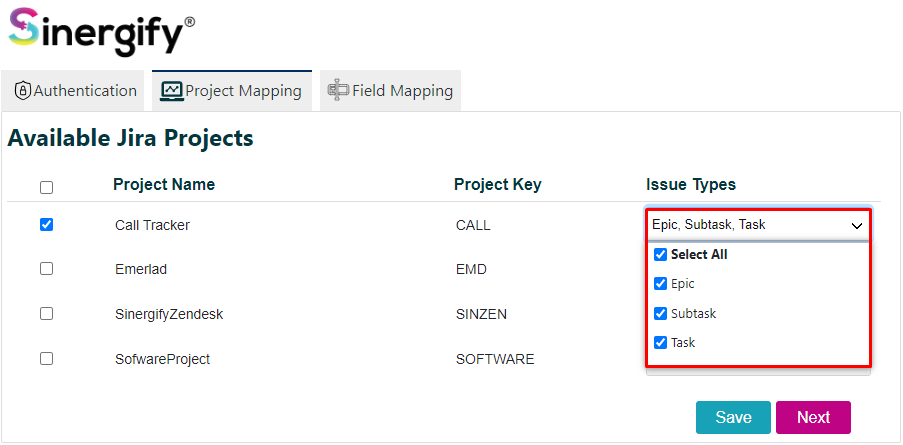
Once the Issue Types are saved, select 'Next’ to set up 'Field Mapping'.
Field Mapping
This will allow users to manage mappings between Jira and Zendesk fields seamlessly.
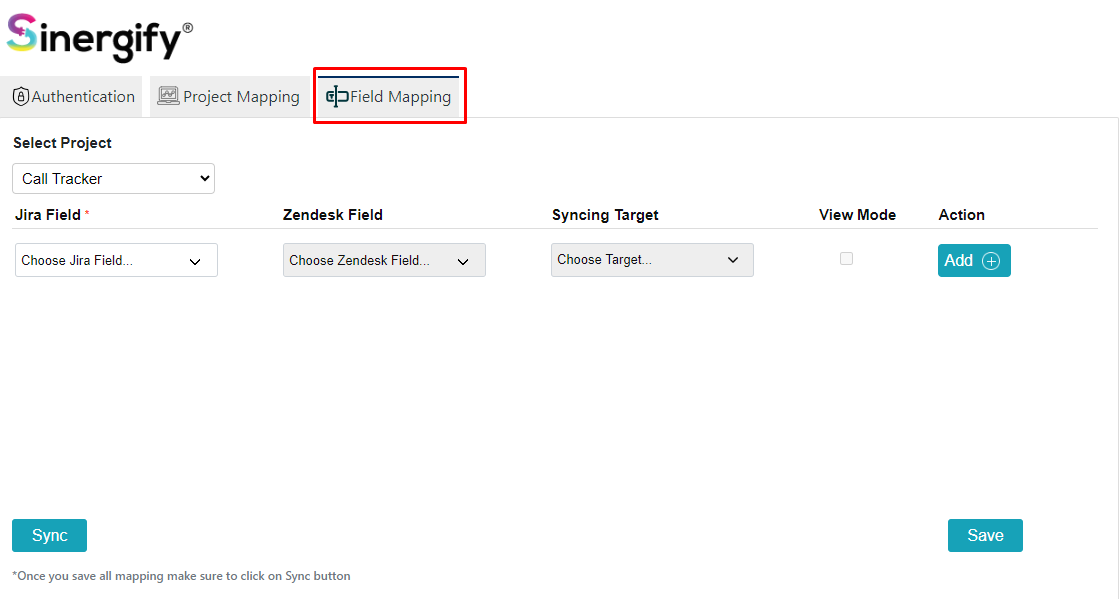
Select the Jira Project from the dropdown to map fields.
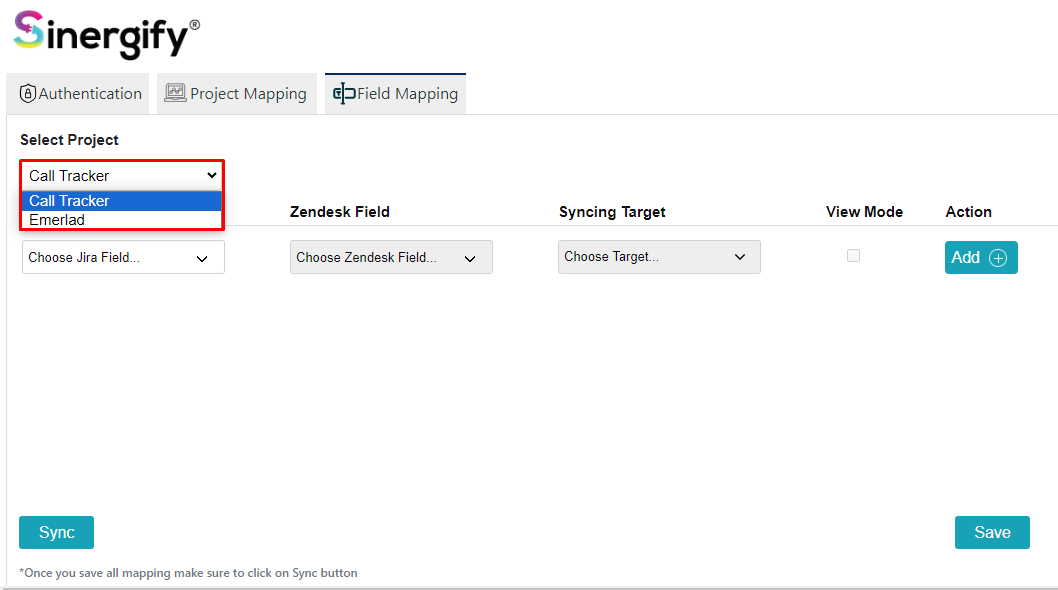
Based on the selected project, a comprehensive list of corresponding Jira fields will be displayed.
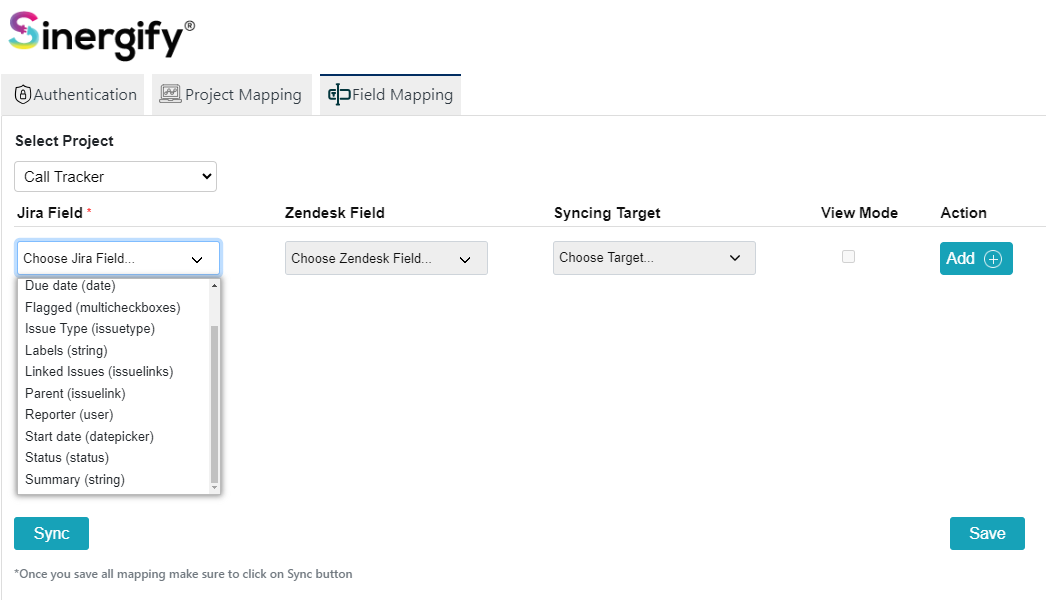
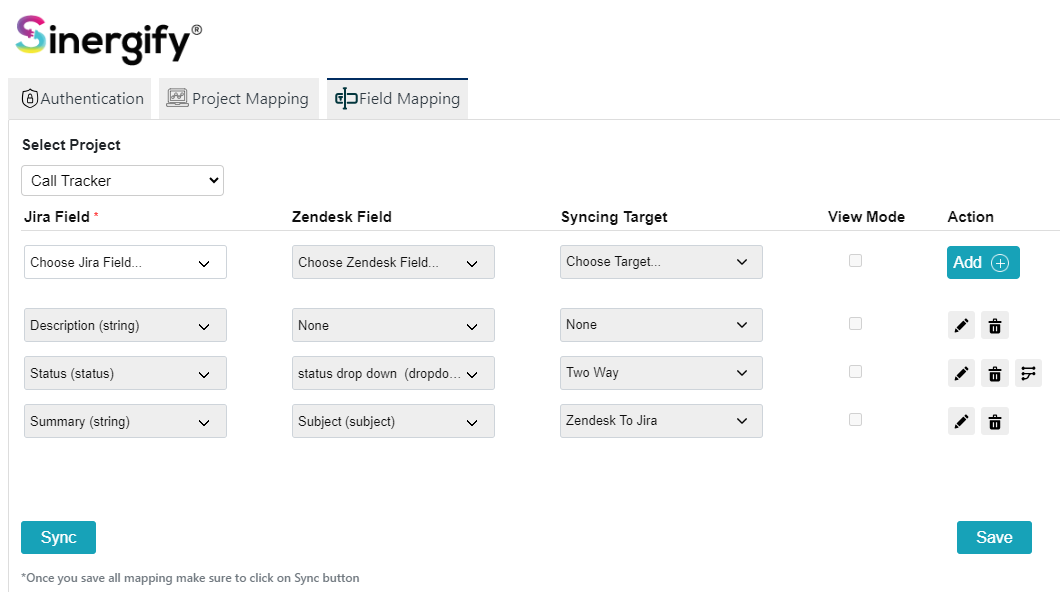
Map the Jira fields with Zendesk fields based on the selected project. Once done click on the ‘Add’.
Field type syncing compatibility
There are some restrictions on the field types that are compatible with syncing. See the reference below that shows the restricted field types for both platforms.
Restricted Jira Field Type
-
multiuserpicker
-
userpicker
-
user
-
datetime
-
cascadingselect
-
issuelink
-
issuetype
-
gh-epic-link
Restricted Zendesk Field Type
-
Assignee (Standard Zendesk Field)
-
Group (Standard Zendesk Field)
-
Credit card
-
Regex
-
Checkbox
-
Lookup relationship
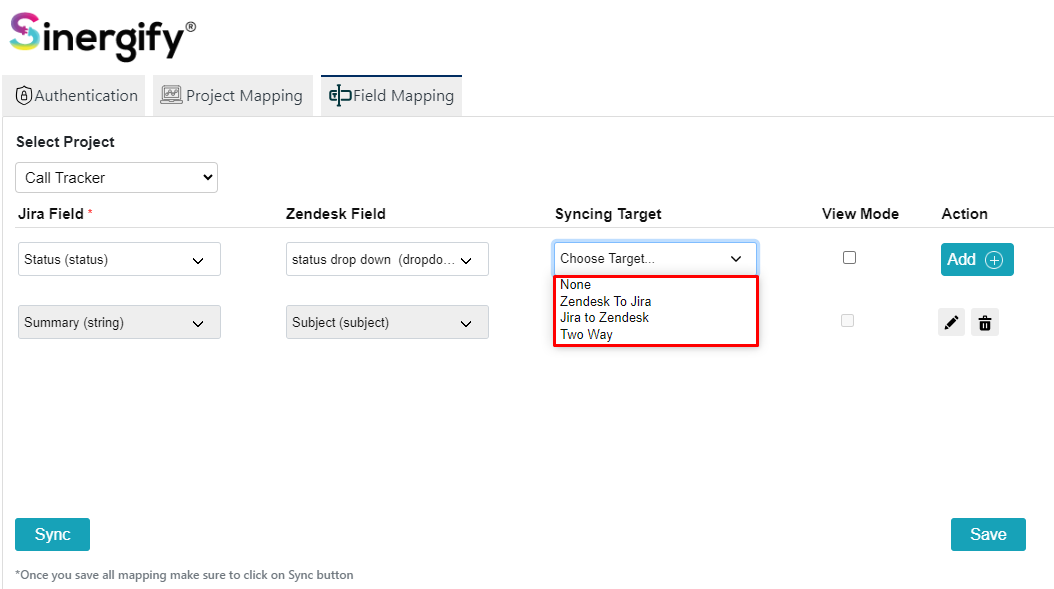
Syncing Target
It enables you to sync updates directly from Zendesk to Jira or vice versa or both. Users have to decide the type of sync according to the business requirements.
-
Jira to Zendesk
Whenever we update the fields of the Jira issue, linked Zendesk tickets are also updated.
-
Zendesk to Jira
Whenever there is an update on the fields of Zendesk tickets, the fields of linked Jira issues are also updated.
-
Two-way
When the target is set to two-way, any update made on either side will update the linked record on the other side.
-
None
When the target is set to None, auto-syncing will not update the field on the linked records.
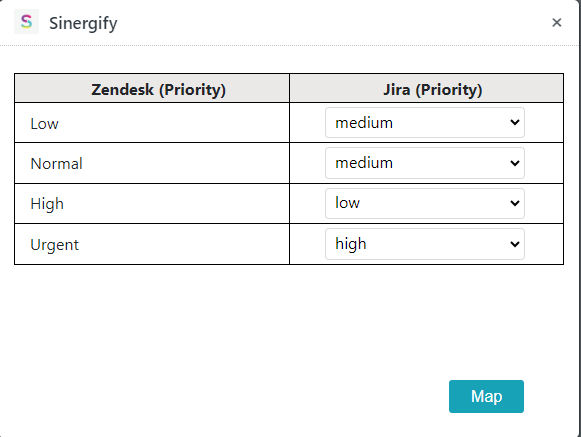
Picklist Value Mapping
You can also decide the mapping of picklist values between Zendesk and Jira, which is applicable only for picklist-type fields. To do this, select the Data Mapping icon next to the delete button.
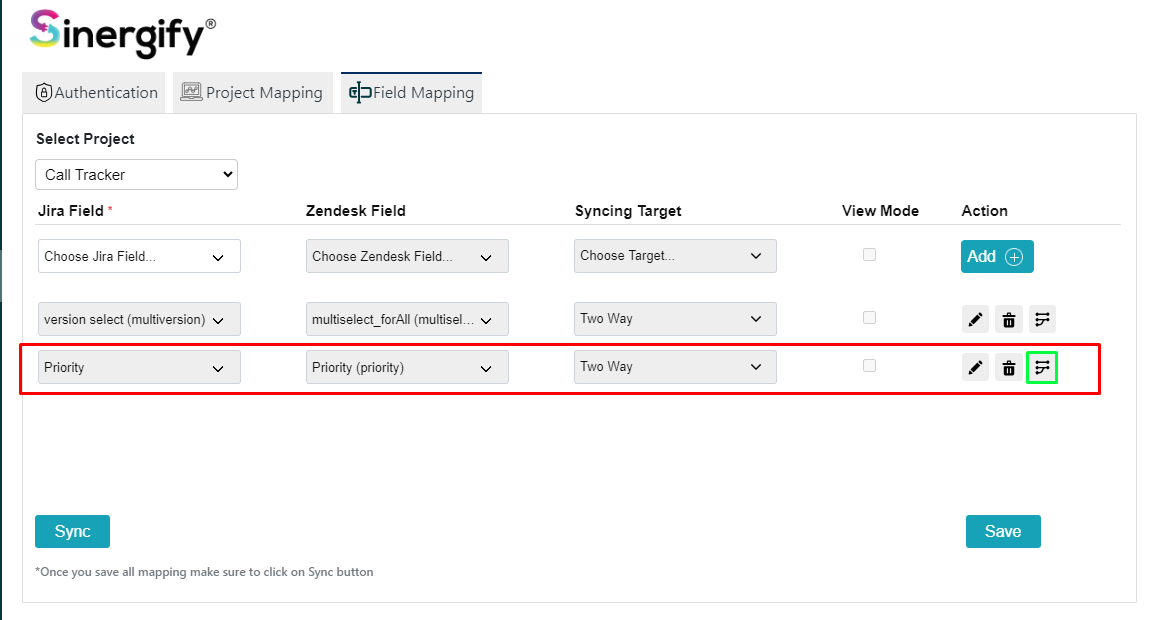
Select the Zendesk picklist value that should map with the Jira picklist value as per business requirements. Select Map once the mapping is done. See the reference screenshot below.
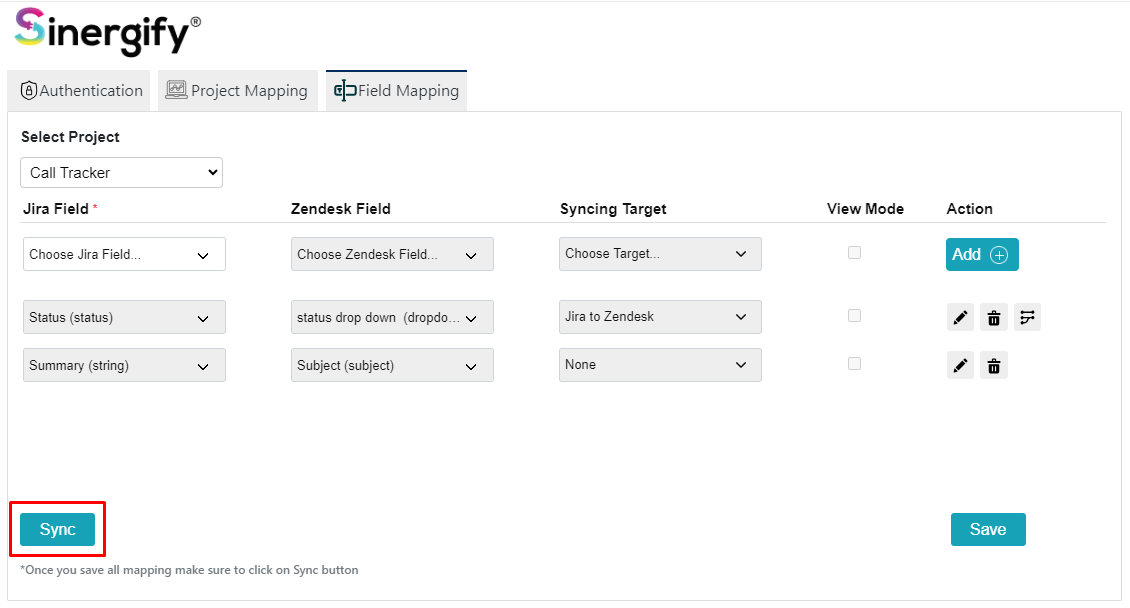
Sync
It is mandatory to click the Sync button after making the changes. Once done select ‘Save’.
View Mode
Whenever the user clicks on the view mode checkbox then the mapped Jira field will not be included on the Create Jira form, this field will be used on the detail screen to see the details.
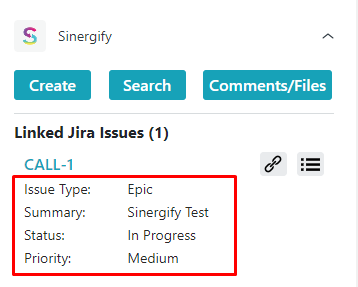
Only the fields with the view mode checkbox true will be shown on the Jira issue detail screen. There are four types of fields that are shown by default on the Linked Jira issue detail page. Below are the names of the fields that are stored by default.
-
Issue Type
-
Summary
-
Status
-
Priority
Below is an example of the fields in Zendesk tickets.
In the field mapping section, you can add more relevant fields and check the view mode checkbox as per requirements. This can help to see more details about the Jira issue while not necessarily putting it on the Create Jira screen for Zendesk users. See the screenshot below.
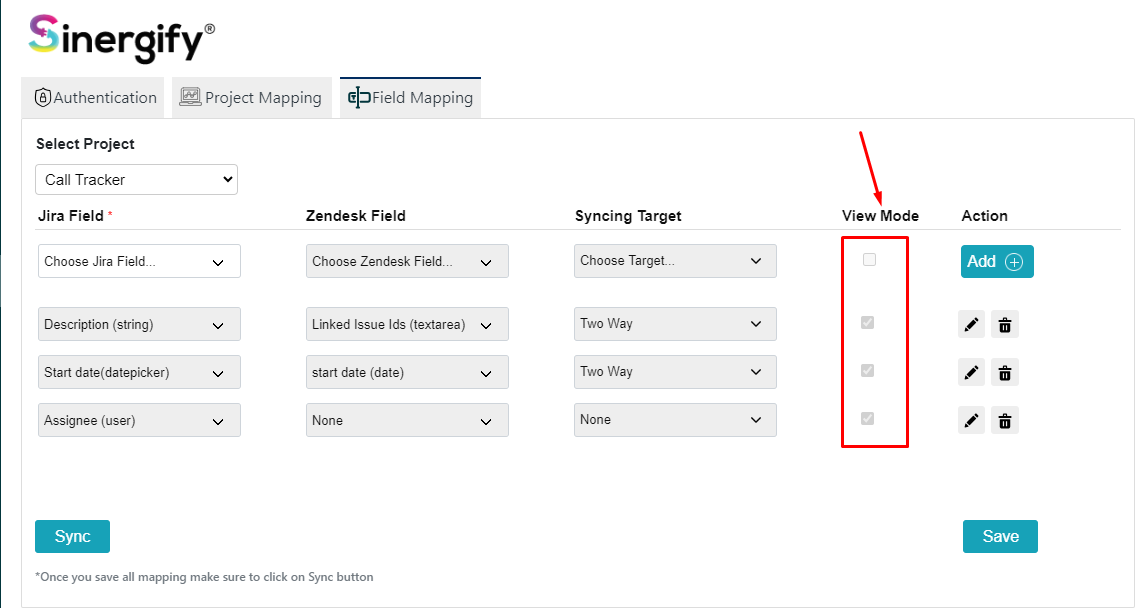
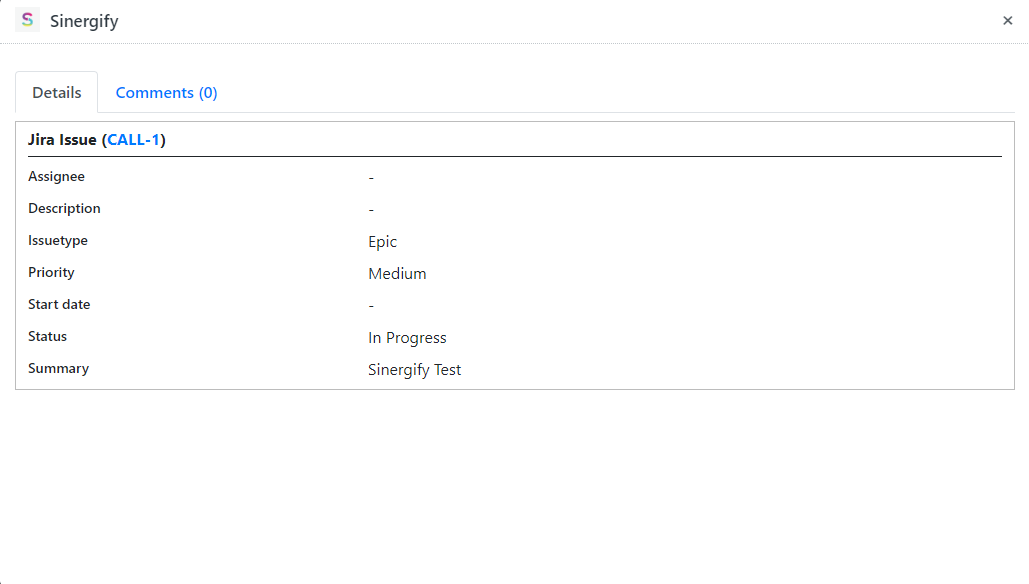
Once you click on save, these fields will also be available on the Jira issue detail page.
To view these details, click on the detail icon as shown below.
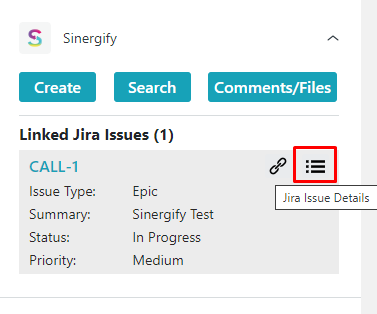
The following page will appear to see the Jira issue details.
Points to Remember
Display fields on the Create Screen: When setting up field mapping to display fields on the Create screen, consider the following scenarios:
|
Scenarios |
Jira Fields |
Zendesk fields |
Syncing target |
View Mode |
|---|---|---|---|---|
|
When you want to prepopulate the Zendesk field information on the Create Screen |
*Choose field |
*Choose field
|
Any target |
Unchecked |
|
When you don't want to prepopulate the Zendesk field information on the Create Jira screen. |
*Choose field |
Empty |
None |
Unchecked |
|
When you want to show fields on the Create Screen and do not perform any Auto syncing. |
*Choose field |
*Choose field |
None |
Unchecked |
Handle the fields on the Jira issue Detail screen: When setting up field mapping to display fields on the detail screen, consider the following scenarios, fields marked with * is the required action.
|
Scenarios |
Jira Fields |
Zendesk fields |
Syncing target |
View Mode |
|---|---|---|---|---|
|
When you want to display fields on the Jira issue detail Screen. |
*Choose field |
Optional |
Optional |
Optional |
|
When you want to display the fields on the Jira issue detail Screen hide it from the Create Screen. |
*Choose field |
Optional |
Optional |
*Checked |
Auto-syncing of the fields: When setting up field mapping for auto-syncing, consider the following scenarios:
|
Scenario |
Jira Fields |
Zendesk fields |
Syncing target (Choose Any) |
View Mode |
|---|---|---|---|---|
|
When you want to Autosync fields but do not want to display on the Create Jira Screen |
*Choose field |
*Choose field |
Zendesk to Jira Jira to Zendesk Two-way |
Checked |
|
When you want to Autosync fields and also want that field to be visible on the Create Jira Screen |
*Choose field |
*Choose field |
Zendesk to Jira Jira to Zendesk Two-way |
Unchecked |
Installation (Jira)
Log in to your Jira Instance as an Admin.
Select Apps, and under the drop-down menu, select Find new apps.
Enter the Sinergify (Zendesk-Jira)Connector in the Search for Apps input box and press Enter. Select Get App, and the application will be installed in the background. Follow the below steps once the app is installed.
Authentication (Jira)
-
In the Apps drop-down, select Manage your apps.
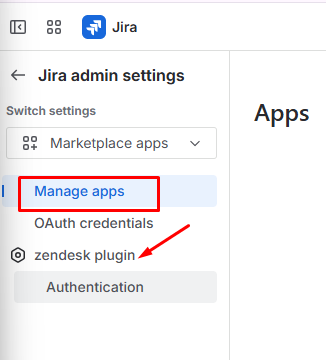
-
In the left panel, navigate to Zendesk Plugin → Authentication.
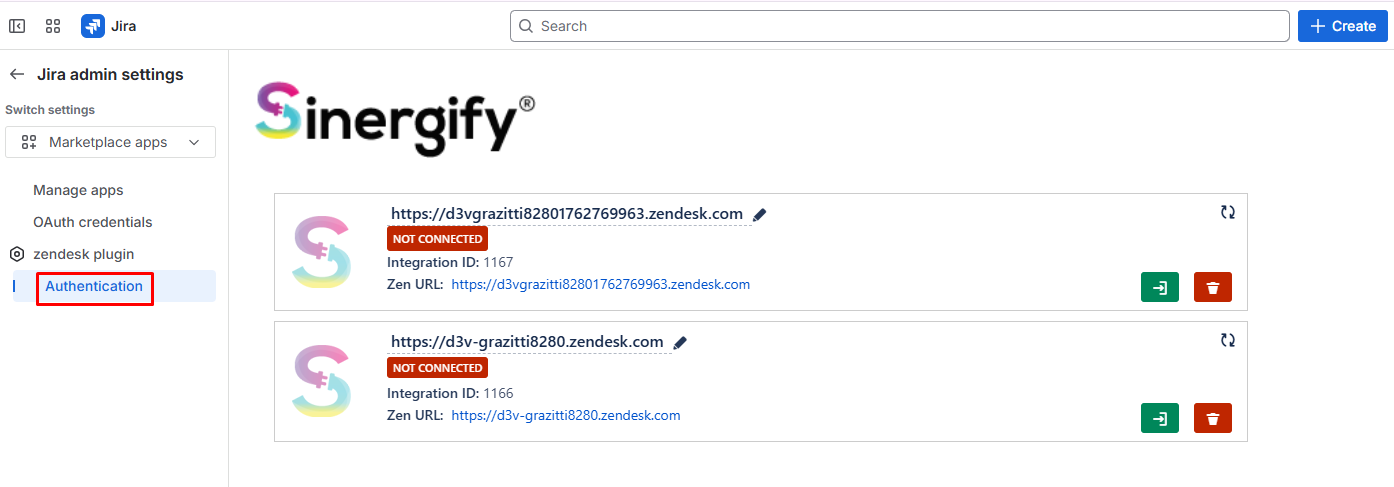
-
A new authentication tile will appear, displaying the Zendesk instance details.
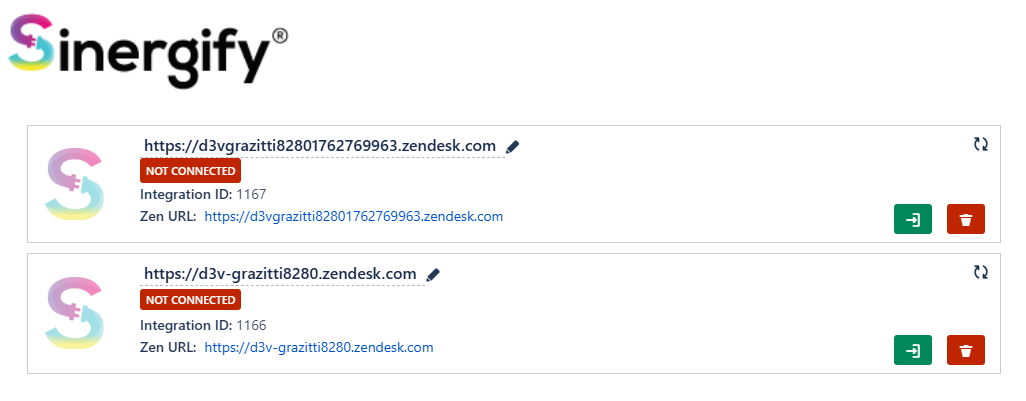
Note: By default, you can connect only one Zendesk instance. To link additional Zendesk instances, please contact [email protected].
-
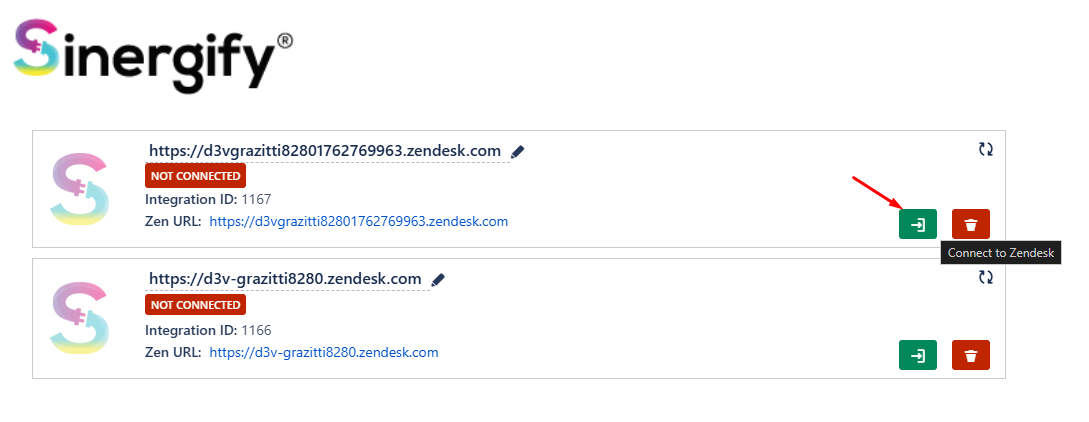
Click the green Connect to Zendesk icon to authorize your Jira instance using your Zendesk account.
-
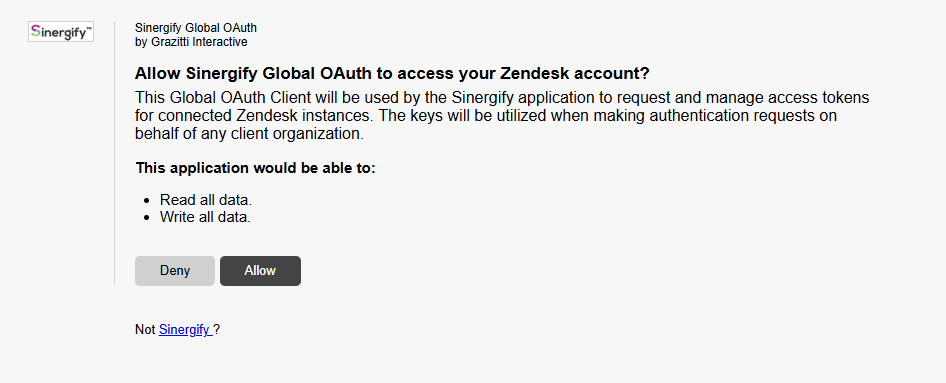
This will open a new window for authorization. Click ‘Allow’ to allow your Jira Instance to access via the logged-in Zendesk Account.
Important Notes
-
If you are already logged in to Zendesk, your account will be automatically authenticated.
-
If you are not logged in, you will be prompted to enter your Zendesk credentials.
-
Make sure pop-ups are enabled in your browser settings.
-
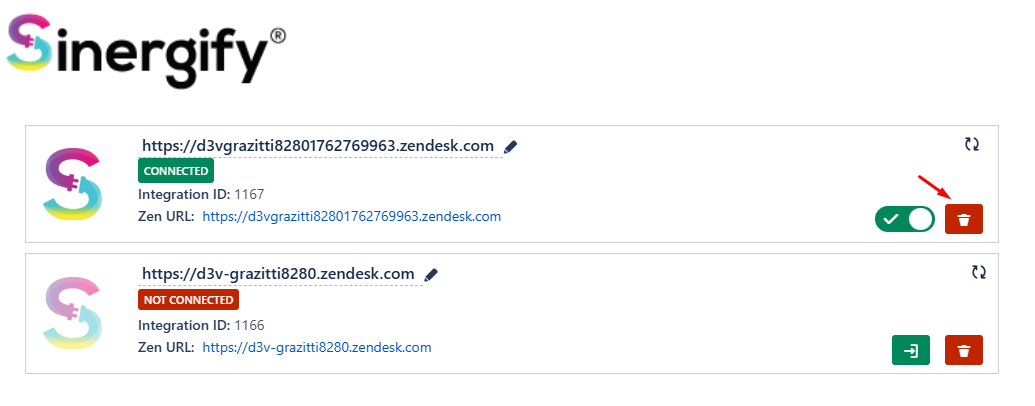
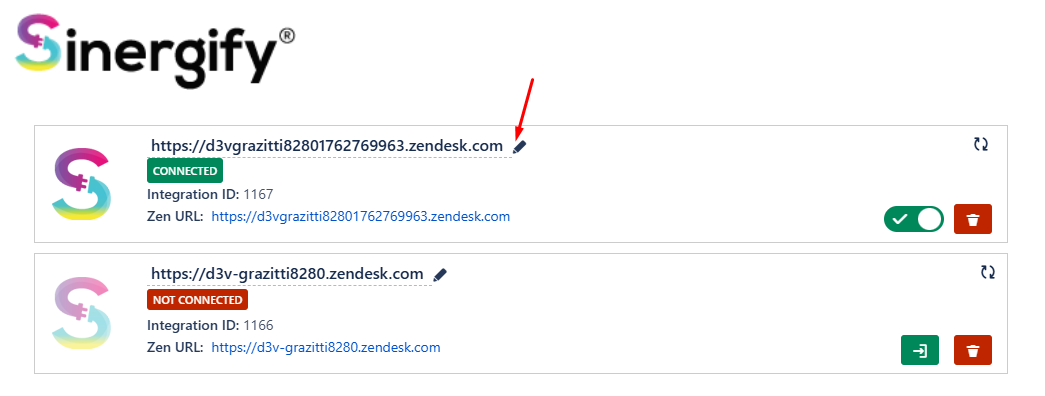
Once done, the authentication screen on Jira will now reflect the instance status as ‘Connected’.

7. To change the Zendesk instance URL, click the Edit icon.
8. To switch the integration user, click the highlighted button. You will be redirected to enter the new integration user credentials and complete the authorization process.
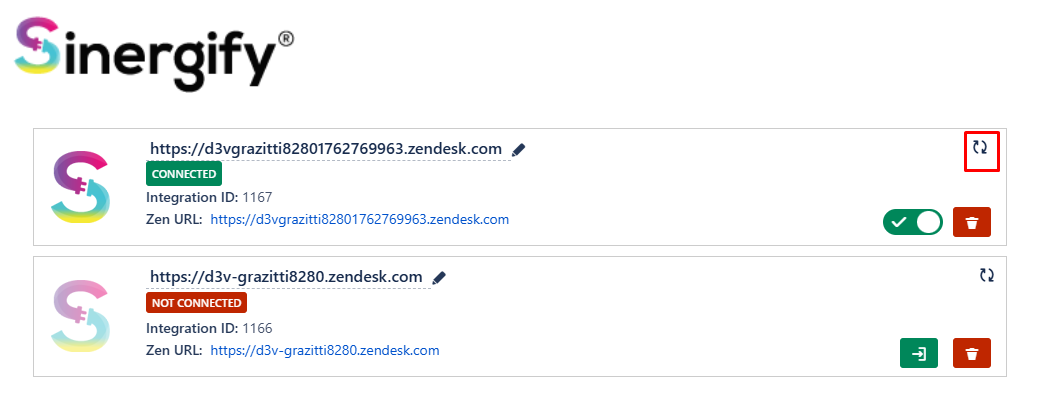
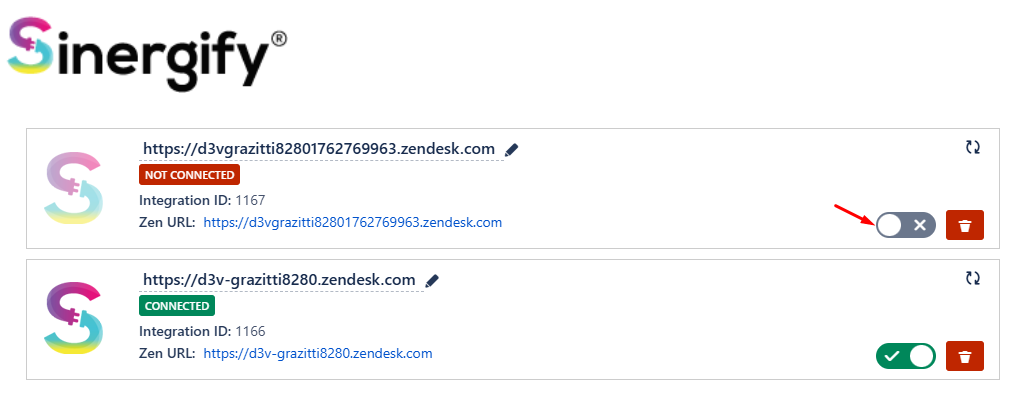
9. Disable Plugin: Clicking this will deactivate the instance. The status will change to Not Connected, and no updates will be sent from Jira to Zendesk.
10. Delete: Clicking this will permanently remove the instance. All configurations linked to this instance will be deleted from both Zendesk and Jira.