Feedback
Multiple Jira Instance Linking


This feature enables users to link multiple Jira instances with their Salesforce Org. The authentication and configuration of the different instances can be controlled from Admin Settings in Sinergify.
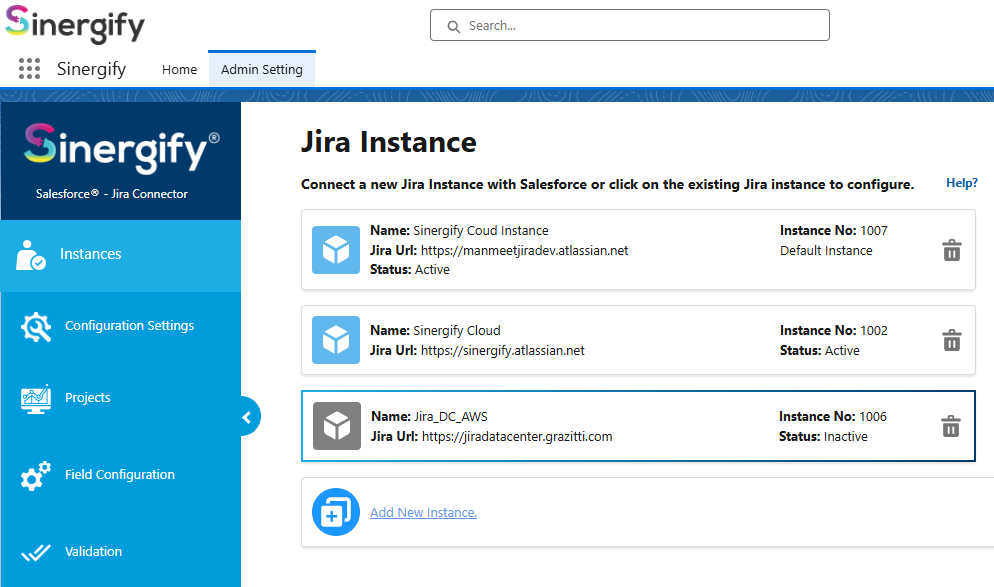
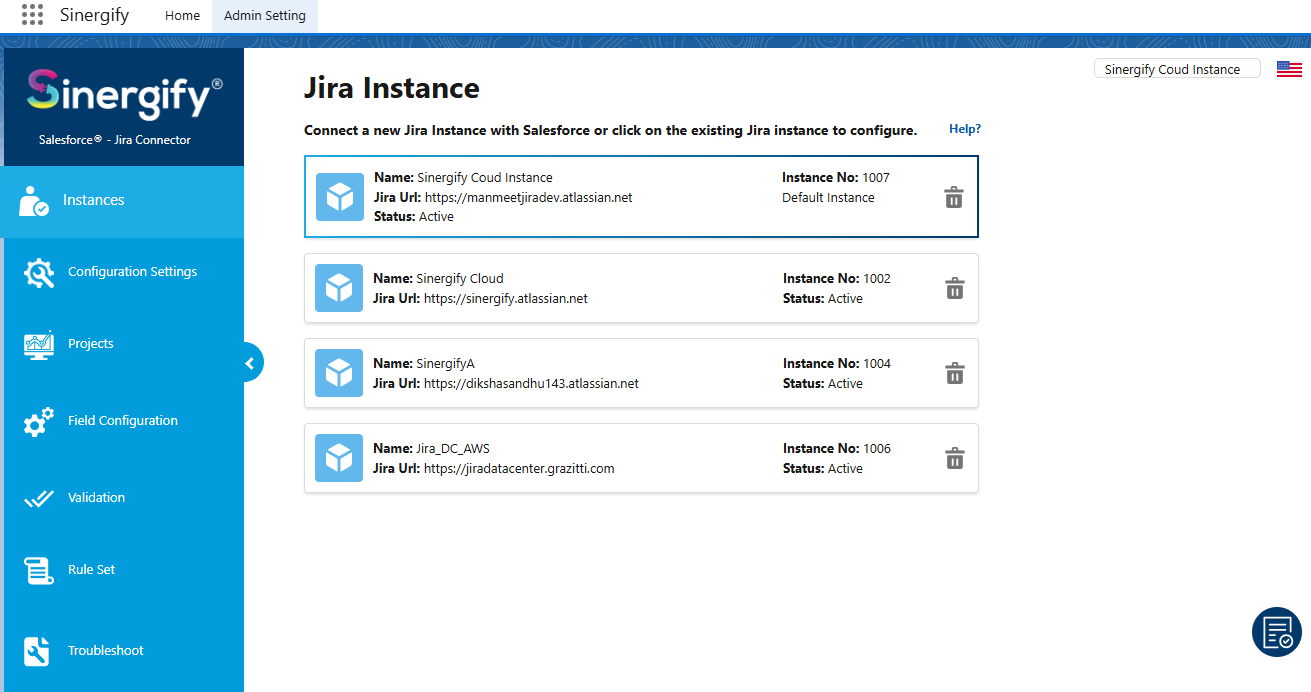
Accessing Jira Instances
The Instances screen is accessed from Admin Settings → Instances and displays all Jira instances connected to the Salesforce org. From this screen, admins can add new Jira instances, view existing ones, and select a specific instance to manage its authentication and configuration settings.
A new page will appear on your screen to add more Jira instances.

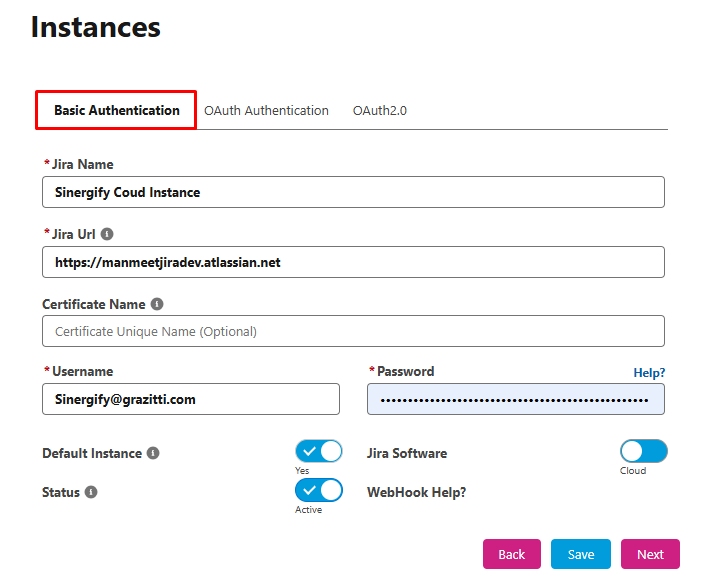
Authentication Methods
You can configure a Jira instance using either of the following authentication methods:
-
Basic Authentication
-
OAuth 2.0 Authentication
Basic Authentication Setup
Use Jira credentials to authenticate and connect the instance.
OAuth 2.0 Authentication Setup
Authenticate securely using OAuth 2.0 based authentication.
Once authentication is completed, save your changes and click Next to proceed to the Configuration Settings page.
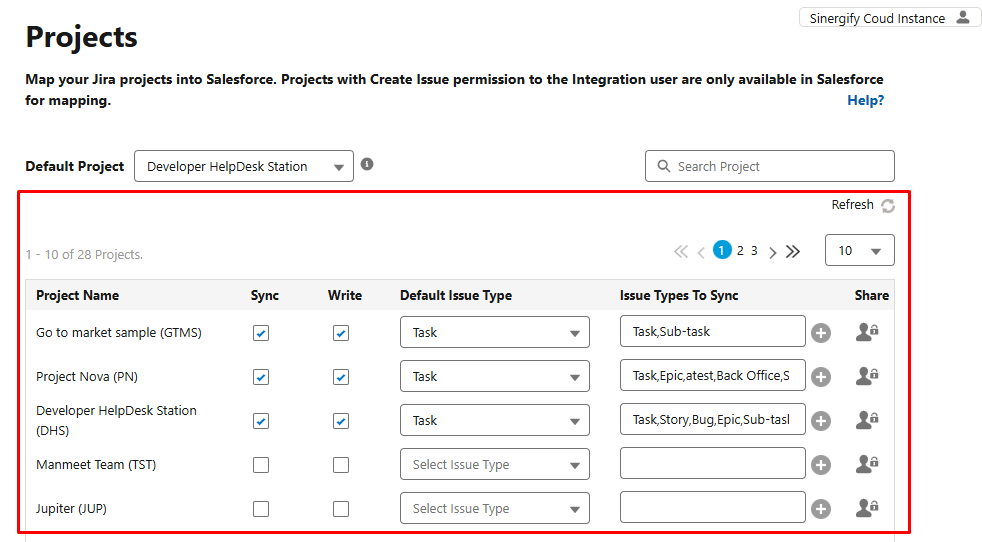
Projects Screen
The Projects screen lists all Jira projects available in the selected Jira instance. From here, admins can enable or disable synchronization for individual projects, define a default Jira project and issue type, select which issue types should sync, and configure project-level write permissions.
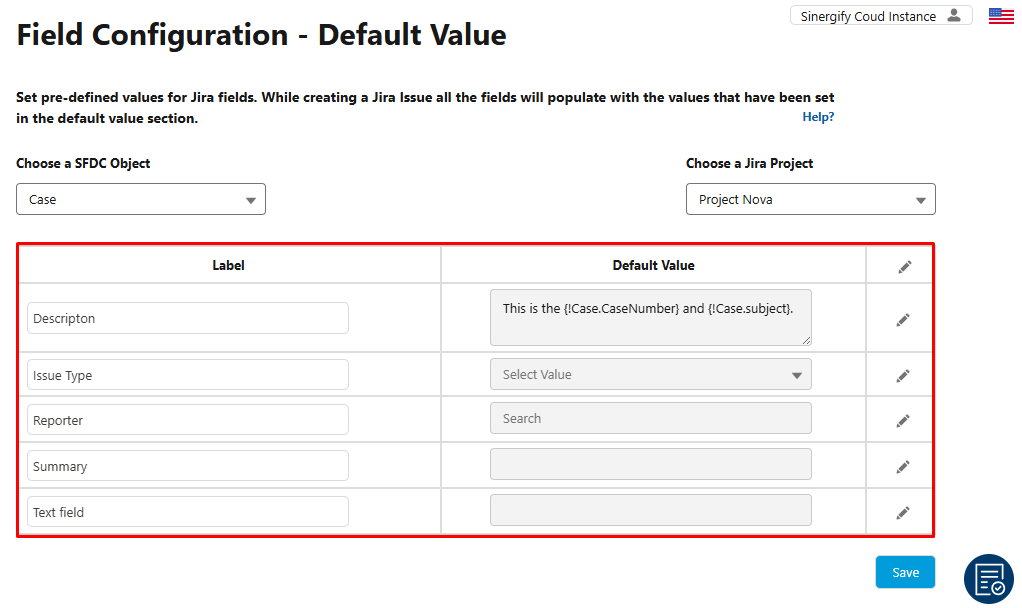
Field Configuration Screen
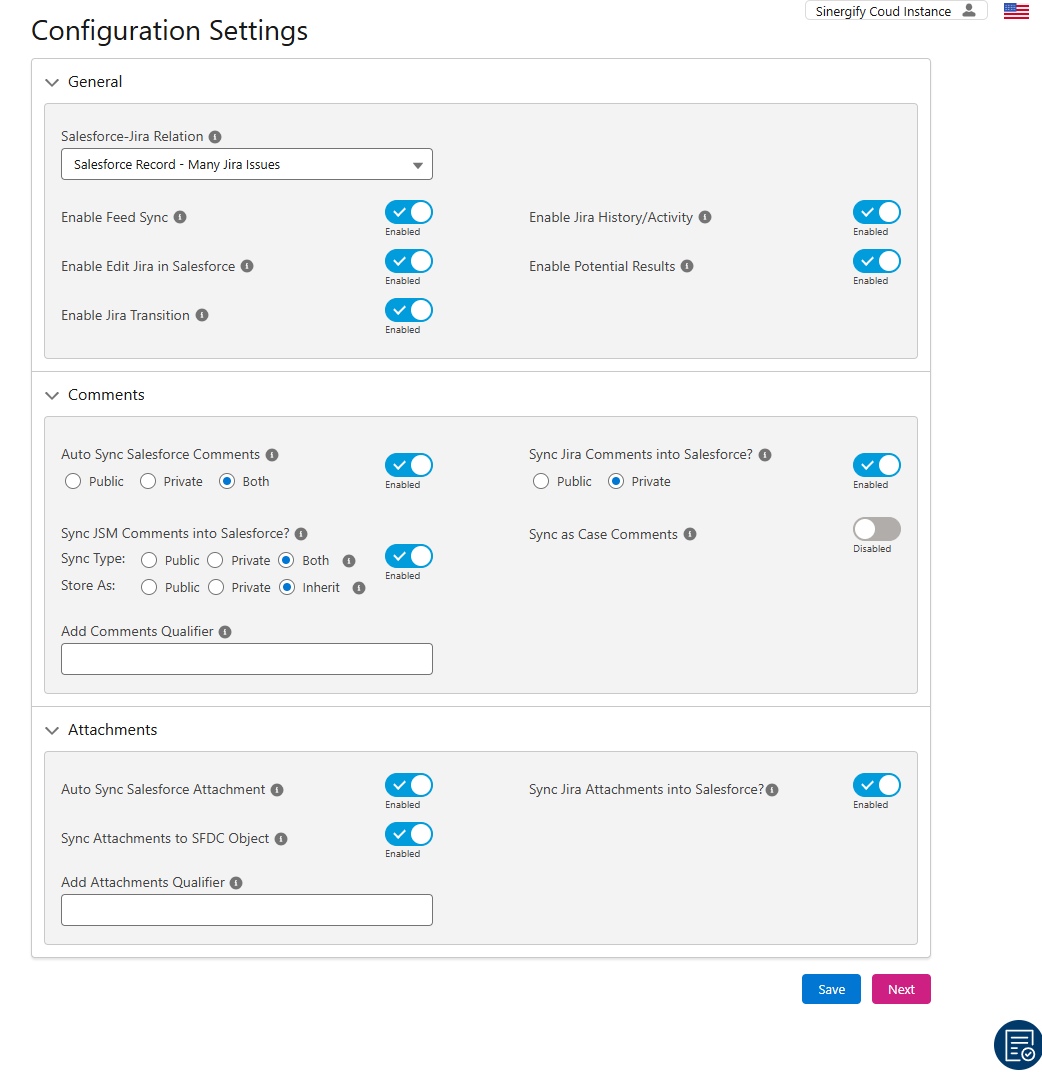
The Field Configuration screen is used to map Salesforce objects and fields with Jira projects and fields. Admins can select the Salesforce object to sync, choose a Jira project, and configure field-level mappings. Additional options such as global mappings, default field values, reporting enablement, and sync configurations are also managed from this screen.
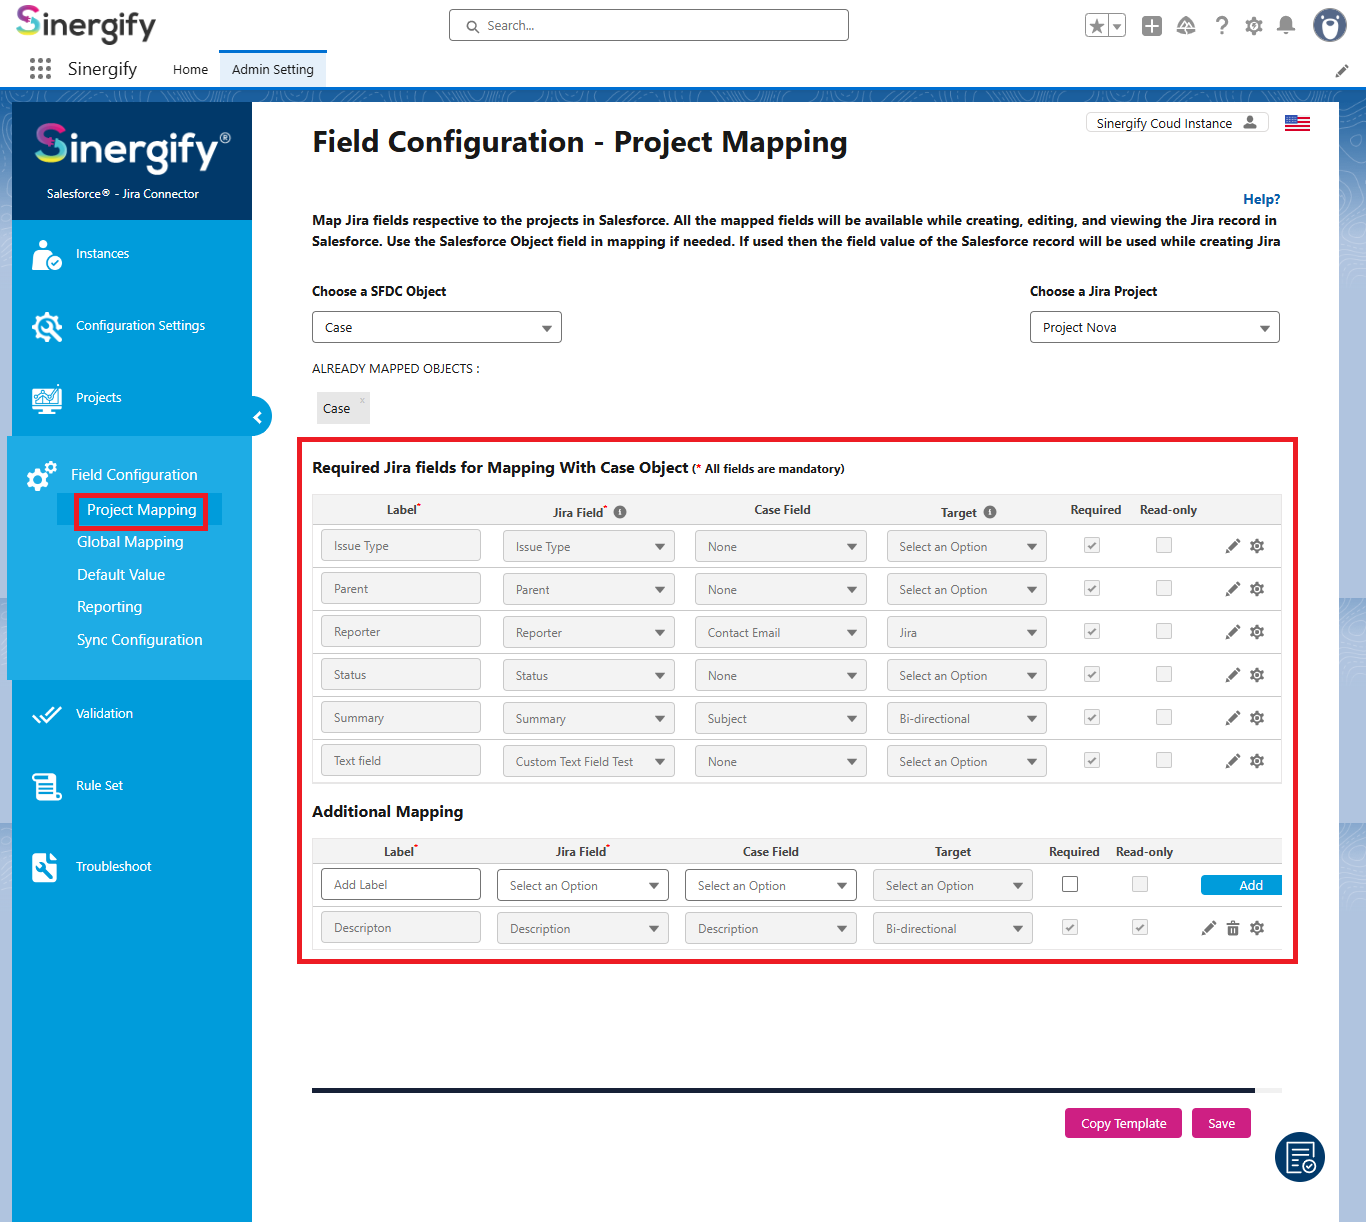
Other settings like configuring Global Mapping, setting up Default Value for the fields, enabling Reporting for the fields, and setting up Sync Configurations can be done from here.
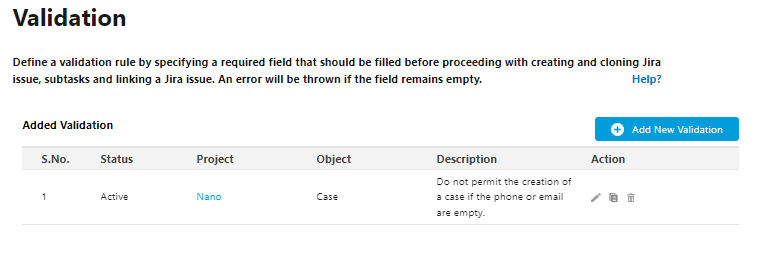
Validation Screen
The Validation screen allows admins to define rules that control when Jira issues can be created from Salesforce. Validations can be applied to a single Jira project or across all projects for a selected Salesforce object. If a validation condition evaluates to true, Jira issue creation is restricted.
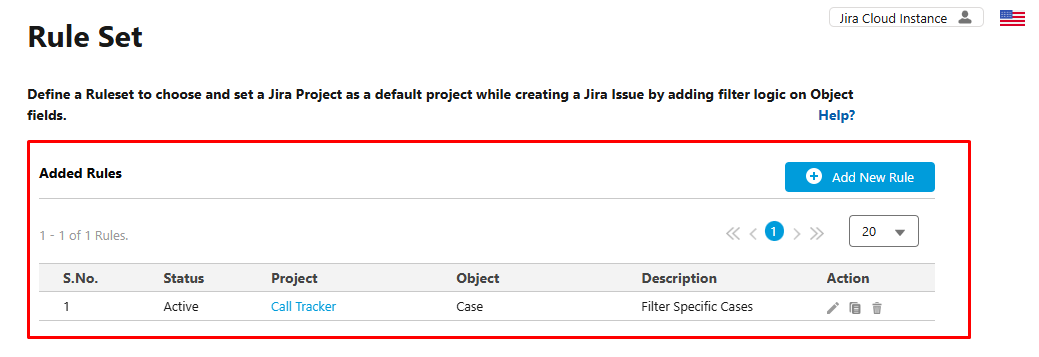
Rule Set Screen
The Rule Set screen is used to define conditional logic for routing Jira issues to the appropriate Jira projects. These rules help automate project selection based on Salesforce data, ensuring issues are created under the correct Jira project.
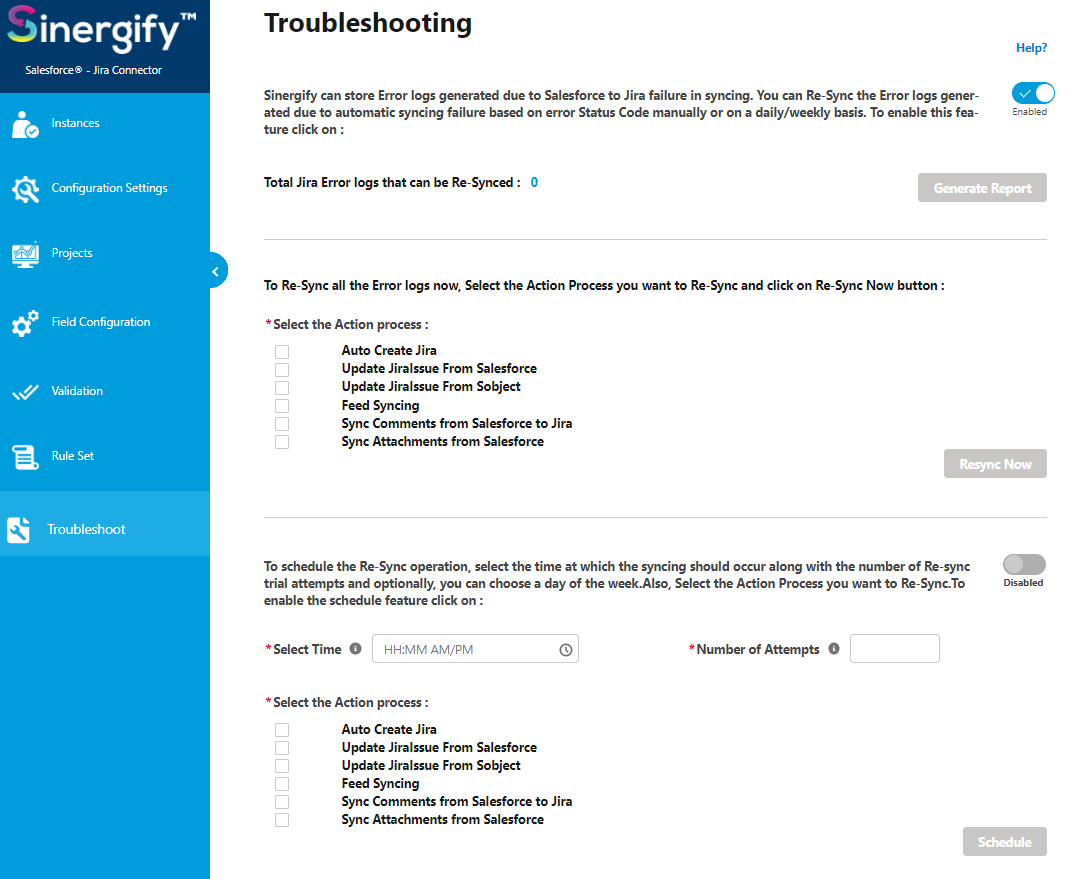
Troubleshooting Screen
The Troubleshooting screen is used to reinitiate synchronization for asynchronous failures caused by system or data issues. This screen helps admins recover failed sync records without requiring manual reprocessing.
In case you have multiple Jira instances configured, you can click on the instance on which you want to make the changes.
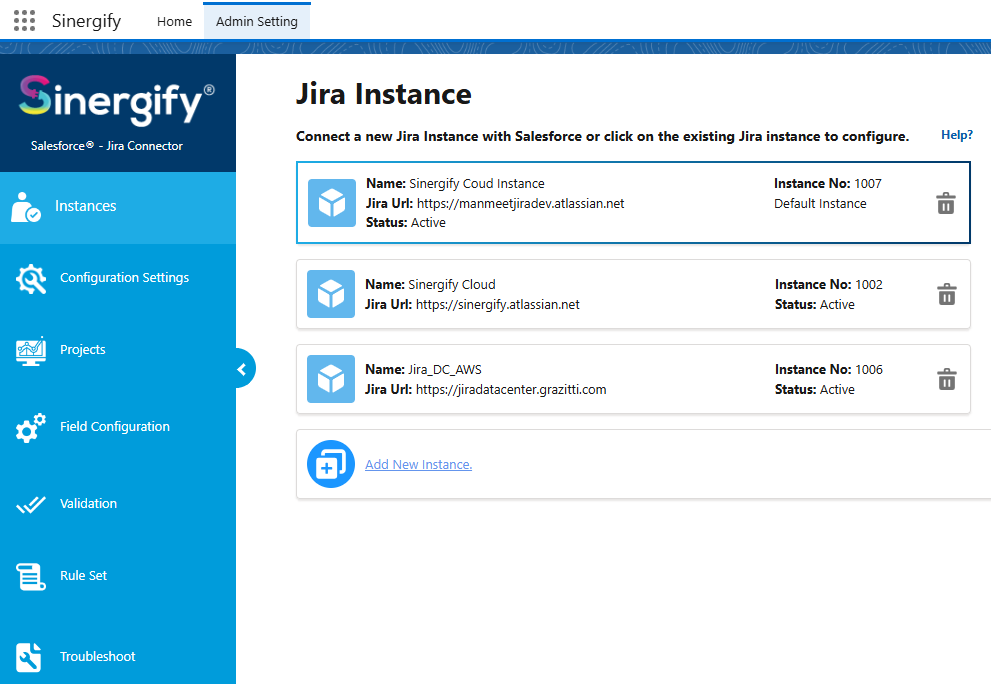
You can do the following:
-
Default Instance: Choose a default Jira instance out of all. (Yes/No)
-
Status: Activate or Deactivate an instance temporarily without having to delete and reconfigure it from scratch.
Note: The instances marked in blue indicate that those are active and ready to use. And if marked in grey, that means the instance is not properly configured.