
 Feedback
Auto Launch Jira Creation Process
Published Date: 09-07-2026
Read Time:
Jira issues can be created automatically with the help of Process builder or Apex code/Triggers/quick action button.
We use the ‘Jira Field - Salesforce Field mapping’ and ‘Default values’—configured in Admin Settings (Field Configuration)—for auto-creation of Jira issues. The process picks the field values in the following ways:
-
If the Jira field is mapped with the Salesforce object field, the field value of the Salesforce record is pulled.
-
If the Jira field is not mapped with the Salesforce object field but default values are provided, the process pulls the value from the given default value in the configuration.
-
If the Jira field is neither mapped with the Salesforce object field and nor has a default value, the value will be left blank. In case if any of such fields are mandatory, the process would not be able to create Jira. Therefore, make sure the accurate data is available before the Jira creation process fires.
Autolaunching Jira creation process using Flow builder:
-
Log in to your Salesforce Org as an Admin.
-
From Setup, enter “Flows” into the Quick Find box, select Flows, and then click New Flow.
-
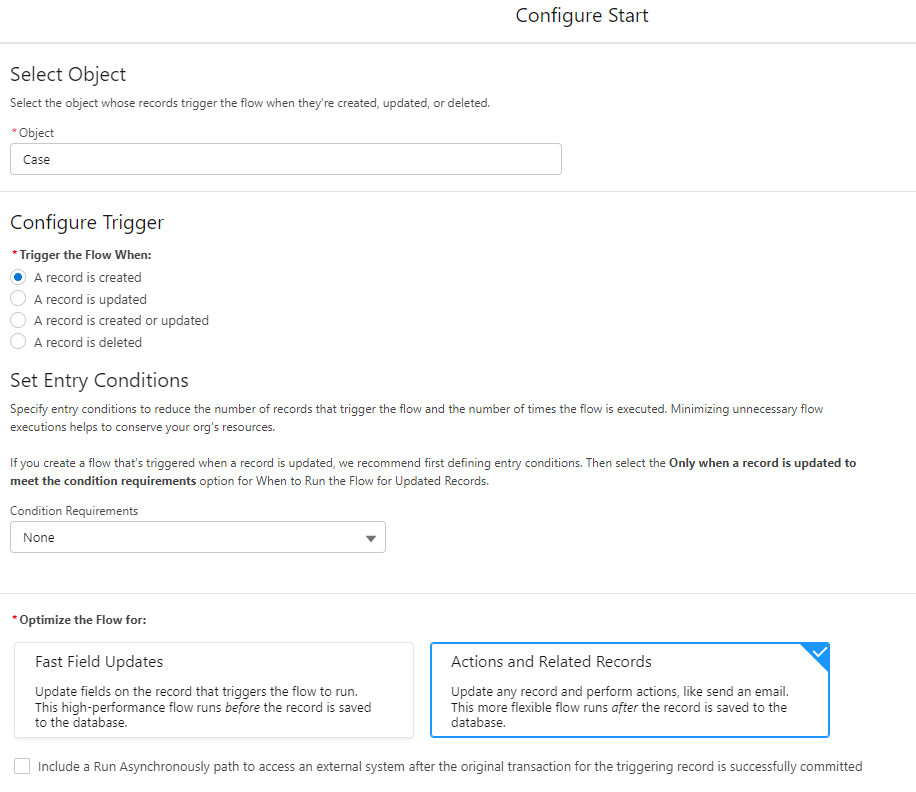
Select “Record Triggered Flow” from the available options.
-
Under select “Object” whose records trigger the flow when they’re created, updated, or deleted.
-
Under Configure the flow select “A record is created”, Leave Set Entry conditions as “None”.
-
Under option Optimize the flow select “Action and Related Records”.

-
Click “Done”.
-
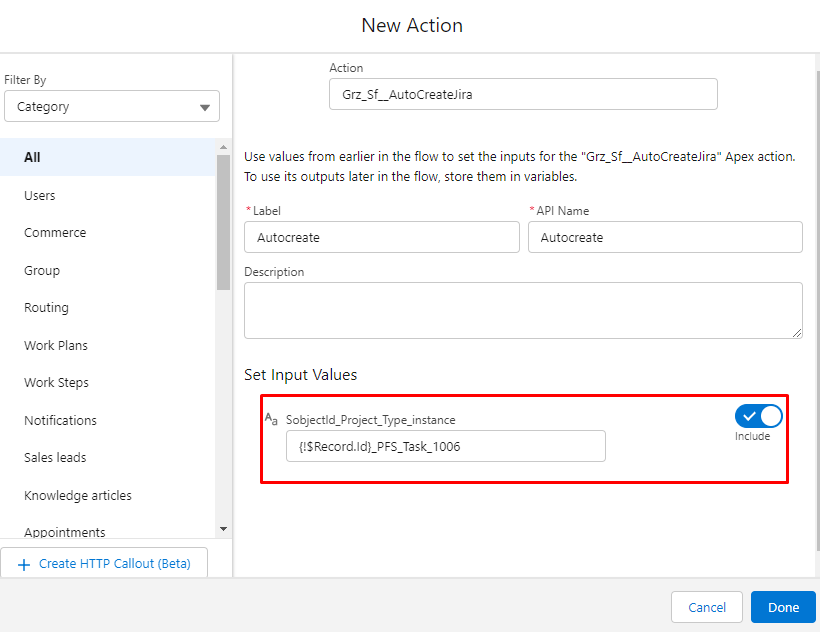
Click (+) Icon to add the “Action”.
-
Search for “Grz_Sf__AutoCreateJira”.
-
Fill the “label” and “Set input values” and Click “Done”.

-
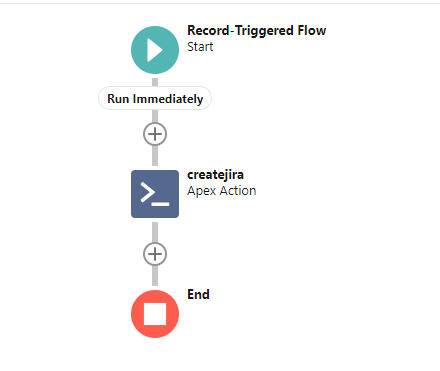
The final flow will look like the below screenshot:

Automatic Jira issue creation using Button
-
Navigate to Setup.
-
Log into your Salesforce instance.
-
Click on the gear icon at the top right corner.
-
Select Setup from the dropdown menu.
-
Open Object Manager.
-
In the Setup menu, find and click on ‘Object Manager’.
-
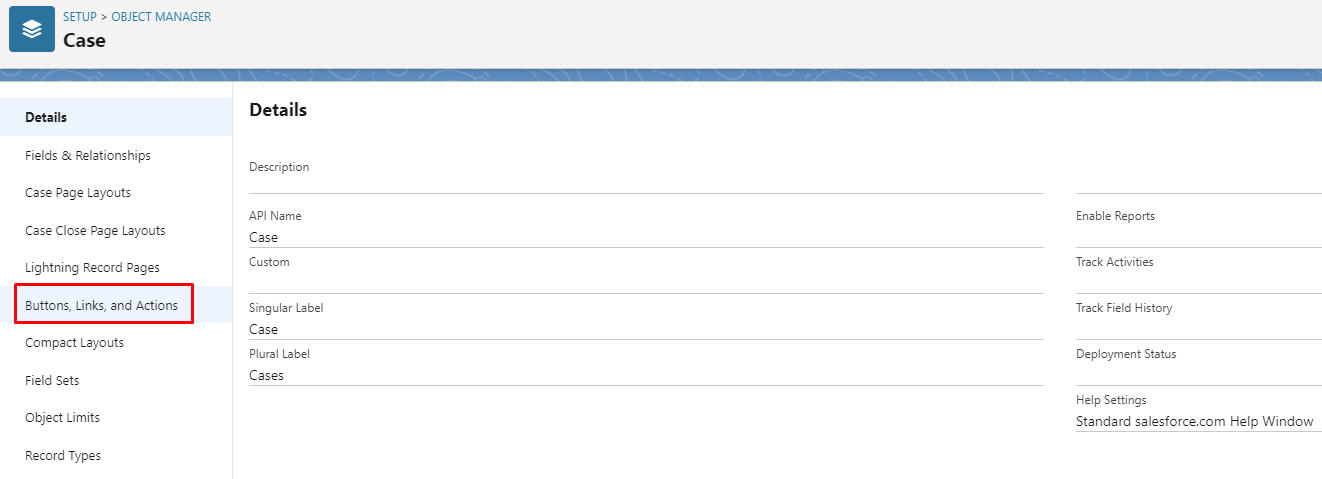
Choose the object for which you want to create the button. E.g. Case, Opportunity, etc.
-
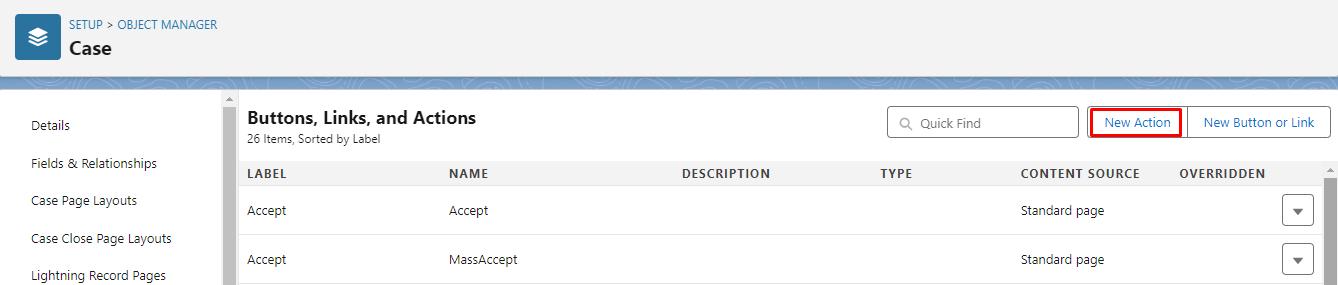
From the object’s detail page, go to the left-hand panel and click on ‘Buttons, Links, and Actions’.

-
Click on ‘New Action’.

-
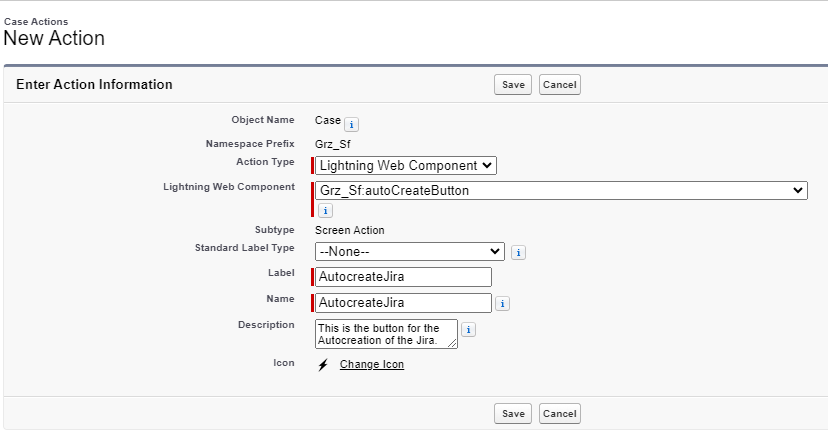
Configure the New Action:
-
Action Type: Select ‘Lightning Web Component’.
-
Lightning Web Component: Select ‘Grz_sf_autoCreateButton’.
-
Label: Enter the desired label for your quick action (e.g. ‘Autocreate Jira’).
-
Name: Enter a unique name for the action (e.g., Autocreate_Jira).
-
Description: Provide a description of what this action does (e.g. ‘Automatically creates a Jira issue’).
-
Configure any additional fields or settings as needed.

-
Click on ‘Save’ to create the new quick action.
-
Add the Quick Action to the Page Layout.
-
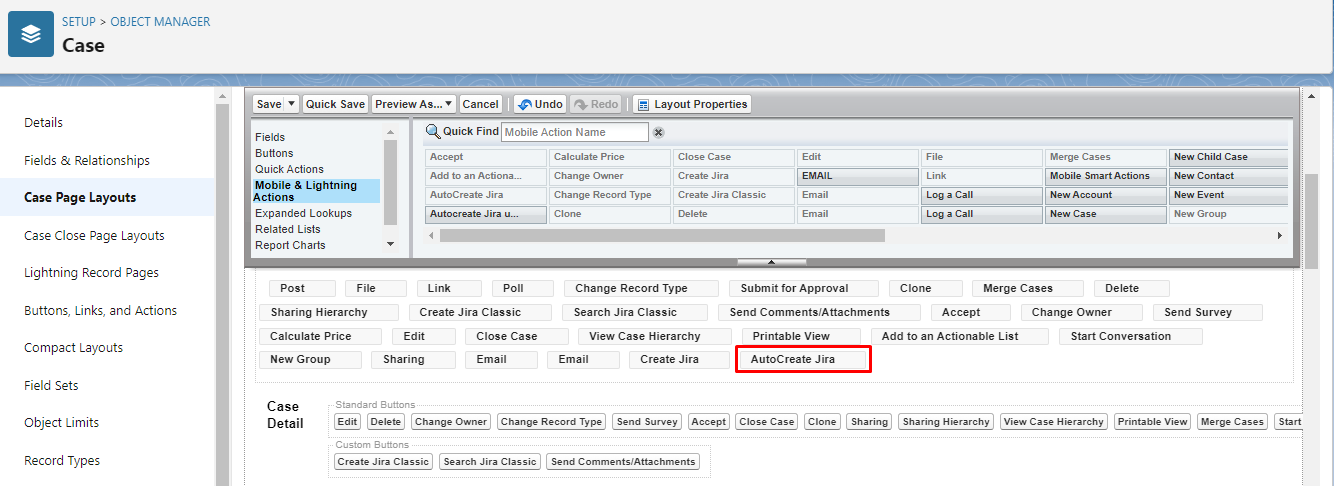
Navigate to the ‘Page Layouts’ section for the chosen object.
-
Select the page layout where you want to add the quick action.
-
Drag the newly created quick action from the ‘Mobile & Lightning Actions’ section to the ‘Salesforce Mobile and Lightning Experience Actions’ section on the page layout.

-
Save the page layout changes.
-
Go to the Case object, click on Edit Page, add the new action button in the Case Record page, and then click Save.
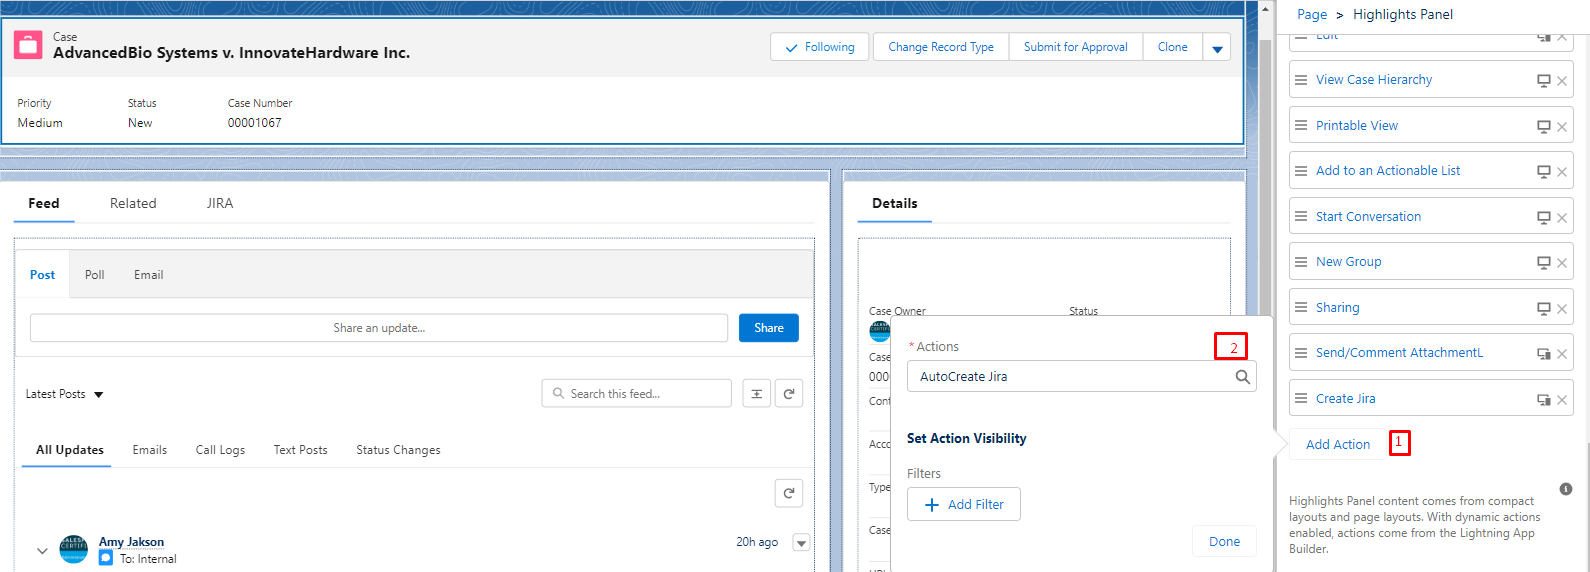

This is how it will look like on the Case record page.

Automatic Jira issue creation using apex class/trigger
In your apex class/trigger, use the Sinergify method to create Jira automatically. We have to pass specific parameters in the following method in order to create Jira successfully.
Find the details below:
// Method Name
Grz_Sf.AutoCreateJira.AutoCreateJira(List<String> SobjectDetail);
‘SobjectDetail’ will be the list of strings. Each element of the string should be in the following structure:
List<SobjectId_Project_Type_instance>
See the reference details below where.
-
‘SobjectId’ refers to the record Id through which a Jira issue should be created and linked.
-
‘Project’ refers to the key of the project for which a Jira issue needs to be created.
-
‘Type’ refers to the issue type.
-
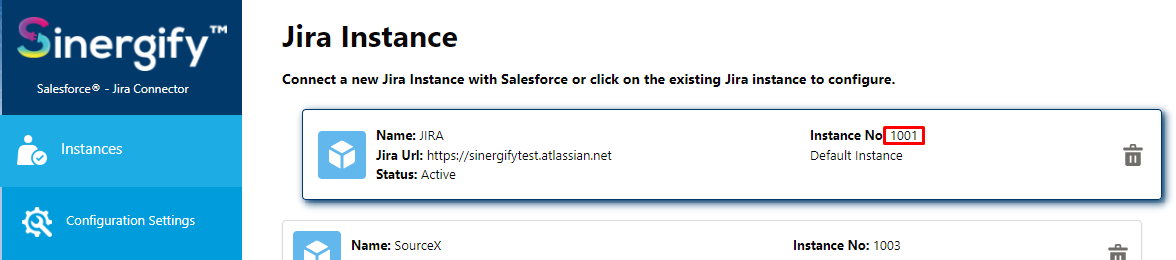
‘instance’ refers to the instance number. It can be obtained from the Admin Settings of Sinergify Application. See the below image for reference.

Refer to the below-given examples:
List<String> SobjectDetail =new List<String>();
SobjectDetail.add(‘500003132100001_GC_Bug_1001’);
SobjectDetail.add(‘500003132100002_GC_Bug_1001’);
SobjectDetail.add(‘500003132100003_GC_Task_1001’);
SobjectDetail.add(‘500003132100004_GC_Bug_1001’);
Note: If you want to Autocreate the Jira through flow builder then follow the reference Document.


