Feedback
Send Comment & Attachment Button-Lightning
Published Date: 09-07-2026
Read Time:
Follow the below-mentioned steps for enabling manual sending of comment and attachments from the SObject.
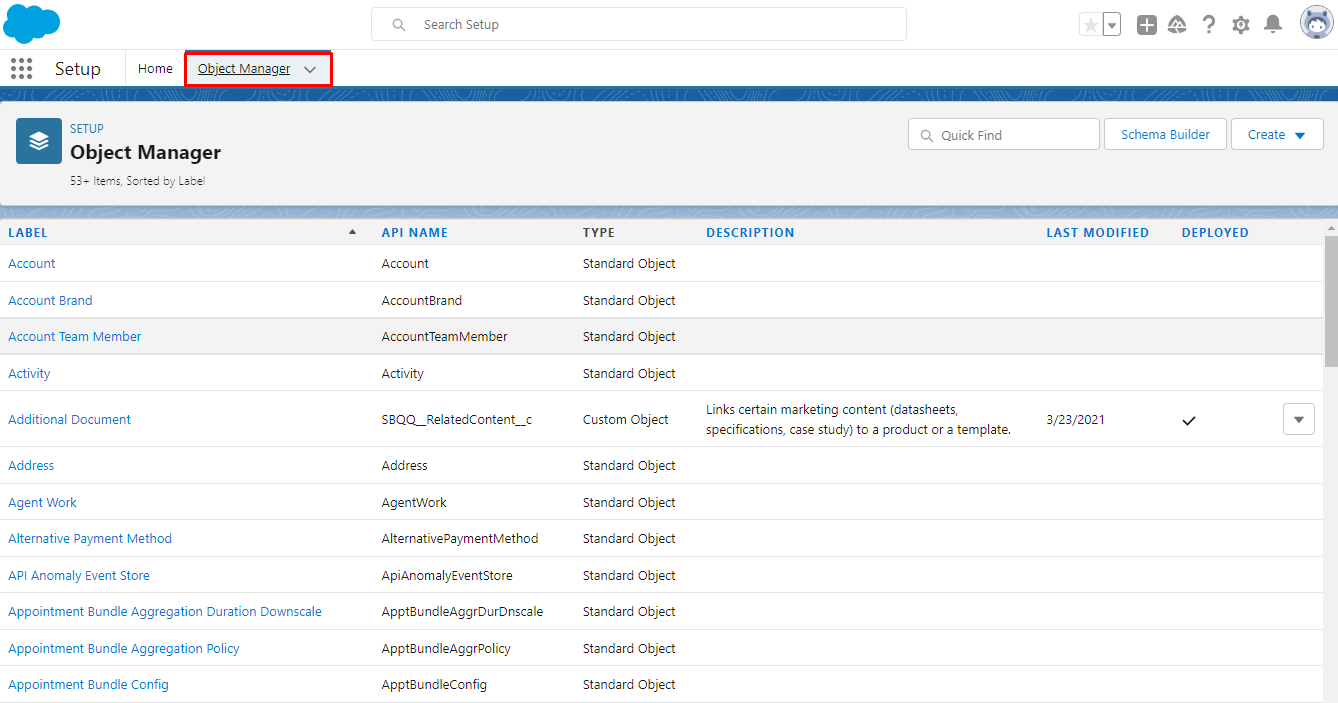
Step 1: From the Setup homepage, click Object Manager.
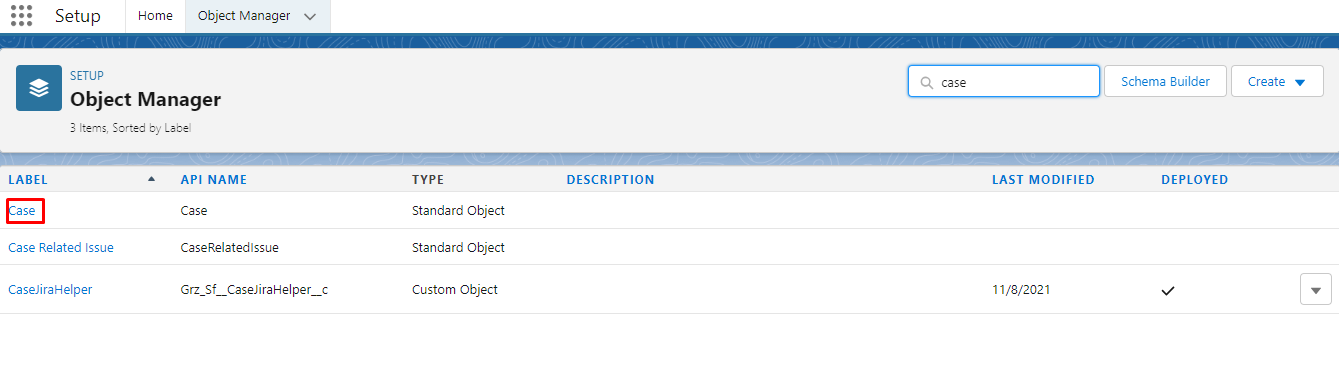
Step 2: Select and click the object for which you want to create a Send comments and attachment button. For example, here we would be creating a button for the Case object.
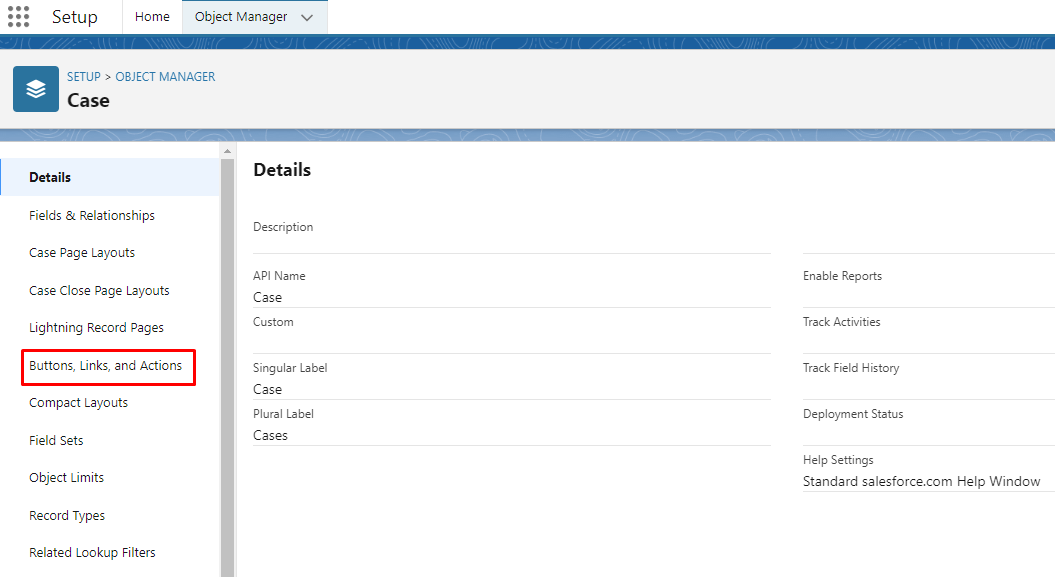
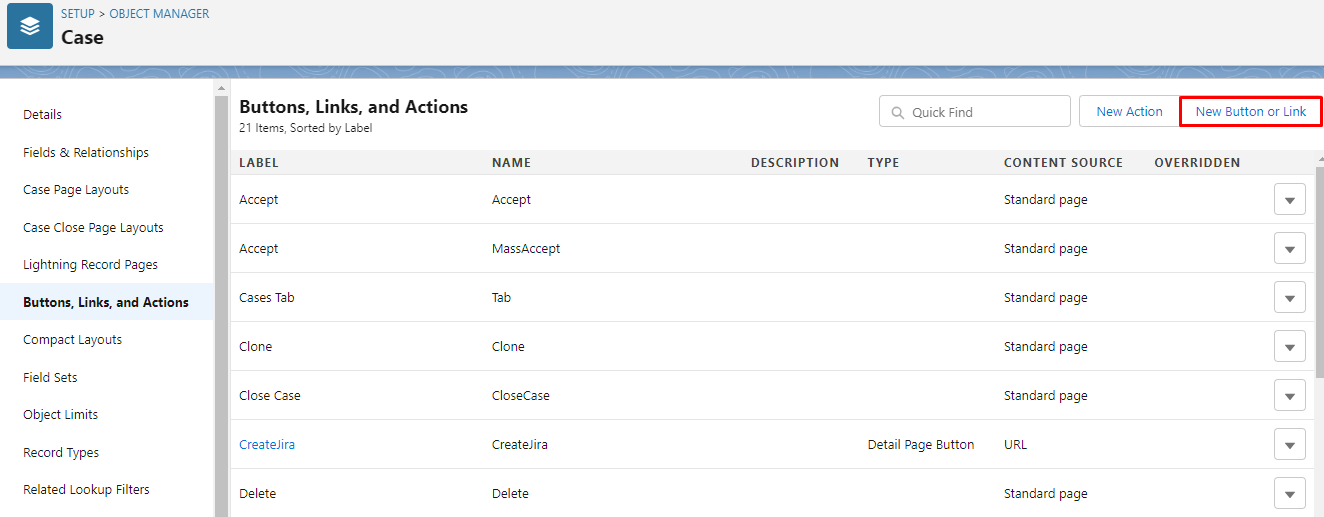
Step 3: From the list of menu sub-tab, click Buttons, Links, and Actions.
Step 4: From the extreme right on the top, click New Button or Link.
Step 5: Enter Send comments and Attachments in the Label field and the Name field will be auto-populated.
-
Select Detail Page Button for Display Type.
-
For Behavior, select Display in existing window without sidebar.
-
For Content Source, select URL from the drop-down options.
-
Enter the following code in the highlighted field as in the screenshot below.
/lightning/r/{!Case.Id}/view?Grz_Sf__ws=CommentsAndAttachments{!MILLISECOND(TIMENOW())}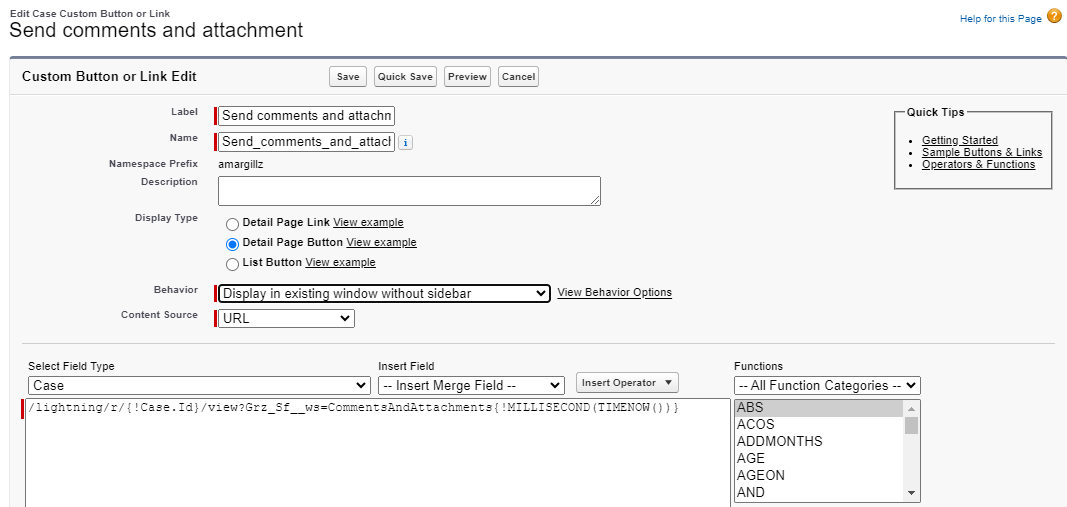
Note:
-
{!Case.Id} here would vary from object to object. Since here we are creating a button for the Cases object, we have used Case Id in the code.
-
If you are using button for the Account object then {Account.Id} will be used.
Make sure the field details look like in the above screenshot.
Step 6: Click Save.
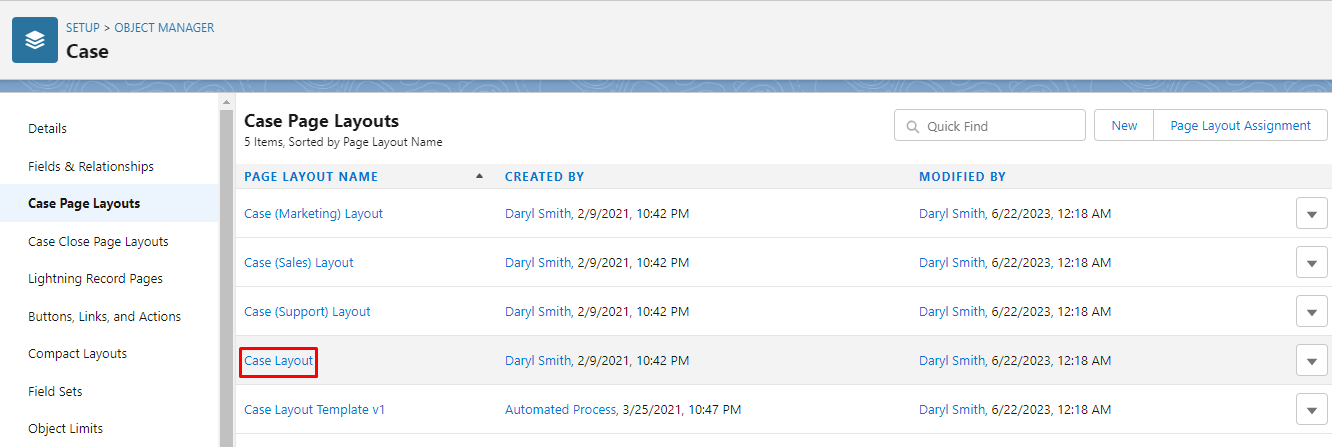
Step 7: Click Case Page Layout from the menu sub-tab.
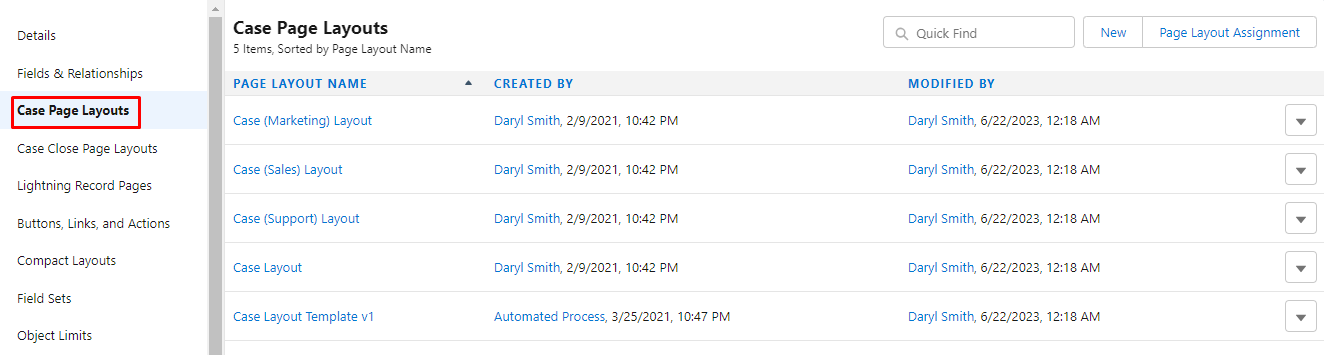
Step 8: Click Case Layout.
Step 9: Click Mobile & Lightning Actions from the Palette.
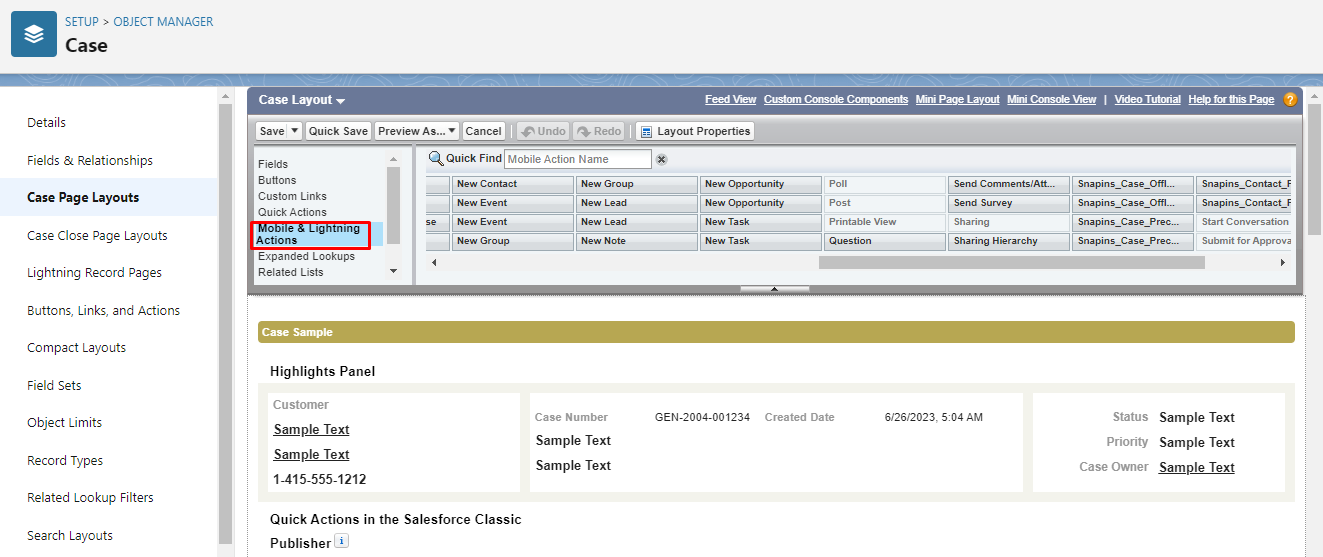
Step 10: Select Send comments and attachment to Jira and drag it to the Salesforce Mobile and Lightning Experience Actions section and drop it there.

Step 11: Click Save.
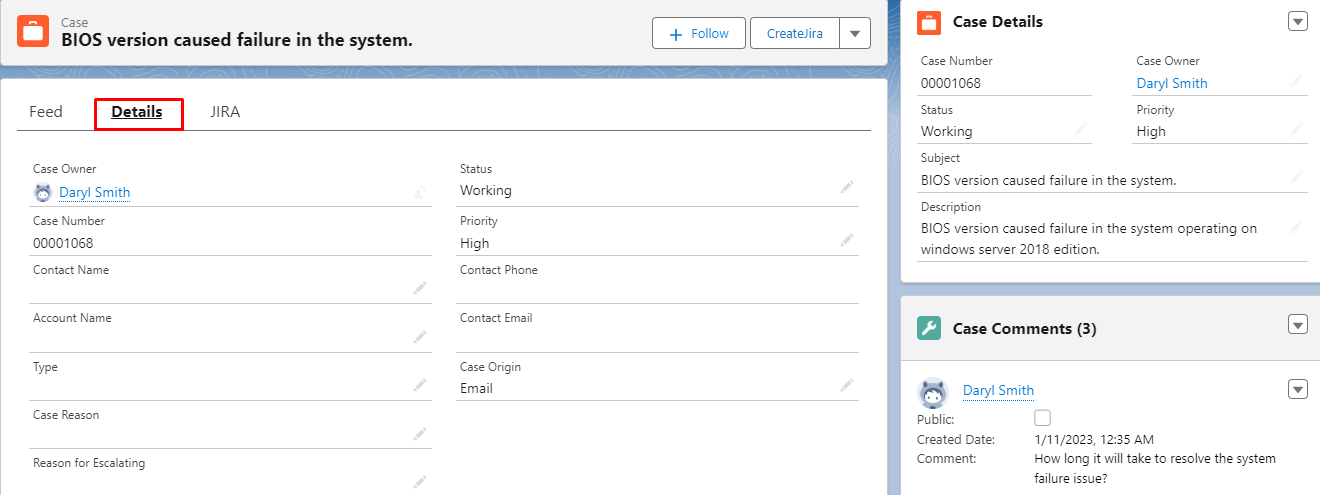
Step 12: Now, visit the Cases page and click on any case and then click on the Details tab on the case detail page.
Step 13: From the Setup tab, click Edit Page.

Step 14: Search for the "SendCommentsAttachmentsCaseToJiraLWC" in the Component List and drag to the bottom of the Details tab.

The component will be hidden until the “Send comments and attachment” button is clicked.
Step 15: Click Save and then Back.
This is how the Button will look like in the Object Detail Page.
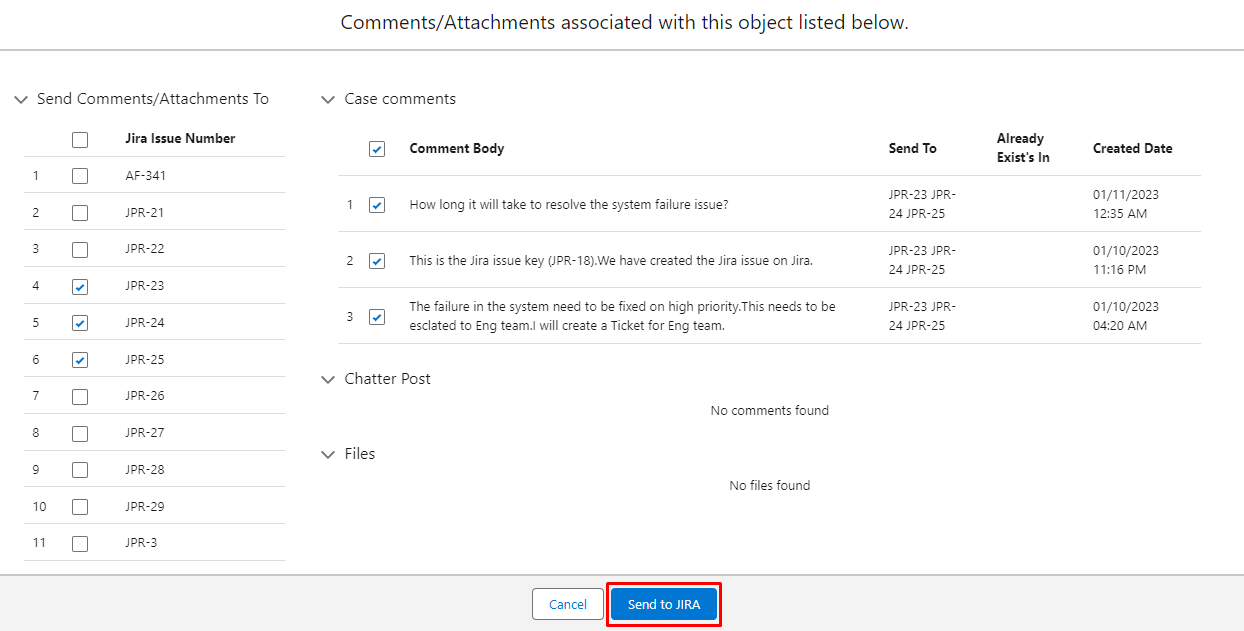
Users can send comments and attachments by clicking on the button “Send Comments and Attachments“.
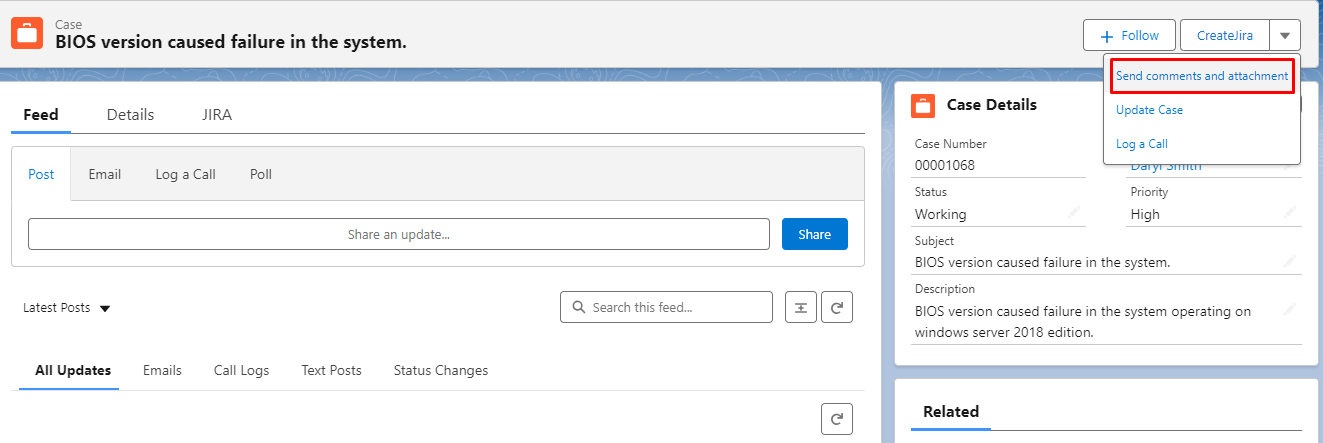
A new screen will appear.
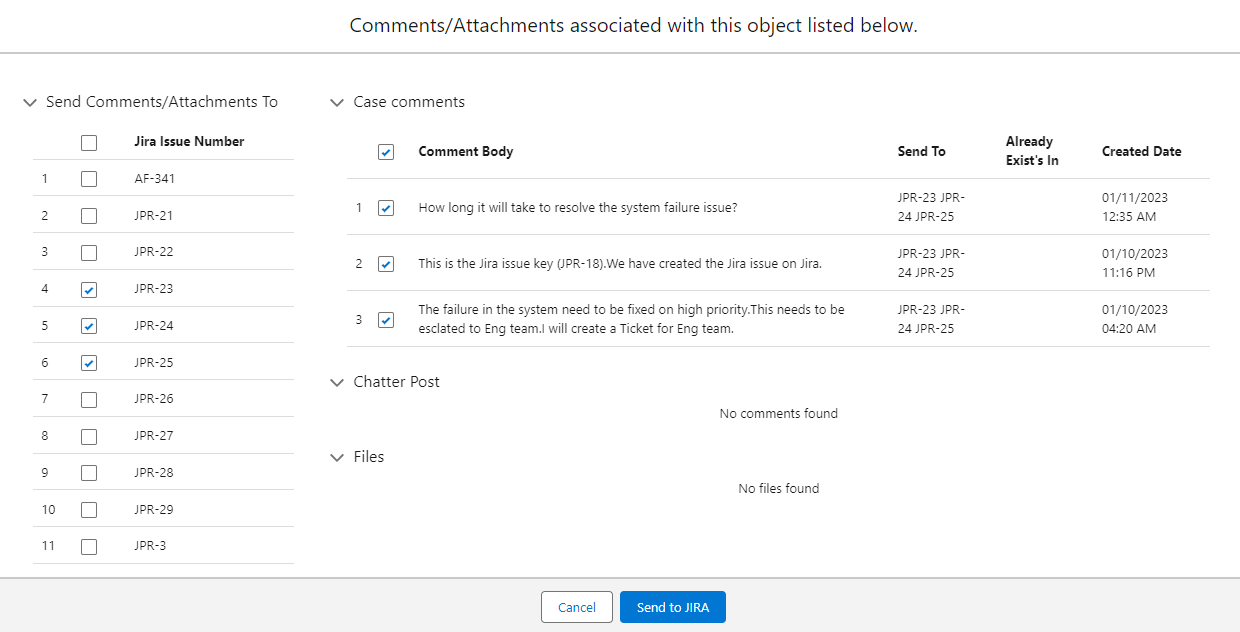
Select the Jira issue Number, comments, and attachments that you want to send to Jira. Once done click ”Send to Jira”.