
 Feedback
Basic Authentication
Published Date: 14-07-2026
Read Time:
After installation, the next step is setting up Jira Remote Site settings for Salesforce and Jira Instance.
Configure Remote Site Settings
-
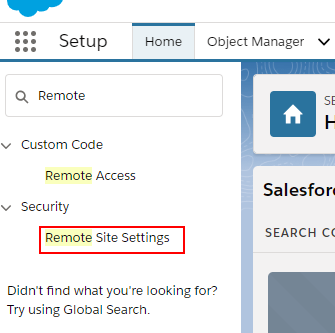
Navigate to the ‘Setup’ page from your Salesforce instance. In the ‘Quick Find’ box, search for ‘Remote Site Settings’ and click on it from the search results.

-
Click ‘New Remote Site’ to add the remote site.


Create a Remote Site for the Jira Instance
-
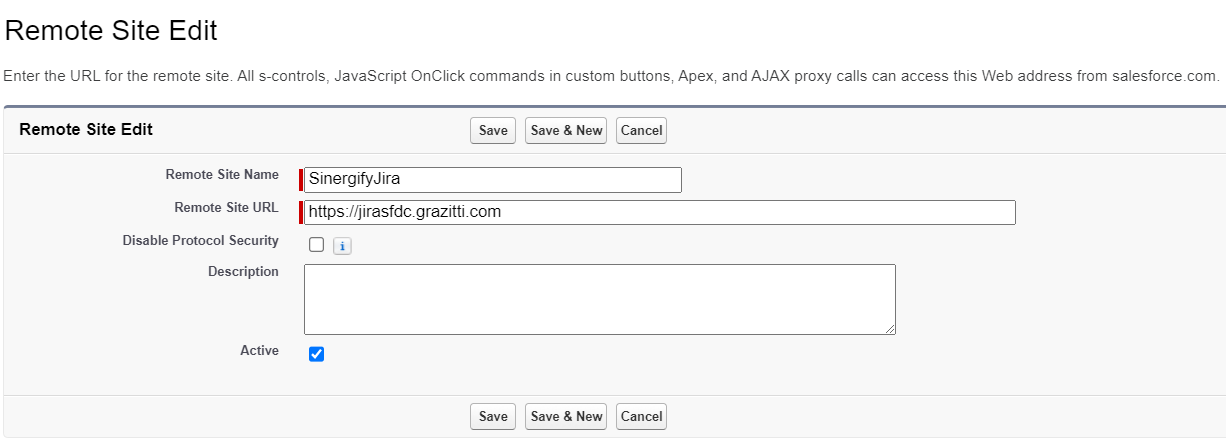
In this step, you will create a Remote Site for your Jira instance to establish a secure connection between Salesforce and Jira.
-
Remote Site Name: Enter a descriptive name for the Jira Remote Site.
-
Remote Site URL: This URL is crucial for enabling communication between Salesforce and Jira.

Create a Remote Site for the Salesforce Instance
-
In this step, you will create another remote site for your Salesforce instance to facilitate secure communication, authentication, and seamless integration within the Salesforce environment.
-
Remote Site Name: Provide a meaningful name for the Salesforce Remote Site.
-
Remote Site URL: Enter the URL of your Salesforce instance.


Token Generation
-
Log into your Atlassian Account
-
Open your browser and go to the Atlassian login page.
-
Enter your credentials to log in.
-
Navigate to Account Settings
-
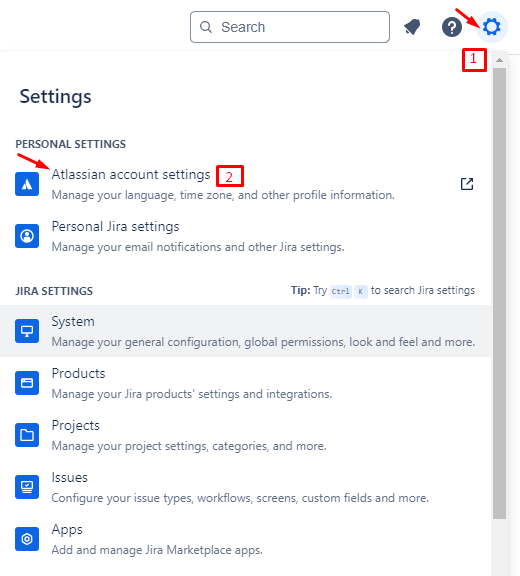
Once logged in, click on the Gear icon.
-
Select Account Settings from the menu.
-
Access Security Settings:
-
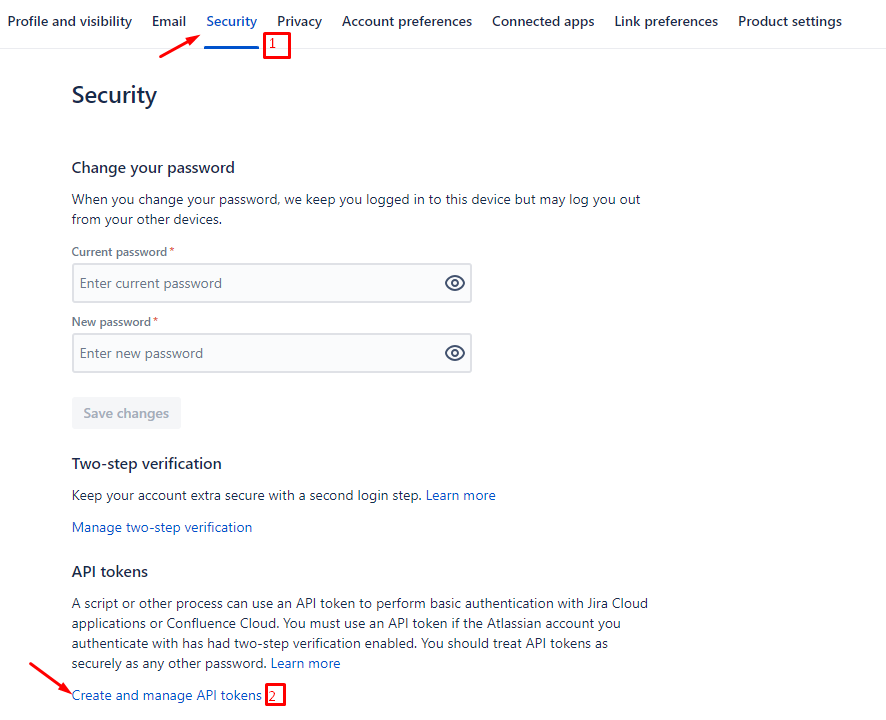
In the Account Settings page, look for the Security section and click on it.
-
Go below and click on the Create and Manage API tokens.
-
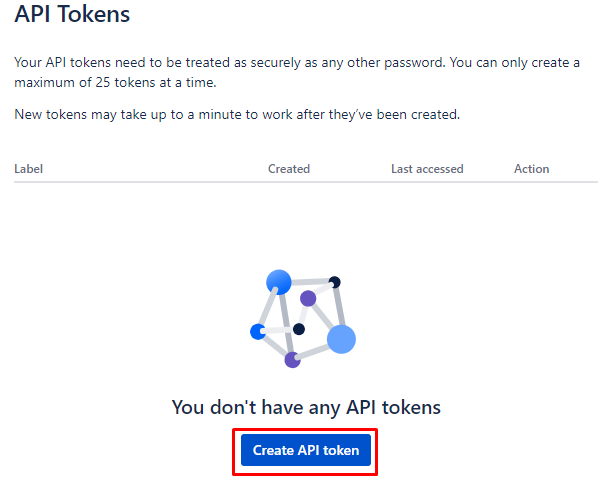
Create a New API Token:
-
A new page will open. Click on the Create API token button.
-
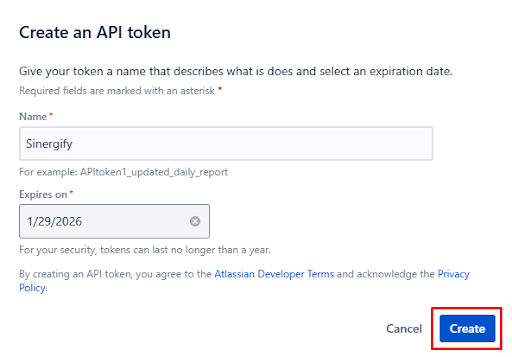
Enter Token Details:
-
A pop-up will appear. Give your API token a name that describes what it does.
-
Select an expiration date for the API token.
a. Token expiration is 1 to 365 days.
-
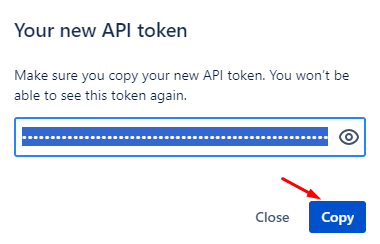
Copy the Generated Token:
-
A token will be generated. Make sure you copy it immediately as it will not be displayed again.
-
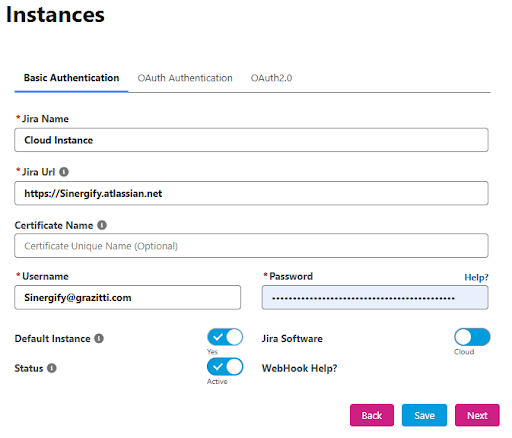
Go to the Sinergify Admin setting tab, and enter the below details.
-
Jira Name: Provide your Jira instance Name.
-
Jira URL: Provide your Jira instance URL.
-
Username: Enter the email address in the username.
-
Certificate Name:
- Select the configured self-signed certificate from Salesforce. This certificate secures the communication between Salesforce and Jira and helps maintain a stable connection in environments with proxies or dynamic IP changes.
- Applicable for Jira On-Premise / Data Center (DC) environments.
- For detailed certificate creation and configuration, please follow the steps outlined above in this document.
-
Password: Paste the Generated API token password created in the above step.
-
Personal Access Token: Personal Access Tokens (PATs) provide a secure, manageable way to Authenticate JIRA with Sinergify without exposing user password.

Note:
PAT feature is only for Jira Server and DC versions and hence when cloud is selected this toggle will be unavailable.
https://confluence.atlassian.com/enterprise/using-personal-access-tokens-1026032365.html
-
Once all the details are added click Save, Please ensure the ‘Status’ is set to Active. If it is not, enable the toggle button.


