Feedback
Send Comment & Attachment Button-classic
Published Date: 05-08-2024
Read Time:
Creating a new Visualforce page for the ‘Send comments and Attachments to Jira’ button
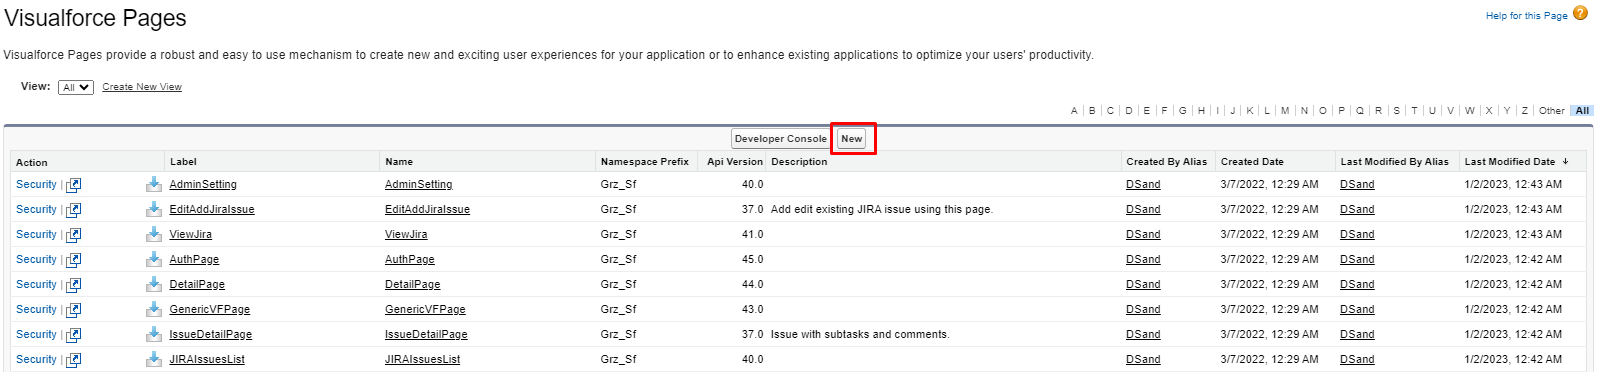
Step 1: From ‘Setup’, search ‘Visualforce’ in the ‘Quick Find’ box and click ‘Visualforce Pages’ from search results.
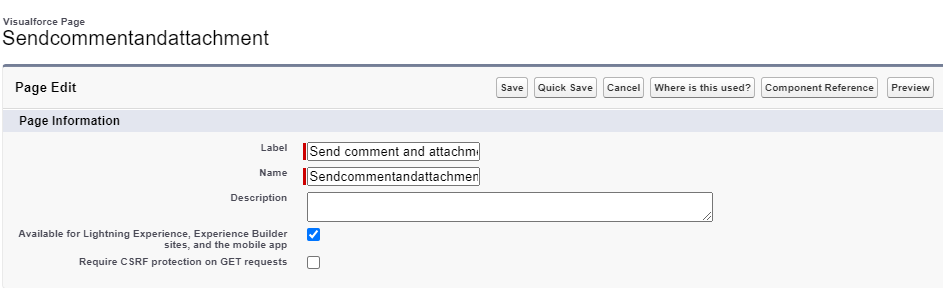
Step 2: Enter ‘Send Comment and Attachment To Jira’ in the ‘Label’ field and ‘Name’ will be autopopulated. Check the box next to ‘Available for Lightning Experience, Lightning Communities, and the mobile App’.
Step 3: Paste the following Apex code in the ‘Visualforce Markup’ section.
<apex:page standardController="Case" sidebar="false">
  <apex:include pageName="Grz_Sf__GenericSendCommAttachCaseToJira"/>
</apex:page>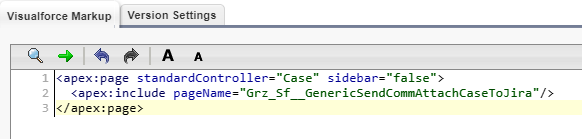
Step 4: Click ‘Save’.
Creating the ‘Send Comments and Attachment to Jira’ Button
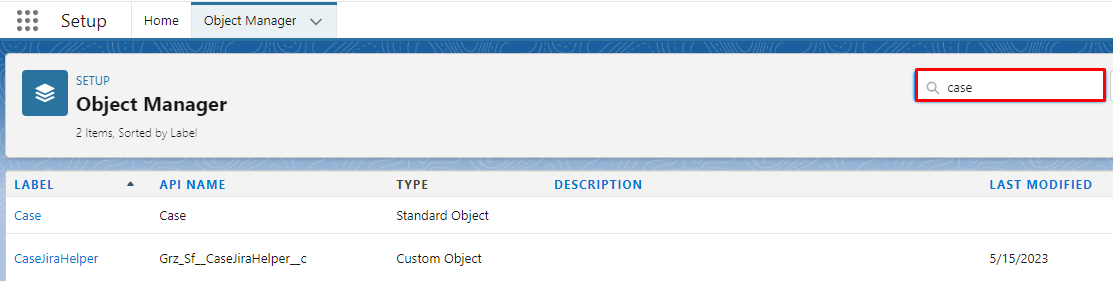
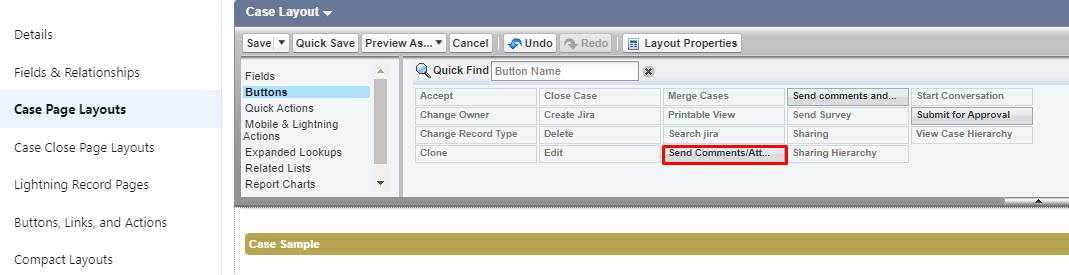
Step 1: From ‘Object Manager’, search the object on which the 'Send Comments and Attachment to Jira’ button needs to be added and click on it. For example in the below screenshot, ‘Send Comments and Attachment to Jira’ button is added on the Case object.
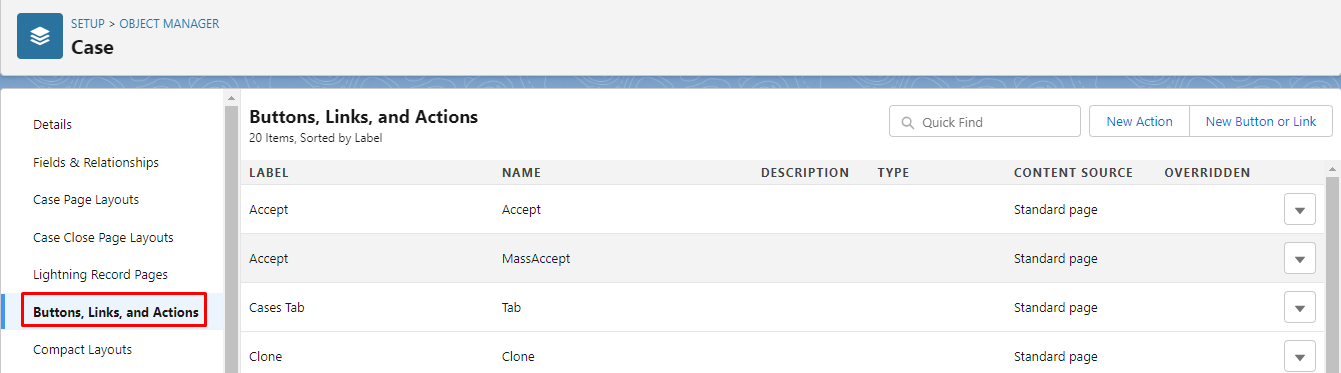
Step 2: Click ‘Buttons, Links, and Actions’.
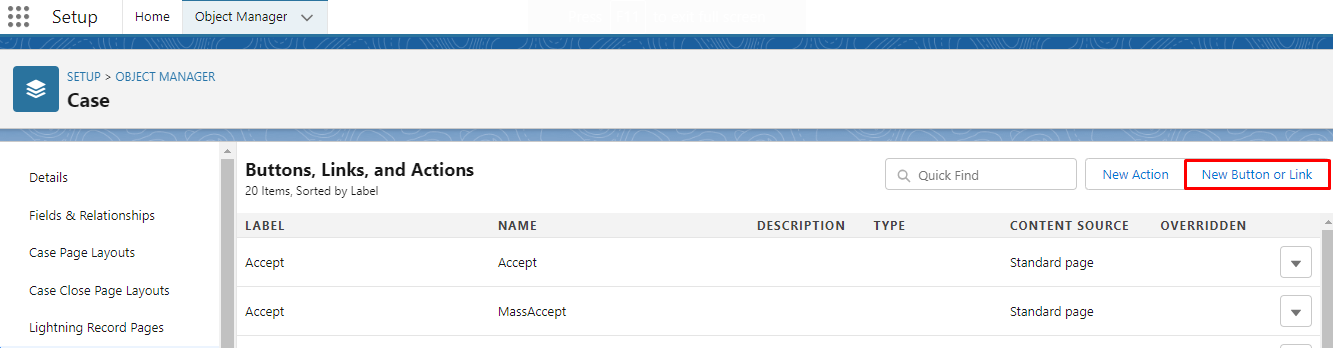
Step 3: Click ‘New Button or Link’.
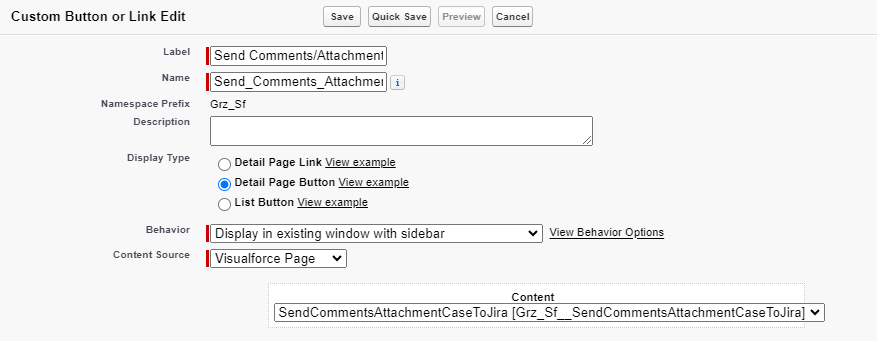
Step 4: Fill in the required details. Enter ‘Send comment and attachment’ in the ‘Label’ field and the name field will be autopopulated. Details for other fields are as following:
-
Display Type: Detail Page Button
-
Behavior: Display in the existing window with the sidebar
-
Content Source: Visualforce Page
-
Content: Select Send Comments and attachments VisualForce page
Step 5: Click ‘Save’.
Adding the “Send Comment and attachment to Jira“ button into the object Page layout
Step 1: On the details section of the object, click on the page layout (For example in the below screenshot, the case page layout is selected as the button is to be added on the case object).
Step 2: Click on the buttons in the Palette. Drag the ‘Send Comments and Attachment to Jira’ button into the ‘Case details’ section. This button will be placed as a custom button in this section.
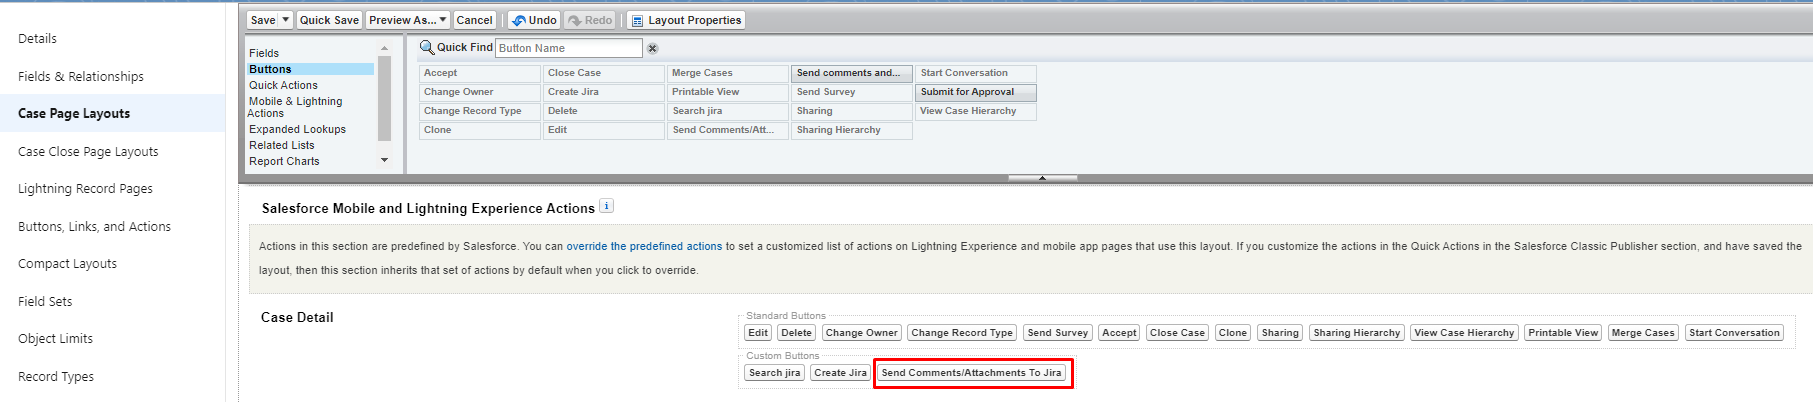
Step 3: Click ‘Save’.
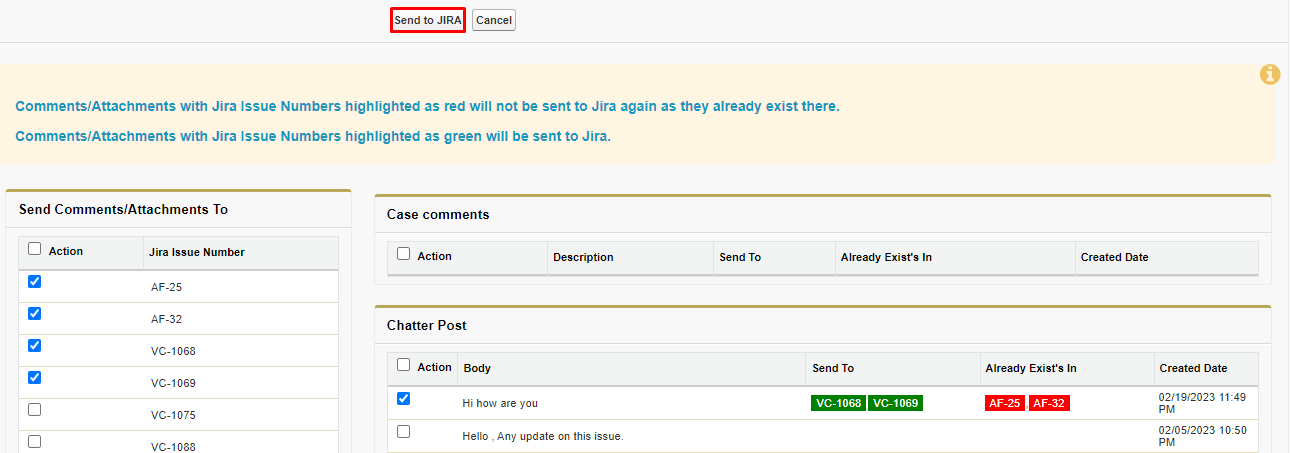
Sending comments and Attachments to Jira Using Send Comments and attachment button on the object Detail page
Users can send comments and attachments by clicking on the button.“Send Comments and Attachments to Jira“.
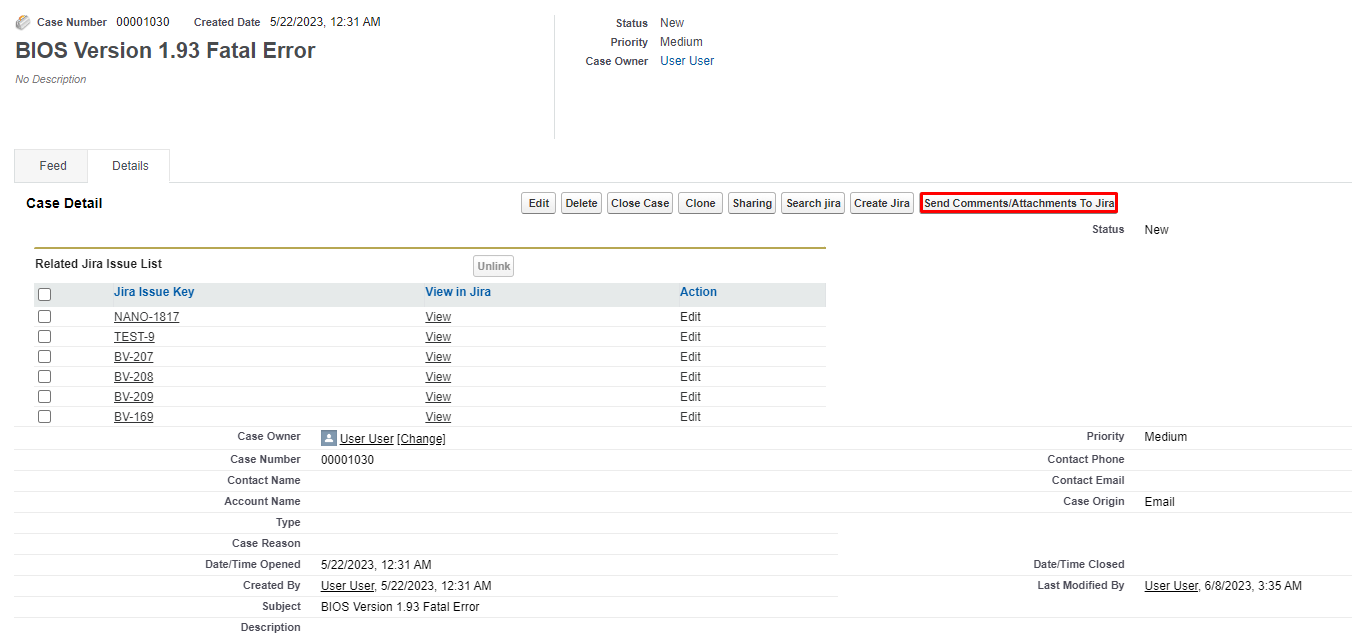
A new screen will appear. Select the Jira Issue to which you want to “Send the Comment and Attachments to Jira” once done click “Save”.
Comments/Attachments with Jira Issue Numbers highlighted as Red will not be sent to Jira again as they already exist there.
Comments/Attachments with Jira Issue Numbers highlighted as Green will be sent to Jira.