
 Feedback
Multiple Jira Instance Linking

This feature enables users to link multiple Jira instances with their Salesforce Org. The authentication and configuration of the different instances can be controlled from Admin Settings in Sinergify.
From Admin Settings, click on the Instances tab.

A new page will appear on your screen to add more Jira instances.

You can use Basic Authentication or OAuth Authentication to configure the Jira instances.
Refer to the following docs to know how to configure:
- Basic Authentication
- OAuth Authentication
Basic Authentication Set-up

OAuth Authentication Set-up

Once the authentication is completed, save the changes and click Next.
You will land on the Configuration Settings page, from where you can control the different features.

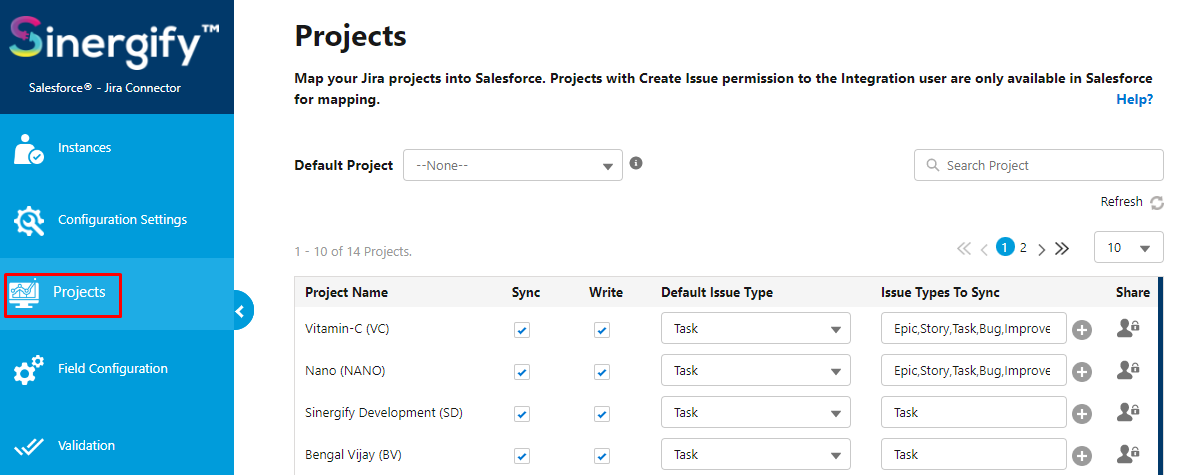
Save the configuration settings and click Next to move to the ‘Projects’ screen. All the projects configured in your Jira instance will visible in this part.
Other options that you can enable from here include enabling sync for the projects, giving write permissions to the projects, defining the default issue type, defining issue types to sync, selecting a default project, and defining project permissions.
Save the project configuration changes and click Next to move to the Field Configuration screen.
On the Field Configuration screen, you can select the Salesforce Object that you want to map with Jira. You can also select the Jira project and based on the selected project, you can map the Jira and Salesforce fields.

Other settings like configuring Global Mapping, setting up Default Value for the fields, enabling Reporting for the fields, and setting up Sync Configurations can be done from here.
Save the mapping and click Next to move to the Validation screen. Over here, you can add validations for a single project or all projects and the applicable Object. If the Validation output is true, a Jira issue can’t be created from Salesforce.

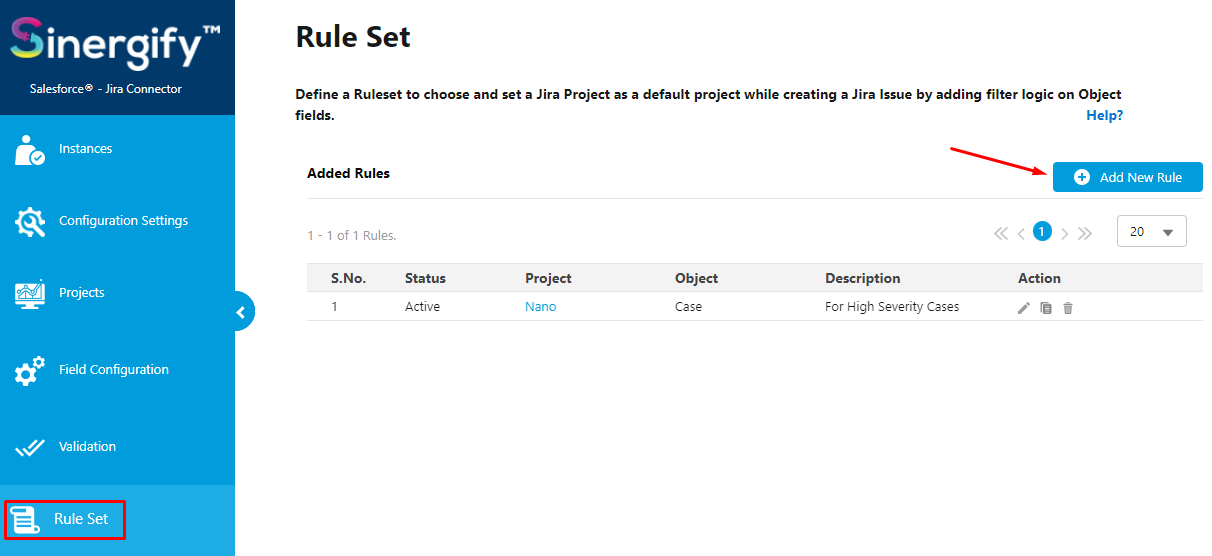
Save the changes and next is the Rule Set screen. This allows you to define the conditions for assigning the Jira under the right projects.
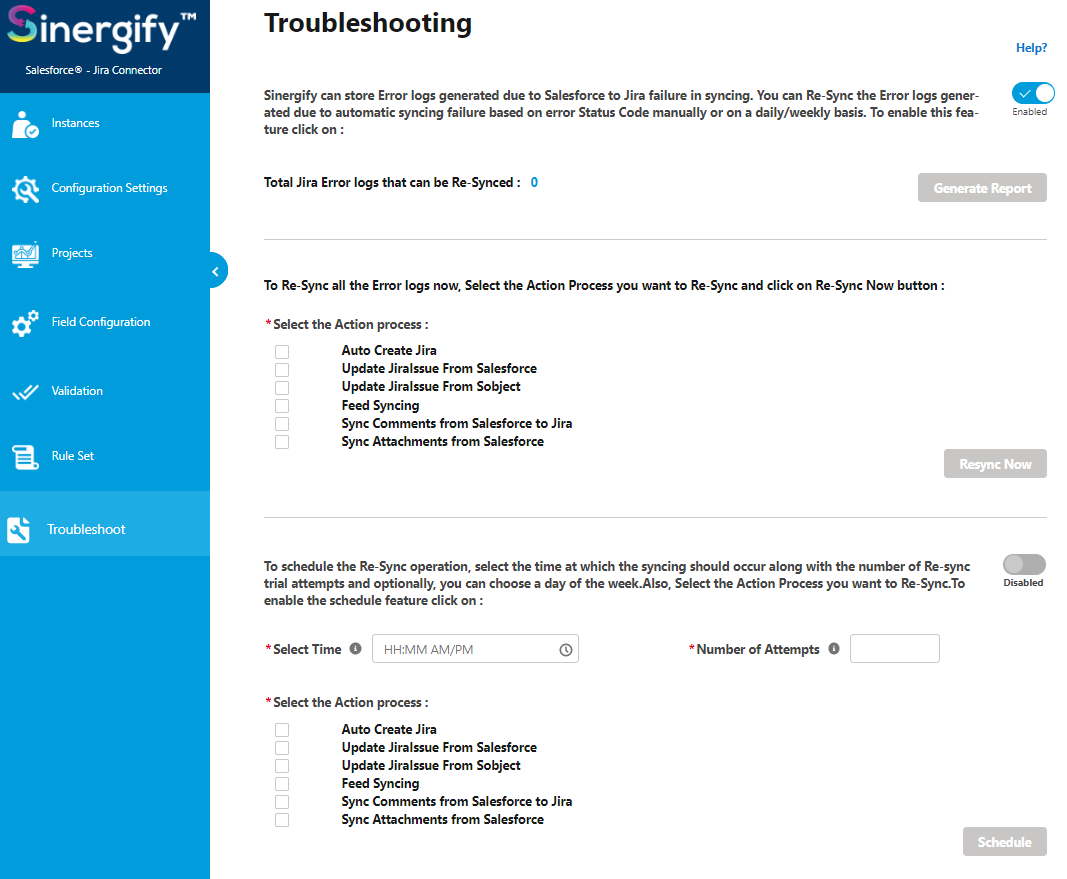
Save the changes and next is the Troubleshooting screen. This screen is used to reinitiate the syncing of Asynchrounous errors due to any system failure or data failure.
To configure an instance, click on the Instances tab and then click on the instance you want to configure.
In case you have multiple Jira instances configured, you can click on the instance on which you want to make the changes.

You can do the following:
- Default Instance: Choose a default Jira instance out of all. (Yes/No)
- Status: Activate or Deactivate an instance temporarily without having to delete and reconfigure it from scratch.
- Webhook Help?: One-Click option to copy the Webhook URL from Salesforce.

Navigate through different tabs to update configuration settings, Projects, Field mapping, Validations, and Rule Sets of the selected instance.
To switch to another instance, either click on the Instances tab again or click on the instance icon from the top right.


