Validation Tab
Published Date: 02-09-2024
Read Time:
You can add validation rules by specifying required fields, which are to be filled on the parent record (case for example) before a user can create a Jira issue. An error notification will appear if the validation rule is met. Follow these steps to create a validation rule:
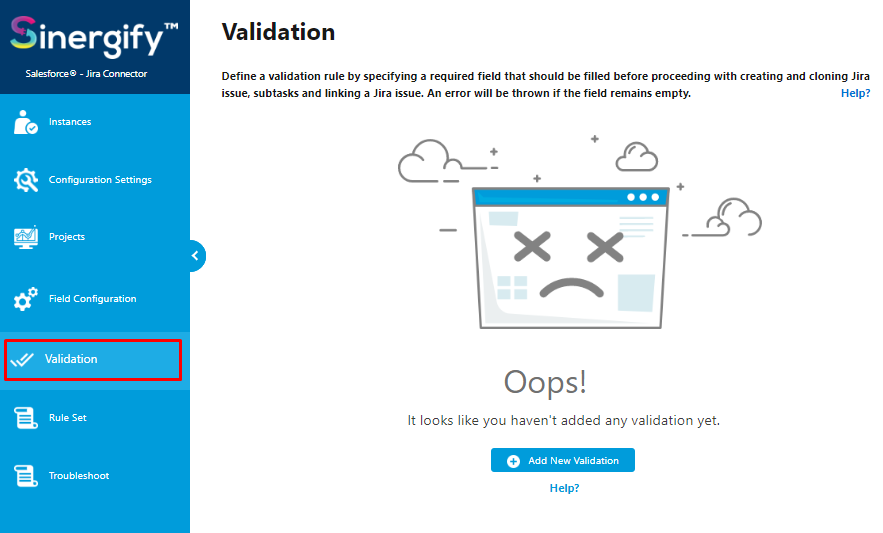
Step 1: From the Admin Settings page, click on the ‘Validation’ sub-tab.
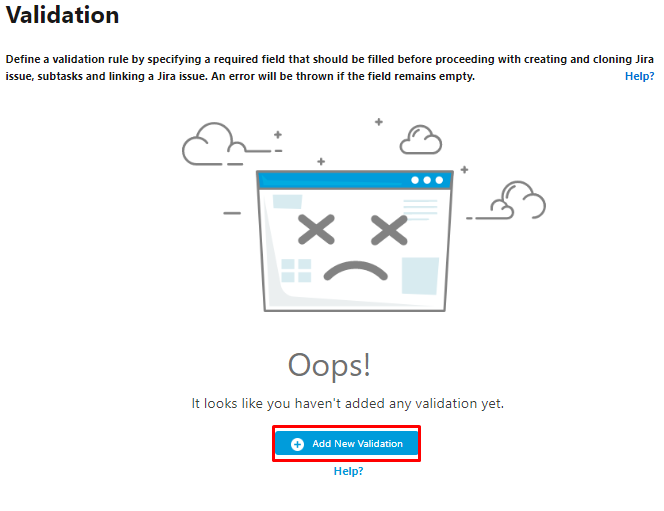
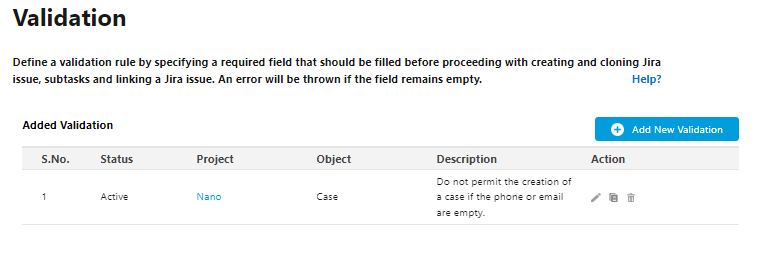
Step 2: Click on the Add New Validation button as shown below.
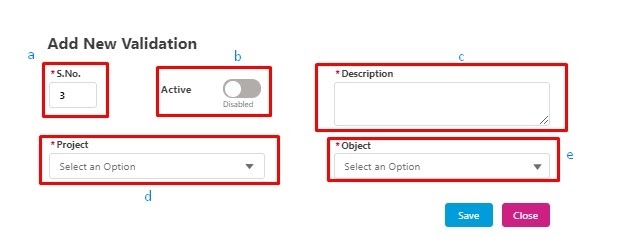
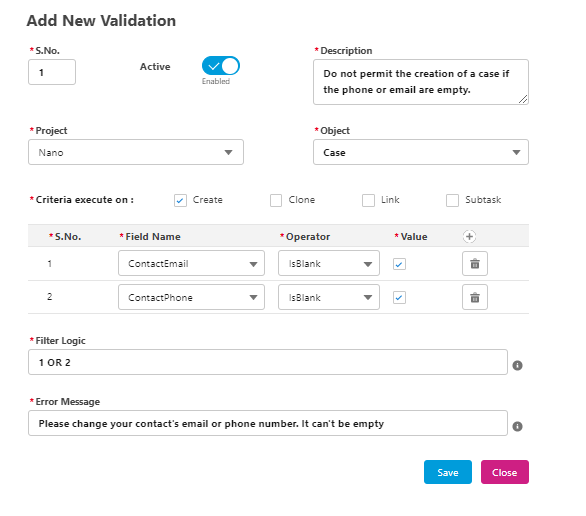
Step 3: A new screen will appear asking for the details as shown in the screenshot below.
- Serial No:- Give priority to the validation rule by providing a serial no. If you have multiple validation rules, serial numbers can help you arrange the order of the execution.
- Active:- Mark the rule status as Active or Inactive.
- Description:- Add a description for the validation rule for better clarity.
- Project:- This gives you an option to select a specific project for which the rule will apply or select ALL if you want to run it for all the projects.
- Object:- Choose the Parent Object of Jira for which you want to set up this rule.
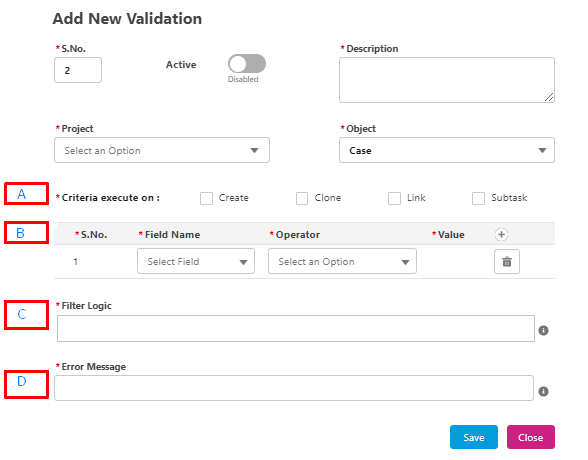
Step 4: Once you have selected all the required options on this screen, further options will be available as in the screenshot below.
- Criteria: Option to execute the criteria on
- Create: While creating a new Jira ticket from Salesforce
- Clone: While Cloning an existing Jira ticket from Salesforce
- Link: While linking an existing Jira ticket from Salesforce
- Subtask: While trying to create a new subtask on existing Jira ticket from Salesforce
- Formula: Option to add one or more conditions/formulas according to field names, operator and value, etc.
- Filter Logic: Decide the logic behavior using OR/AND. For example, if you want to run 1 or 2 or 3 OR 1 and 2 or 3, etc. (This follows the same formula structure as in Salesforce).
- Error Message: Add the Error Message that will appear to the users if the above-mentioned logic results are True. The user won't be able to create a Jira ticket.
As shown in the above example we have set up a rule where either Contact Phone or Email is blank, a Case won't be created and an error message will appear which can be customized as per convenience.
Step 5: Once done, click Save.
A success message will appear and the newly created rule will appear in the validation rule list as shown below.

 Feedback
