Feedback
OAuth Authentication
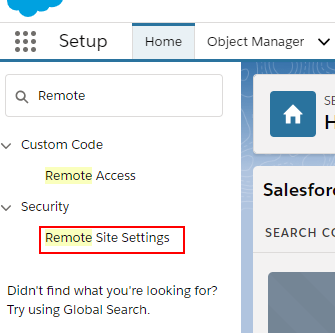
Configure Remote Site Settings
Navigate to the ‘Setup’ page from your Salesforce instance. In the ‘Quick Find’ box, search for ‘Remote Site Settings’ and click on it from the search results.
Click ‘New Remote Site’ to add the remote site.

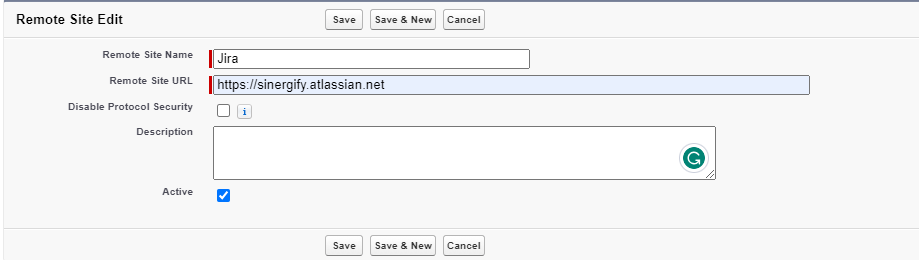
Creating Remote Sites
-
Jira Instance
Remote Site Name: Provide a name like ‘Jira’.
Remote Site URL: Enter the URL of your Jira instance to enable secure communication.

-
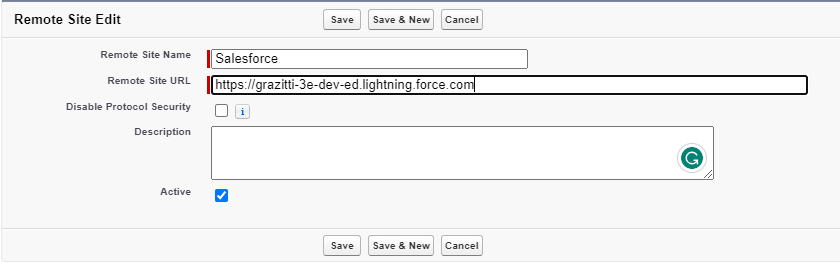
Salesforce Instance
Remote Site Name: Provide a name like ‘Salesforce’.
Remote Site URL: Enter your Salesforce instance URL to ensure seamless integration and communication.

Create Application Links on the Jira Side
-
Log into your Jira system as a user with 'Jira Administrator' permissions.
-
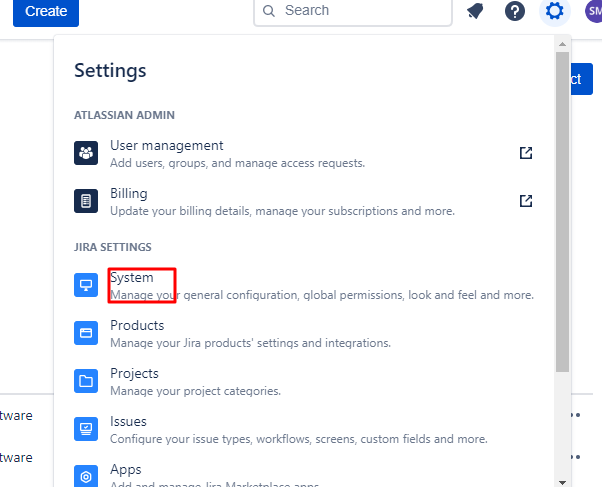
Click on the Gear (settings) icon.
-
Under the Settings drop-down menu, click ‘System’.

-
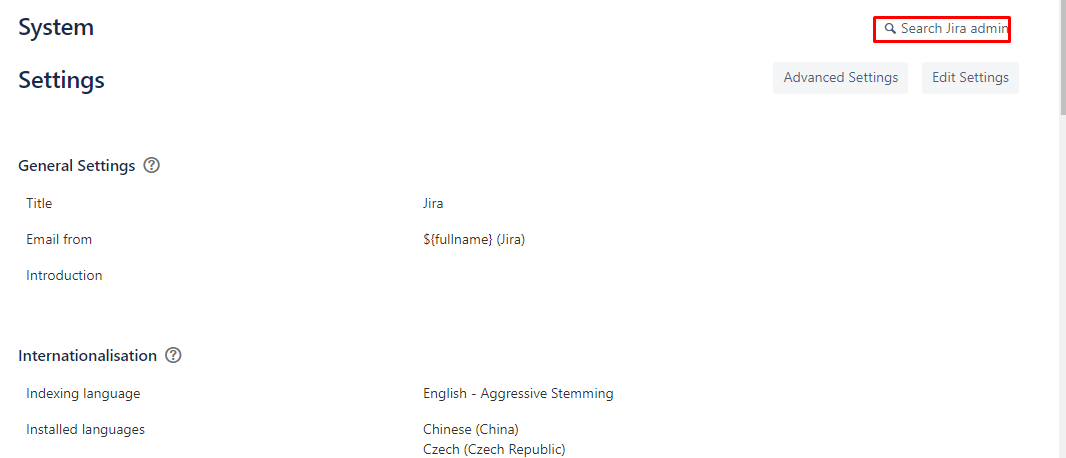
Click ‘Search Jira admin’.

-
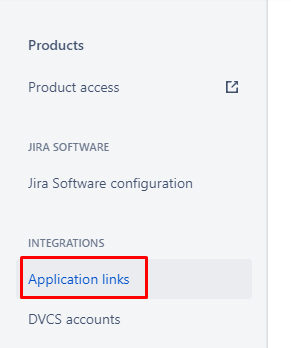
Enter ‘application’ in the search bar and click ‘Application links’ from the search results.

-
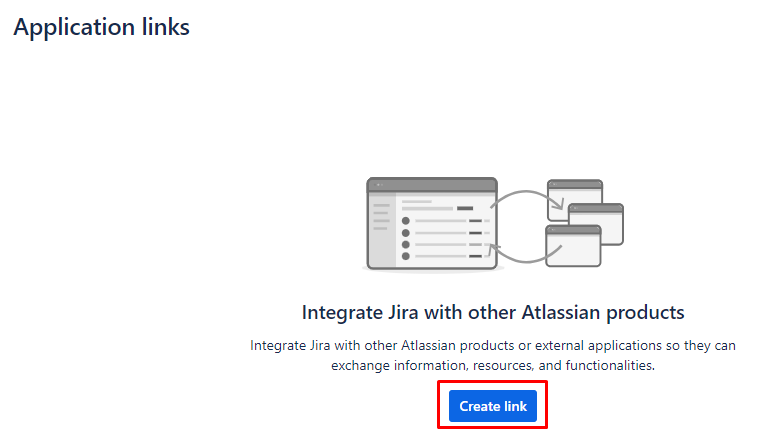
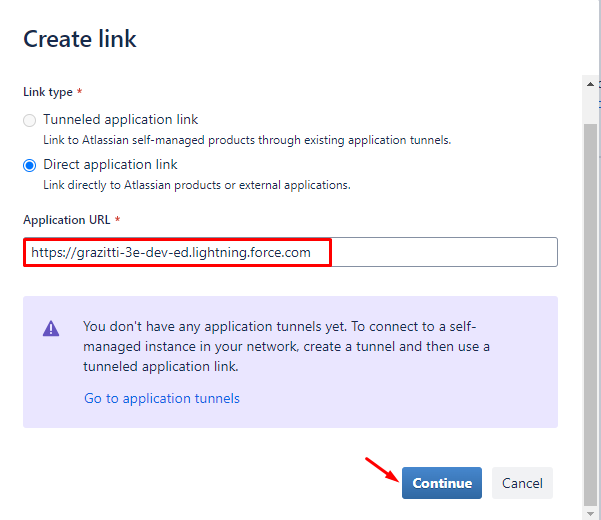
Click on ‘Create link’.
-
Enter your Salesforce Org’s URL in the field and click ‘Create new link’.


-
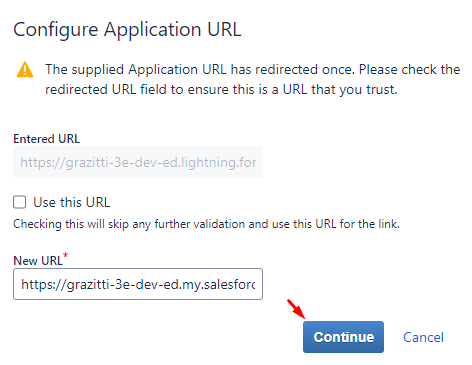
A new window will open to confirm the ‘New URL’. Click ‘Continue’.

-
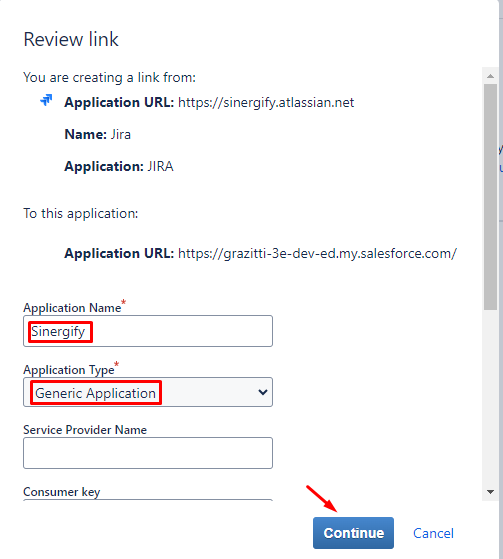
Fill in the details like ‘Application Name’ and select ‘Generic Application’ as the ‘Application Type’. Click ‘Continue’.

-
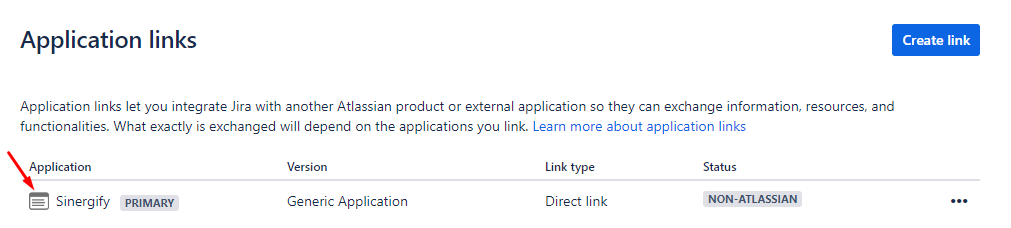
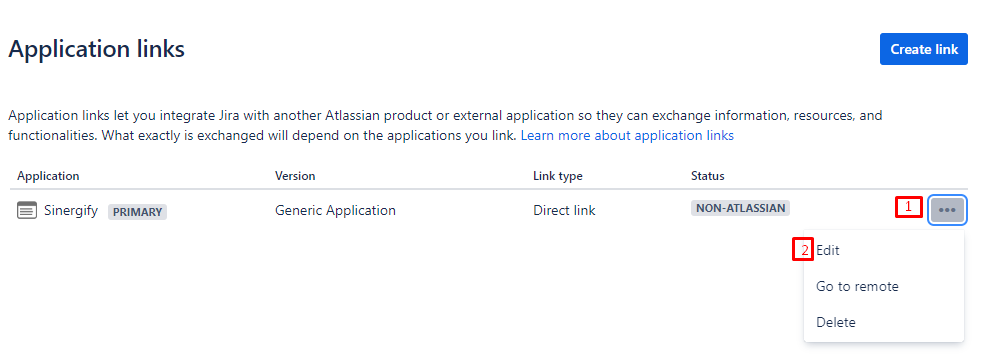
A new application link will be created.

-
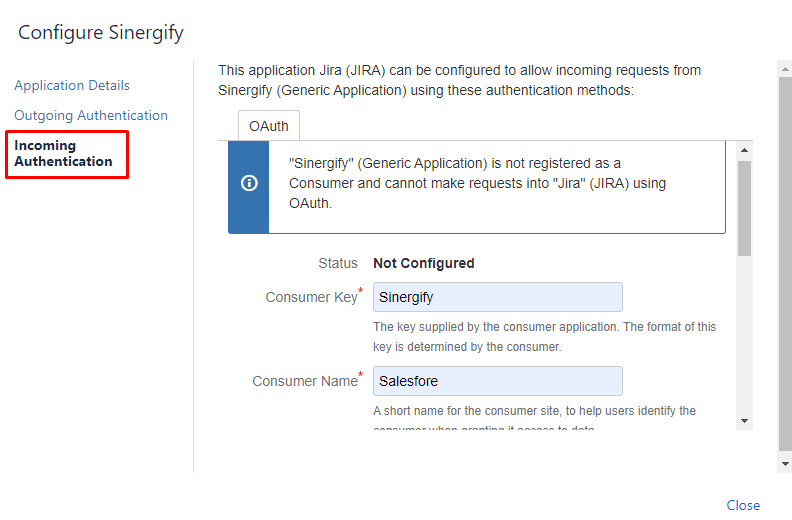
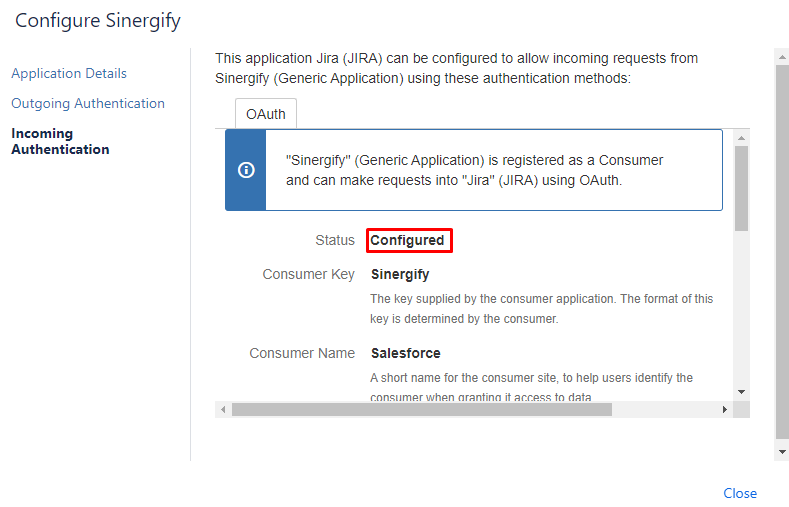
Next is setting up the Incoming Authentication. Click ‘Edit’ (as highlighted in the screenshot below).

-
Enter ‘Sinergify’ in the ‘Consumer Key’ and ‘Salesforce’ in the 'Consumer Name’ fields.

-
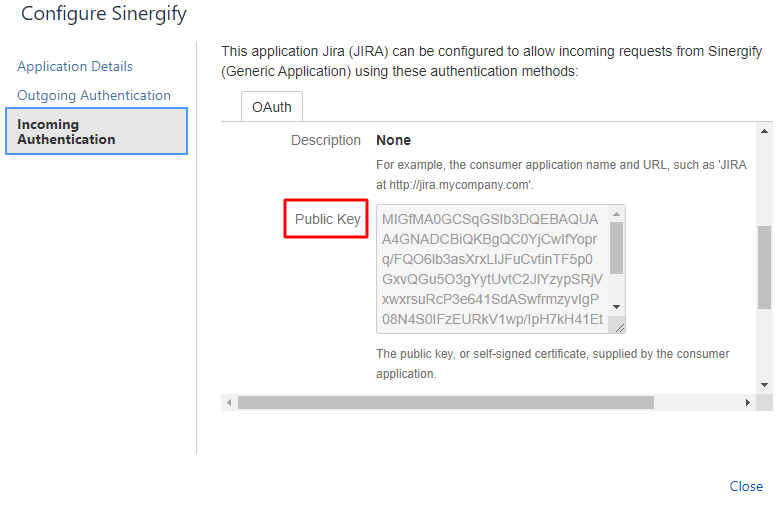
Insert the public key in the ‘Public Key’ field.
Note:
Please check this reference Document for Public/Private keys.
(Please save the Private key also as it will be required later in Step 16)
-
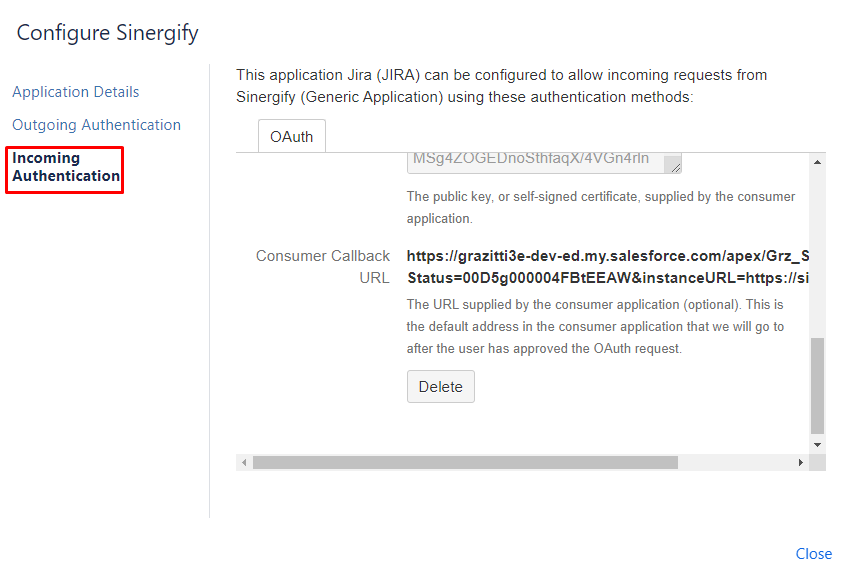
Add your ‘Consumer Callback URL’. The URL should be in the following format. SalesforceOrgURL+’/apex/Grz_Sf__AuthPage?status=’+SalesforceOrgID+’&instanceUrl=’+Jira instance Url
E.g.
https://grazitti3e-dev-ed.my.salesforce.com/apex/Grz_Sf__AuthPage?Status=00D5g000004FBtEEAW&instanceURL=https://sinergify.atlassian.net
-
Click ‘Save’. The status of the application link will be updated to ‘Configured’.

-
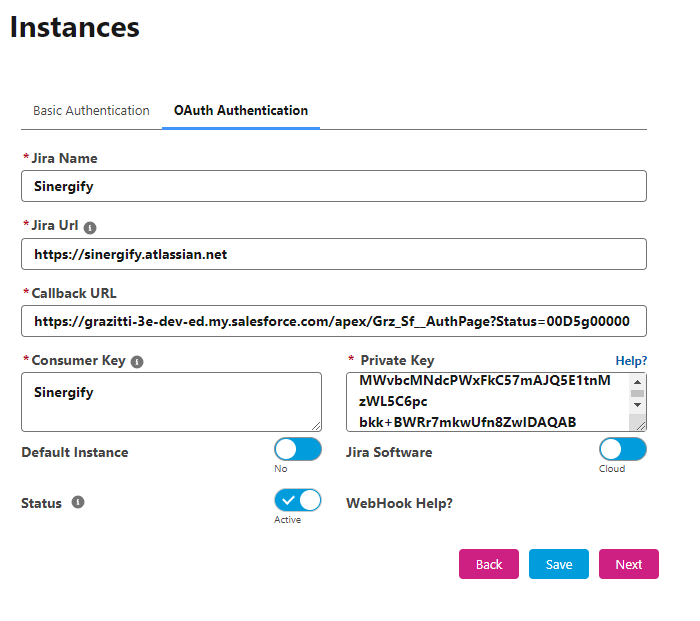
Go to the Authentication tab of the Admin Settings (Sinergify app) and select the ‘OAuth’ tab and fill in the details below.
-
Jira Name: Provide your Jira instance Name.
-
Jira URL: Provide your Jira instance URL.
-
Call back URL: Enter the Call back URL in the SalesforceOrgURL+’/apex/Grz_Sf__AuthPage?status=’+SalesforceOrgID+’&instanceUrl=’+Jira instance Url format.
-
Consumer Key: Enter the Consumer key used in the Application link.
-
Private Key: Enter the Private key generated in step 13 above.
-
Key Consideration Points.
-
A consumer key must be one word only, as Jira does not support more than one word in a consumer key. See the reference Document.
-
Refresh Token: A refresh token helps you re-validate your connection. It is particularly useful when the token expires or is revoked on the Jira side. This can also be used to authenticate the Salesforce side with a different Jira Integration user if needed.
-
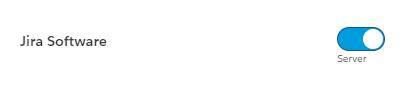
Select the Jira software - Server or Cloud.

-
Toggle to make this Jira instance your default Jira instance.

-
Click ‘Save'.
-
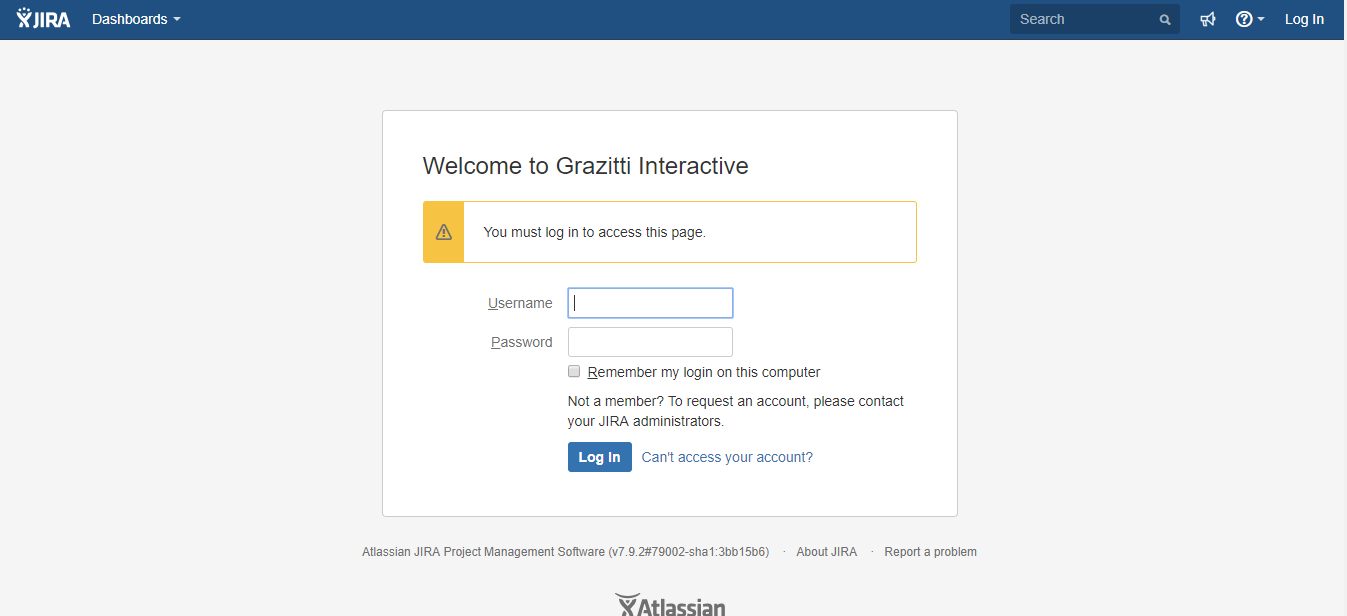
A Pop-up will appear on your screen. Log in using your Jira credentials.
Note: Ensure that pop-ups are not blocked.


-
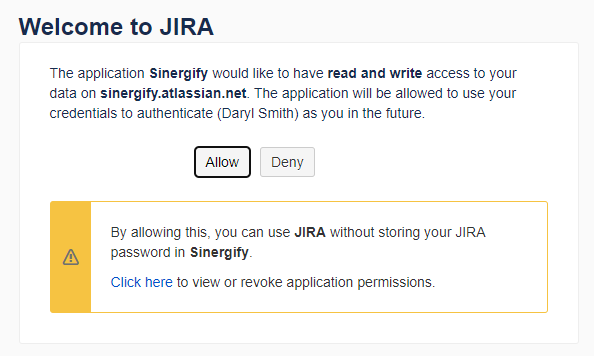
After logging in, a new window will appear asking for the ‘Read’ and ‘Write’ permissions. Click ‘Allow’ to share access token else click ‘Deny’.
-
A new window will appear on your screen asking you to allow or deny the access.


-
If allowed, the access token will be shared and saved automatically in Salesforce and the admin page will reload automatically.