
 Feedback
Configuring the OAuth Authentication
Published Date: 17-03-2026
Read Time:
Step 1: Log into your Jira system as a user with 'Jira Administrator' permissions.
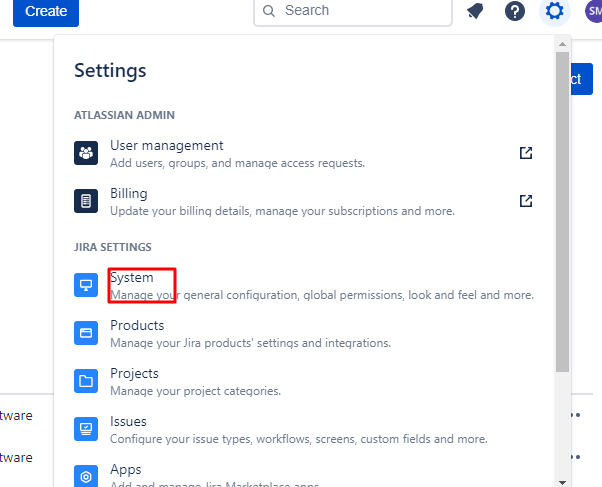
Step 2: Click on the Gear (settings) icon.
Step 3: Under the Settings drop-down menu, click ‘System’.
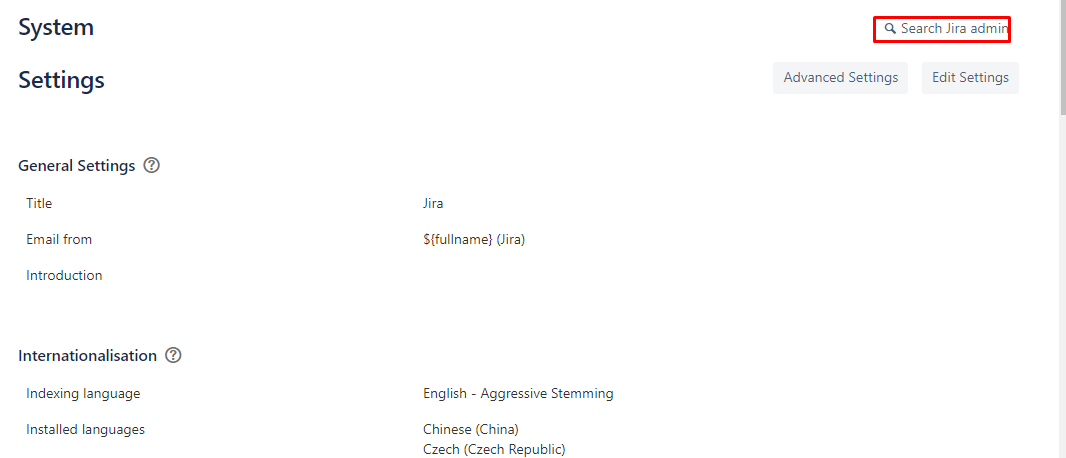
Step 4: Click ‘Search Jira admin’.
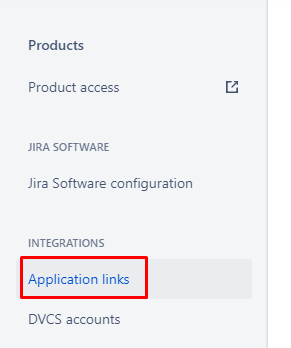
Step 5: Enter ‘application’ in the search bar and click ‘Application links’ from the search results.
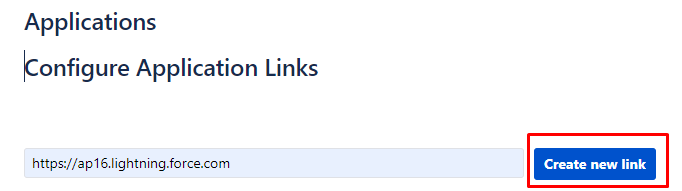
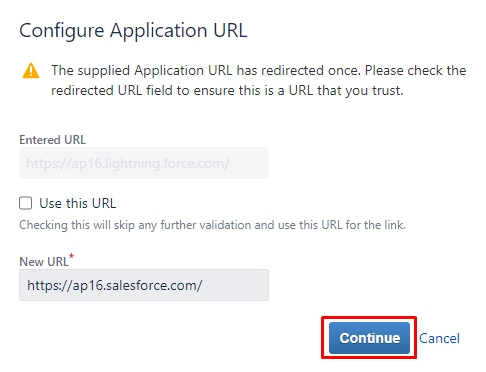
Step 6: Enter your Salesforce Org’s URL in the field and click ‘Create new link’.
Step 7: A new window will open to confirm the ‘New URL’. Click ‘Continue’.
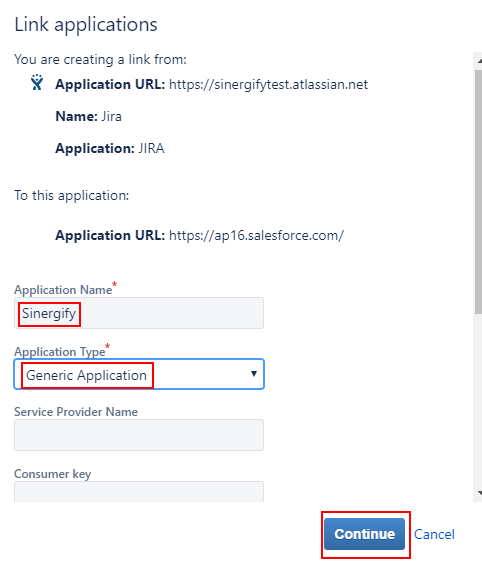
Step 8: Fill in the details like ‘Application Name’ and select ‘Generic Application’ as the ‘Application Type’. Click ‘Continue’.
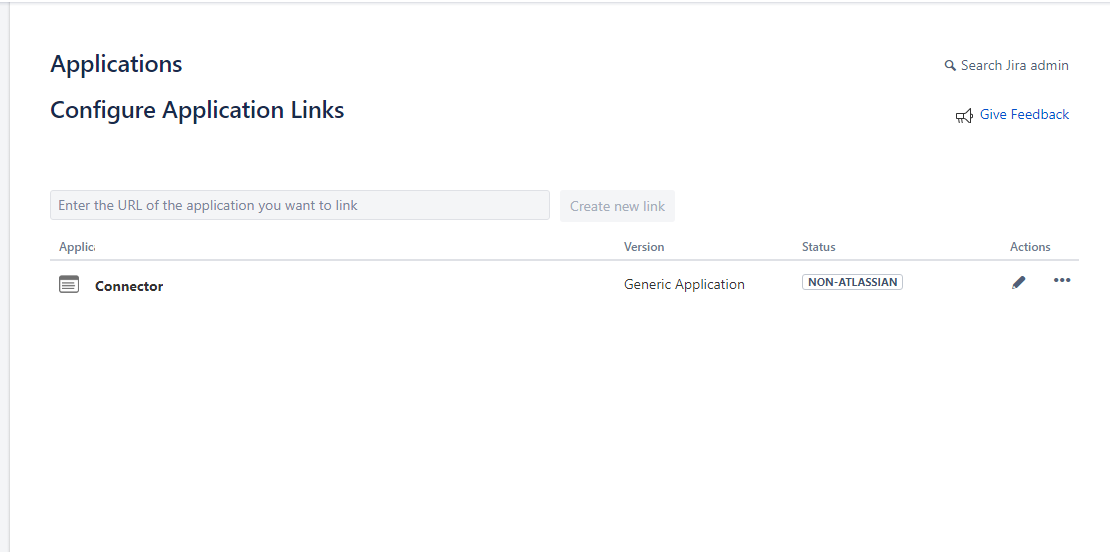
Step 9: A new application link will be created.
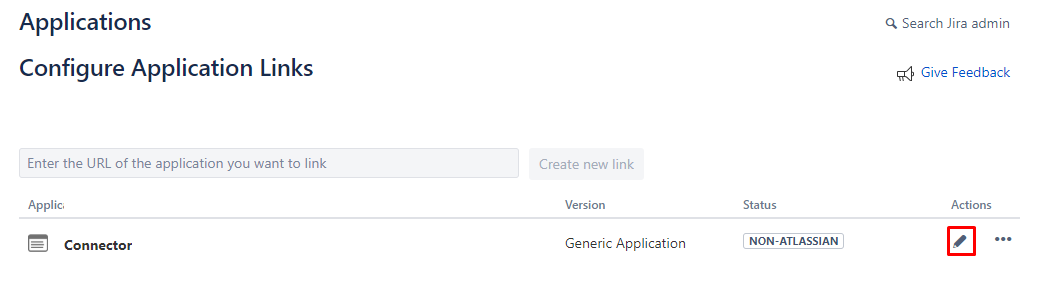
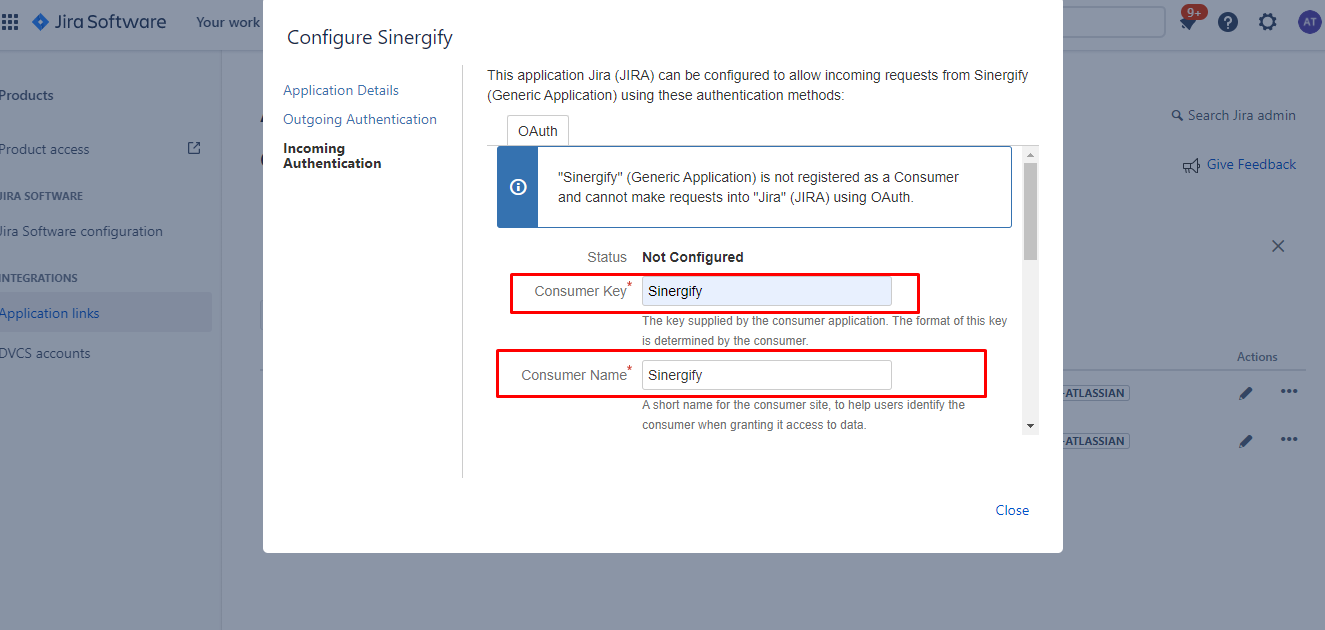
Step 10: Up next is setting up the Incoming Authentication. Click ‘Edit’ (as highlighted in the screenshot below).
Step 11: Enter ‘Sinergify’ in ‘Consumer Key’ and ‘Consumer Name’ fields both.
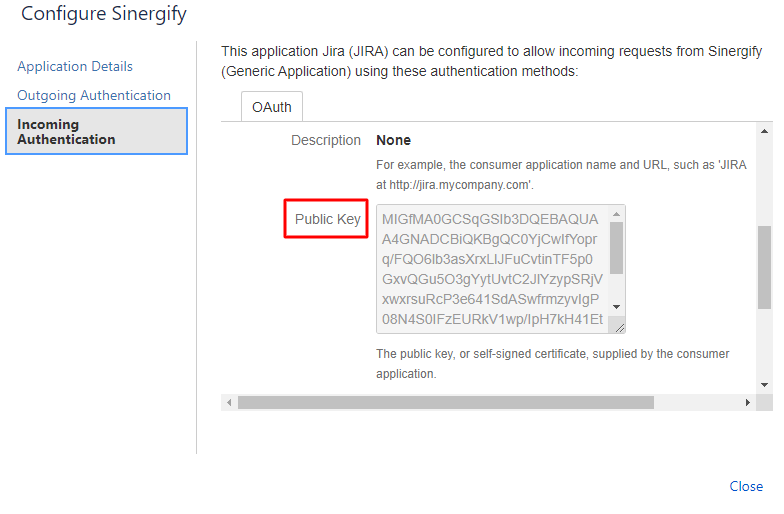
Step 12: Insert your public key in the ‘Public Key’ field.
(Please save the Private key also as it will be required later in Step 15)
Step 13: Add your ‘Consumer Callback URL’. The URL should be in the following format:
SalesforceOrgURL+’/apex/Grz_Sf__AuthPage?status=’+SalesforceOrgID+’&instanceUrl=’+Jira instance Url
For example:
https://ap16.lightning.force.com/apex/Grz_Sf__AuthPage?status=00D0o000000Sx8Z&instanceUrl=https://sinergifytest.atlassian.net
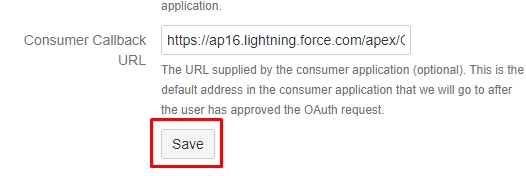
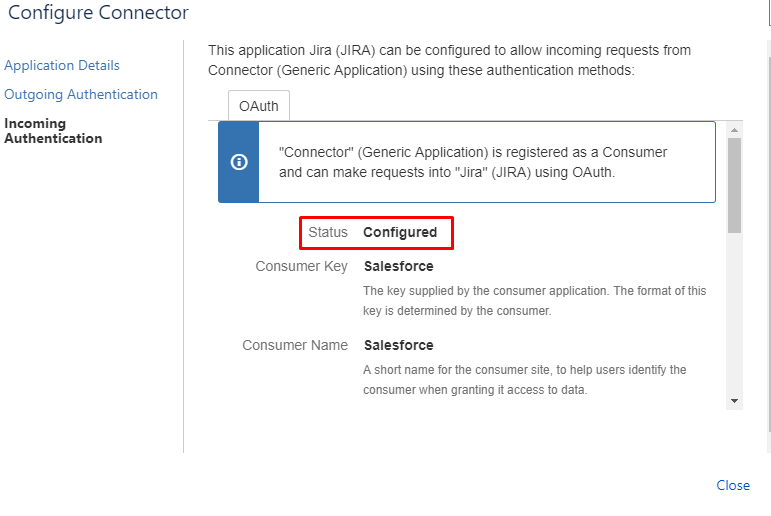
Step 14: Click ‘Save’. The status of the application link will be updated to ‘Configured’.
Step 15: Go to the Authentication tab of the Admin Settings (Sinergify app) and select the ‘OAuth’ tab. Add details like Jira Name, Jira URL, Call back URL, Consumer Key, and Private Key. (You can obtain the Private key as mentioned in Step 12 above)
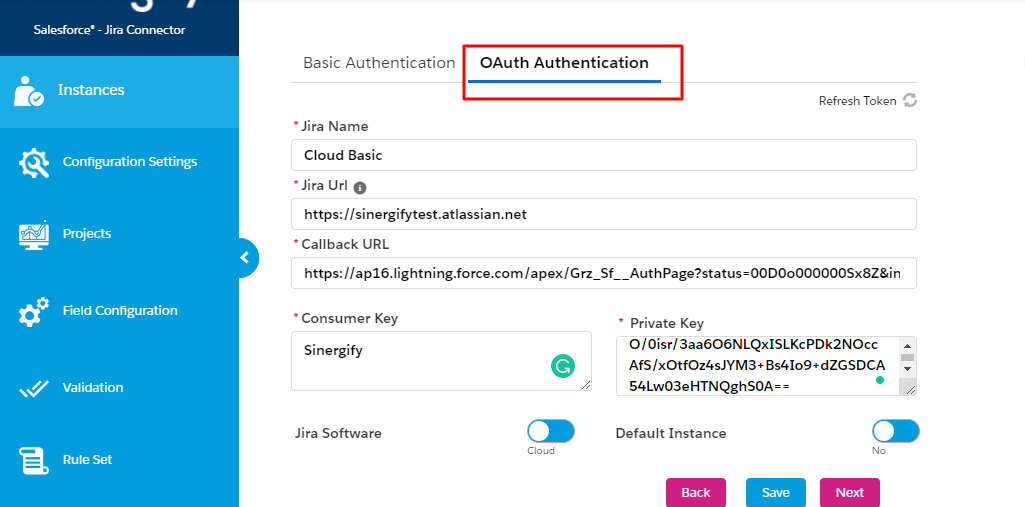
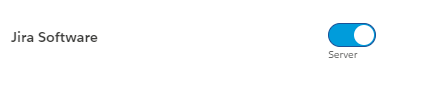
Step 16: Select the Jira software - Server or Cloud-based.
Step 17: Toggle to make this Jira instance your default Jira instance.

Step 18: Click ‘Save'.

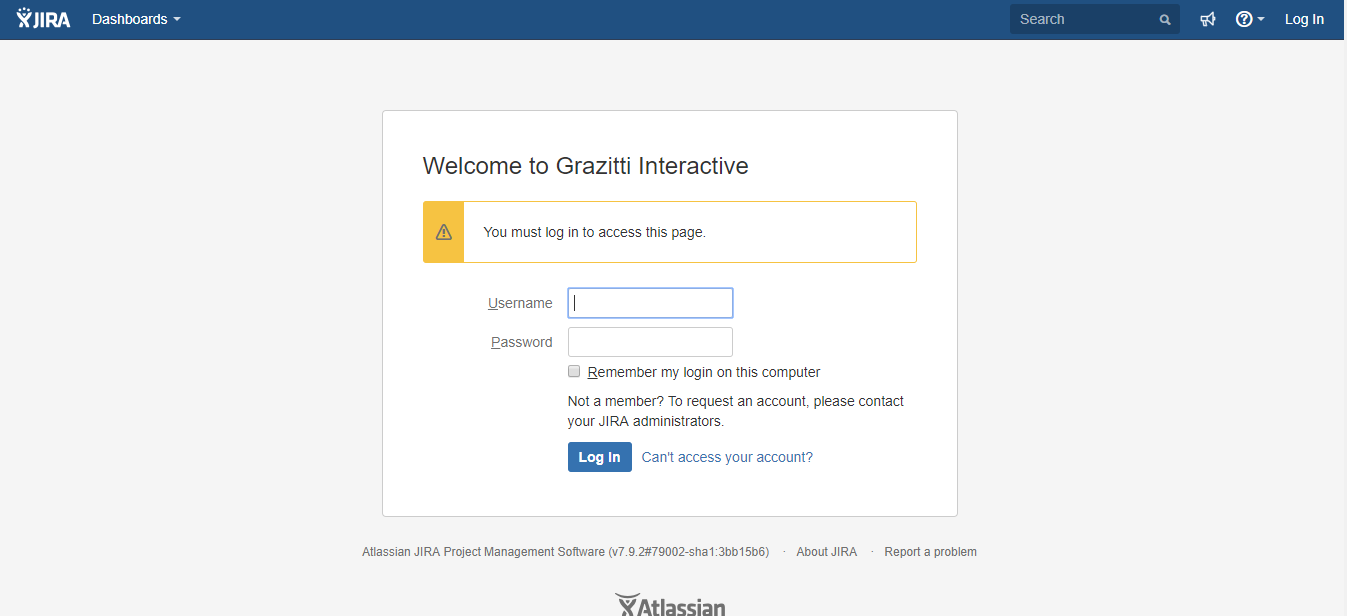
Step 19: A Pop-up will appear on your screen. Log in using your Jira credentials.
Step 20: After logging in, a new window will appear asking for the ‘Read’ and ‘Write’ permissions. Click ‘Allow’ to share access token else click ‘Deny’.

Step 21: A new window will appear on your screen asking you to allow or deny the access

Step 22: If allowed, the access token will be shared and saved automatically in Salesforce and the admin page will reload automatically.


