Feedback
Creating the 'Search Jira' Button
Published Date: 05-08-2024
Read Time:
There are two ways for Searching Jira:
- Search Jira using the ‘Search Jira’ button on the object detail page.
- Search Jira using the ‘Search Jira’ button on the related Jira tab of the object detail page.
Searching Jira Using the ‘Search Jira’ Button on the Object Detail Page
To start with, a ‘Search Jira’ button needs to be created and added to the object layout.
Follow the given steps to create a ‘Search Jira’ LWC button on the object details page.
Creating the ‘Search Jira‘ Button
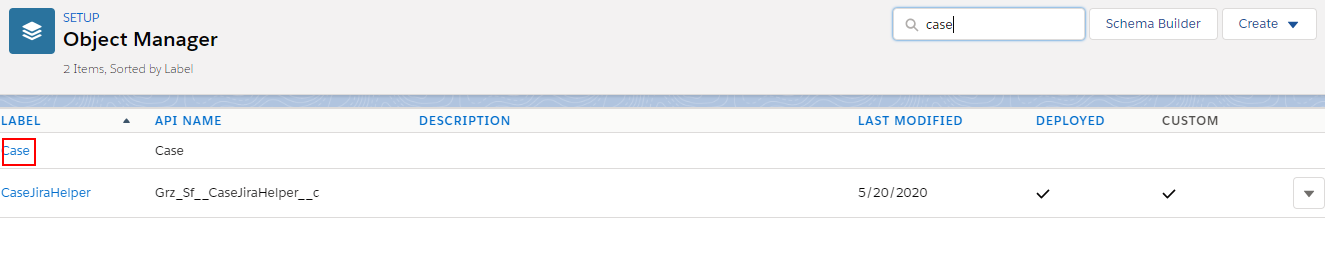
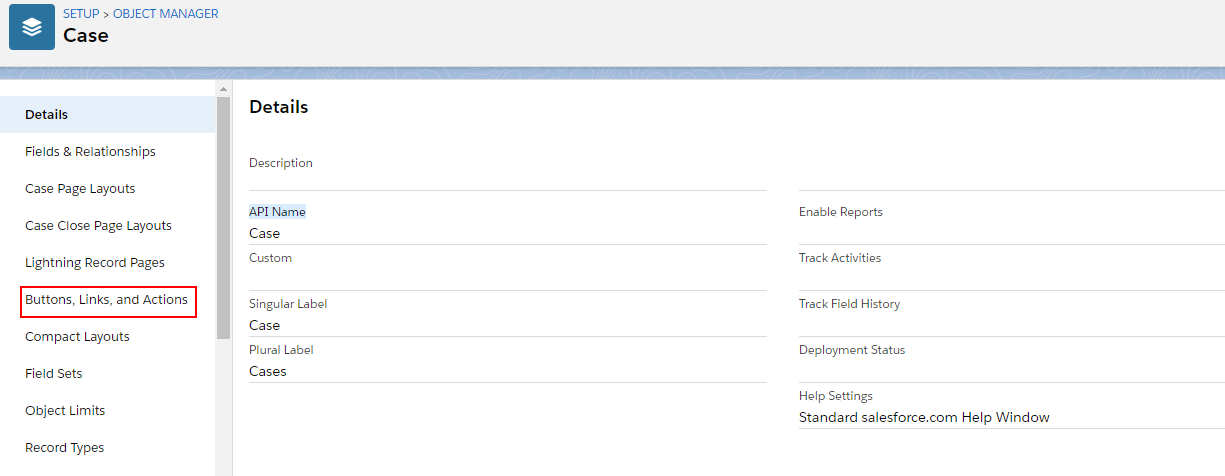
Step 1: From ‘Object Manager’, search the object for which the ‘Search Jira’ button is to be created and click on it. For example in the screenshots below, the ‘Search Jira’ button is to be added to the Case object.
Step 2: Click ‘Buttons, Links, and Actions’.
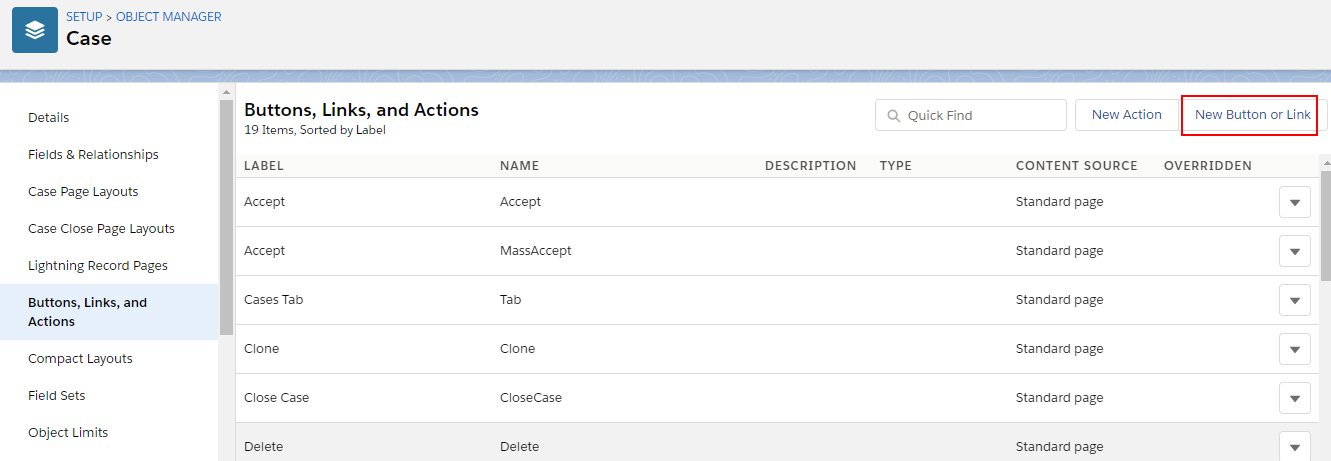
Step 3: Click ‘New Button or Link’.
Step 4: Fill in the required details. Enter ‘Search Jira’ in the ‘Label’ field and the ‘Name’ field will be auto-populated. Details for other fields are as below:
- Display Type: Detail Page Link
- Behavior: Display in the existing window with the sidebar
- Content Source: URL
Use the following link in the URL section:
/lightning/n/Grz_Sf__SearchJira?Grz_Sf_ws={!Case.Id}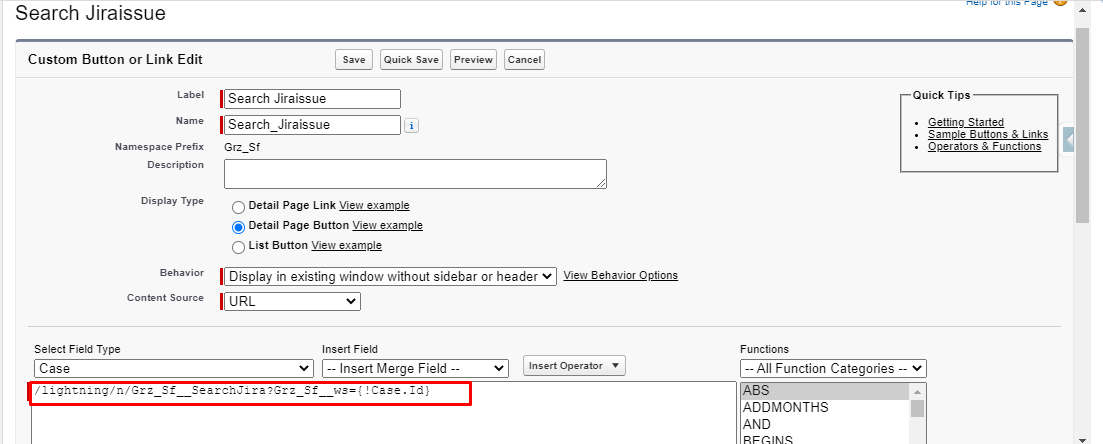
Step 5: Click ‘Save’.
Adding the search Jira button on Object Layout
Step 1: From the object Page Layout, click on the ‘Mobile and Lightning Actions’ field section.
Step 2: Drag the ‘Search Jira’ button from the Palette into the ‘Salesforce Mobile and Lightning Experience Actions’ section.
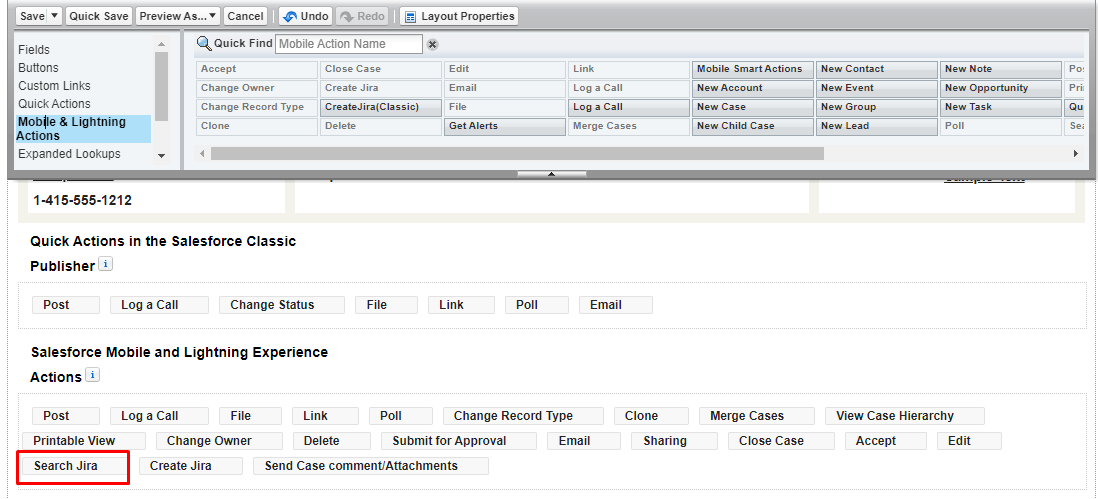
Step 3: Click ‘Save’.
Step 4: ‘Search Jira’ button is now be available on the object detail page.
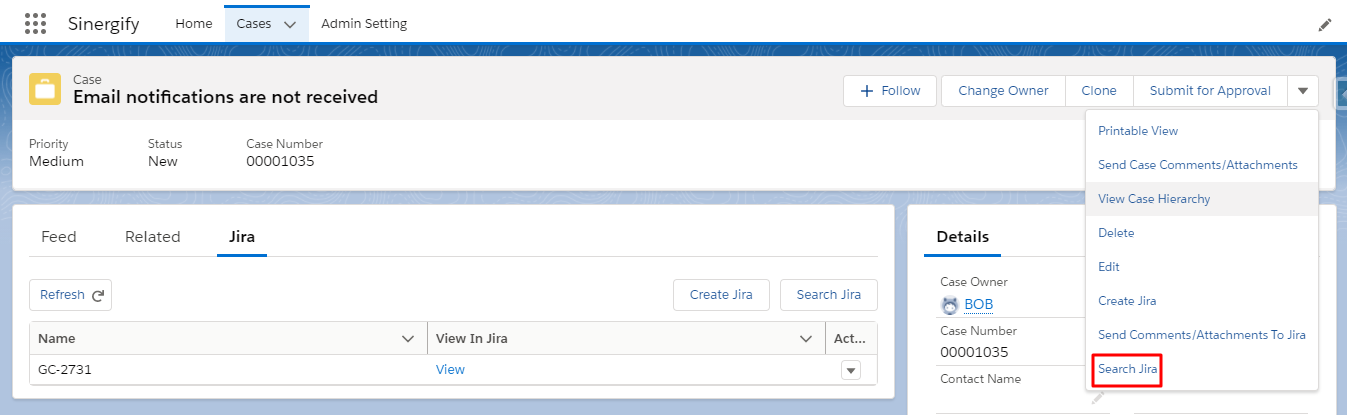
Search Jira
Users can search a Jira ticket linked to an object by clicking on the Search Jira button.
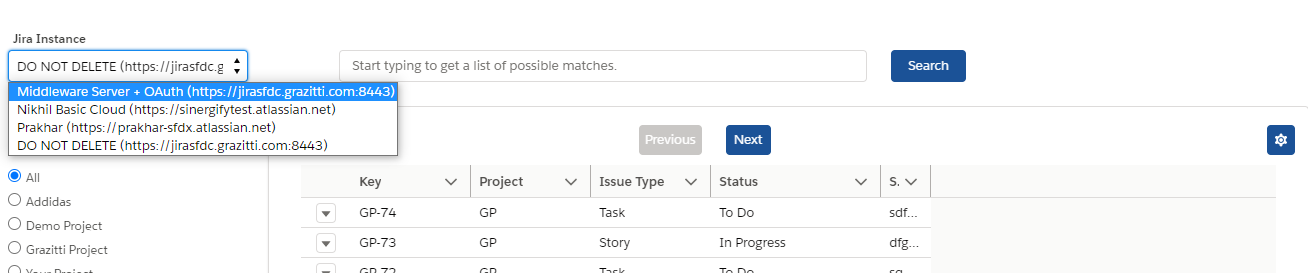
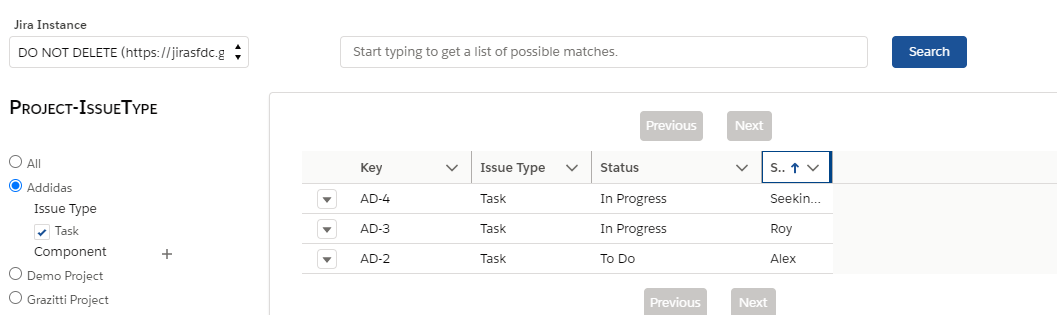
On the search Jira screen, you can select the Jira instance for getting the search results. Under the Project Issue Type categories, you have the option to search from ‘All’ the projects or from specific mapped projects.
The admin is to decide whether to enable Displaying the ‘All’ option. Using ‘All’, the agents can search in all the Jira projects whether the projects are configured in Sinergify or not. But they can link a Jira issue with a case only if it belongs to a mapped project.
The purpose of showing them all Jira tickets is so that they can identify another project that is to be mapped in Salesforce. This will reduce the duplicity and will increase the configuration efficiency.
On selecting the ‘All’ option, Jira results from all the instances configured with your Org will get displayed.
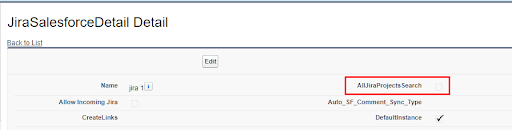
For enabling ‘All’ option on the Search Jira screen, you need to enable ‘AllJiraProjectsSerach setting’ under the ‘SalesforcedetailPage’ Custom setting.
You can choose one project at a time and related issue types. Jira can be searched accordingly.
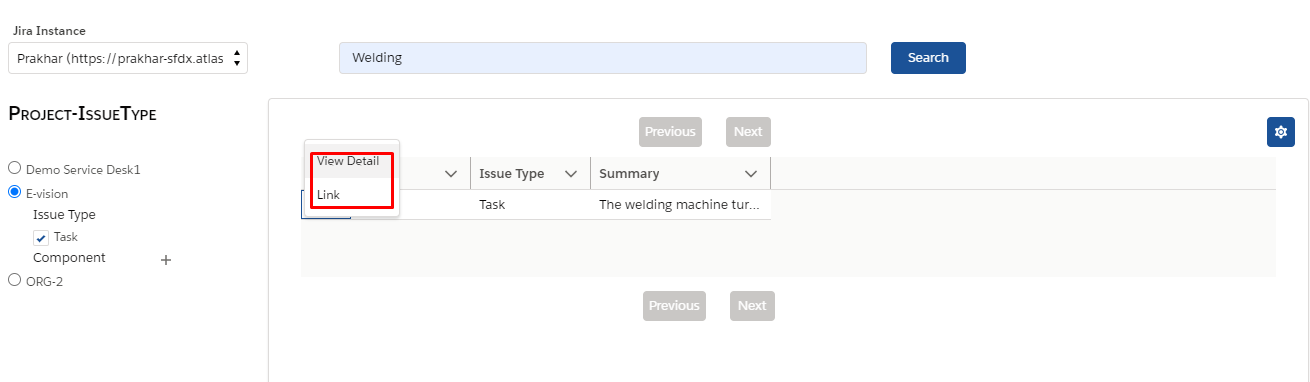
For each Jira row, we have two options in the dropdown:
- Link Jira: Click on the link to associate this Jira with a Salesforce record. This option will be disabled for the records which are already linked with the current case.
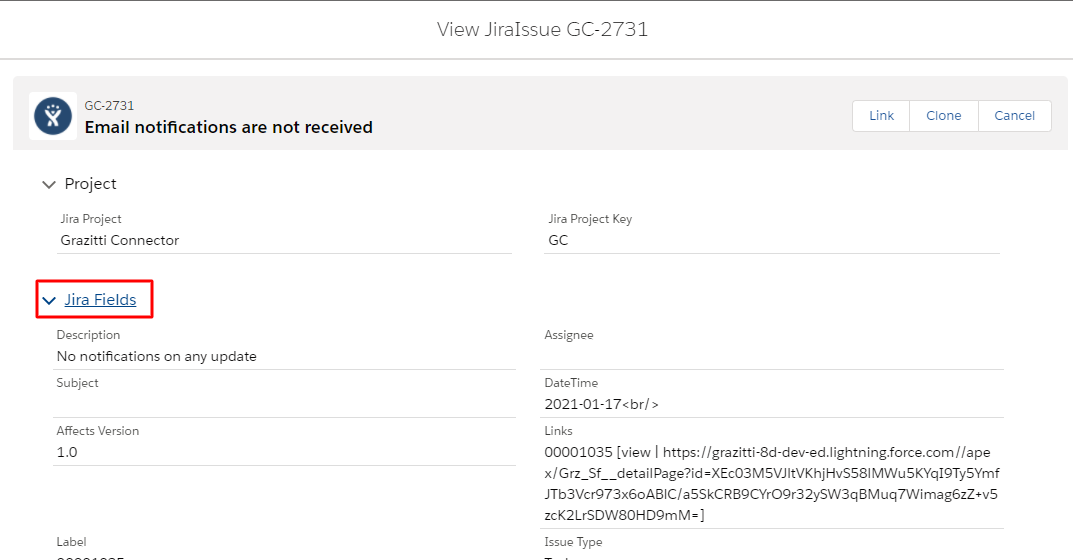
- View Jira Details:Click on View details to view all the details of the Jira issue and from there, you can link the Jira as well.
-

You can now view the Jira details by clicking on the View Detail option. You can link and clone the Jira result.

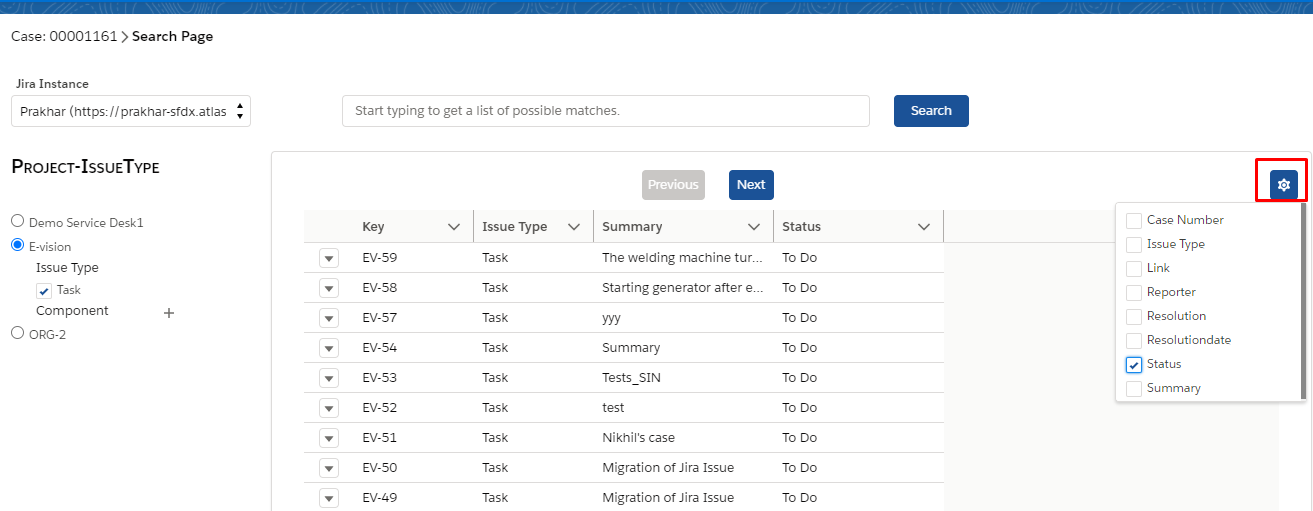
- Gear icon: licking on the gear icon will populate a list of fields that are mapped under the project. Users can select and view the values in those fields as well.