Feedback
Creating 'Related list' Visualforce page for the object
Published Date: 05-08-2024
Read Time:
Step 1: From ‘Setup’, search ‘Visualforce’ in the ‘Quick Find’ box. Click ‘Visualforce Pages’ from the search results.
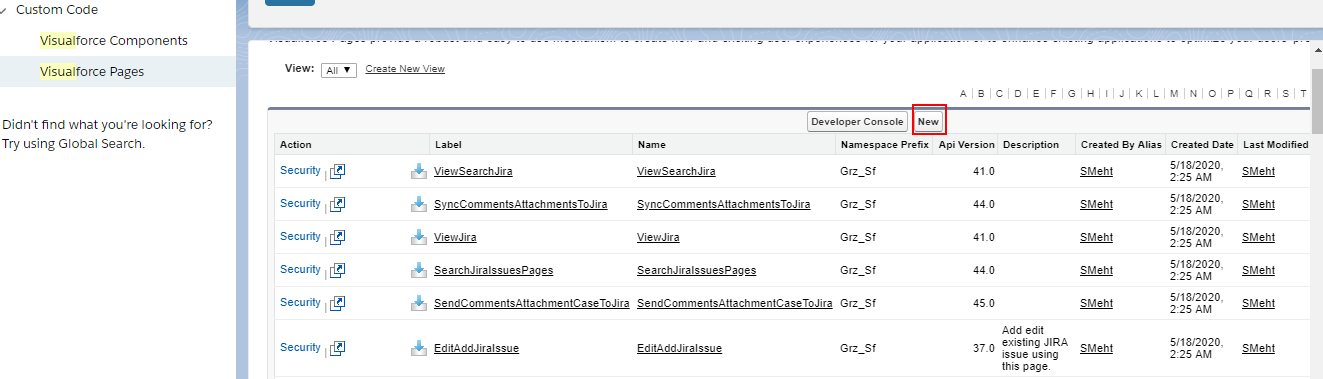
Step 2: Click ‘New’.
Step 3: Enter ‘Linked Jira’ in the ‘Label’ field and the ‘Name’ will be autopopulated.
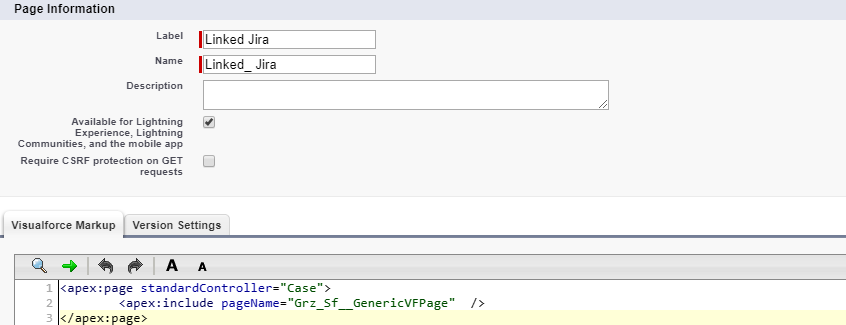
Step 4: Paste the following Apex code in the ‘Visualforce Markup’ section.
<apex:page standardController="Case">
        <apex:include pageName="Grz_Sf__GenericVFPage"  />
</apex:page>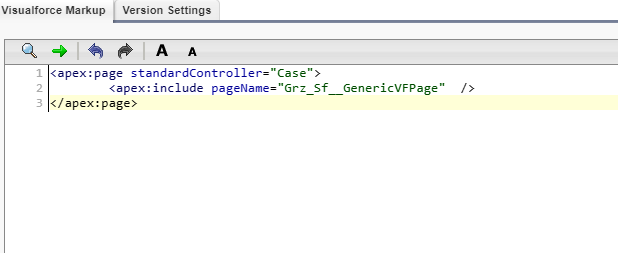
Step 5: Click ‘Save’.
Adding ‘Related list’ on the object page layout
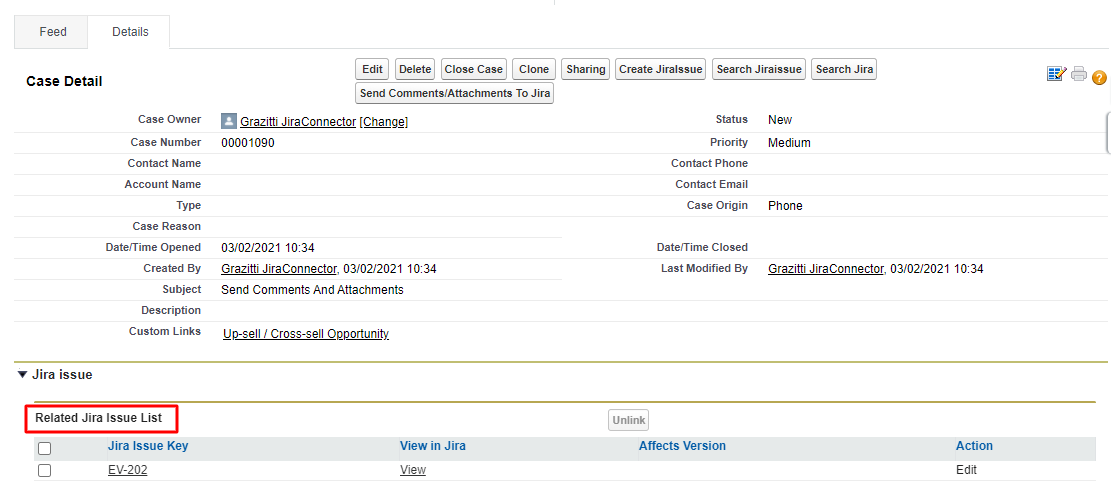
Step 1: On the details section of the object, click Page Layout. (For example, in the below screenshot case page layout is selected as the related list is added on the case object).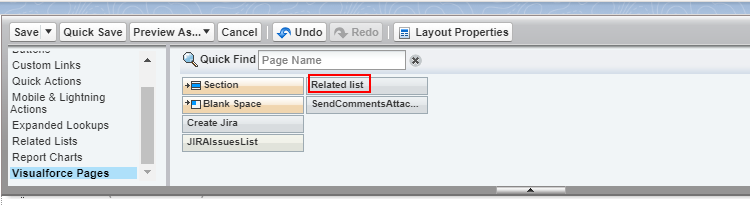
Step 2: Click on Visualforce Pages in the Palette. Drag the ‘Linked Jira’ from the Palette and adjust it below any section of case detail (preferably place it above related list).
Step 3: Click ‘Save’.
Step 4: Linked Jira issues will be visible on the object detail page.
Controlling the Visibility of Jira Fields Under the Related List of Jira Records
In case you don’t want all the Jira fields to be shown on the related list record, there is an option of allowing and restricting the visibility of the Jira fields. For example, if you don’t want the agents to see the address of customers while viewing the Jira details, you can remove this address field from the related list record.
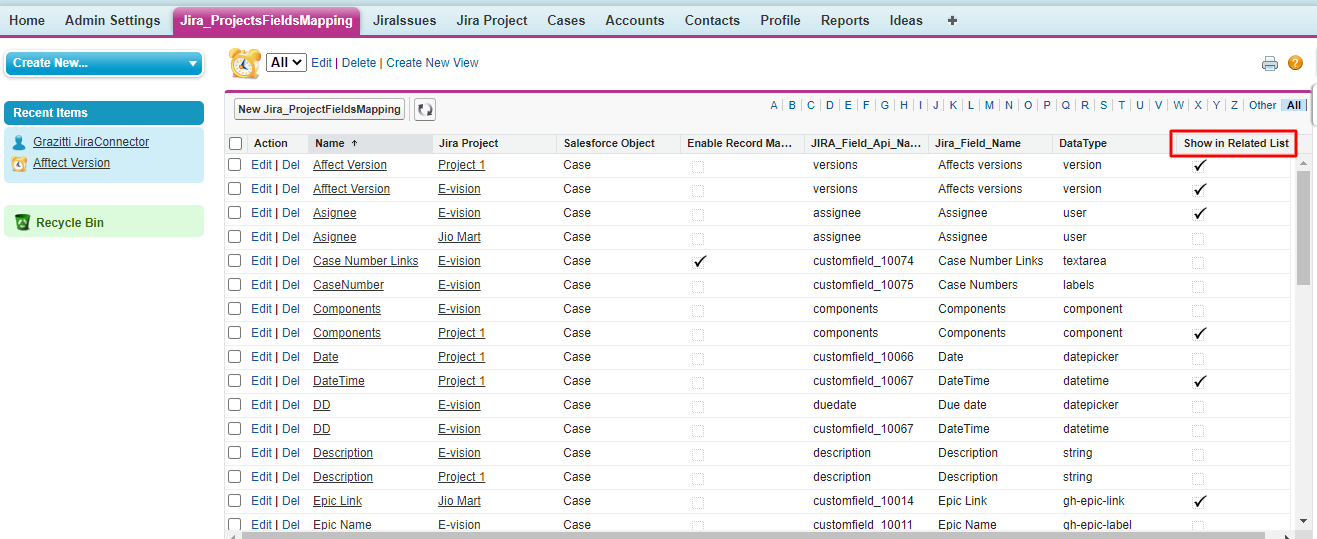
How to add/remove the fields from the related list of Jira records?
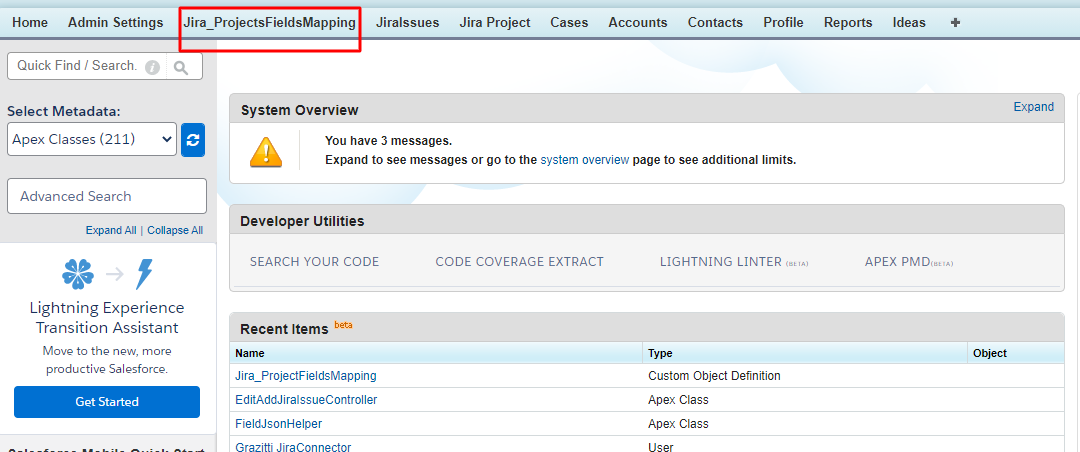
Step 1: From your org home page , click on ‘Jira_ projectsFieldMapping tab.
Step 2: Open the Jira Project Mapping. You will see a list of all the mapped Jira fields of different Jira projects.
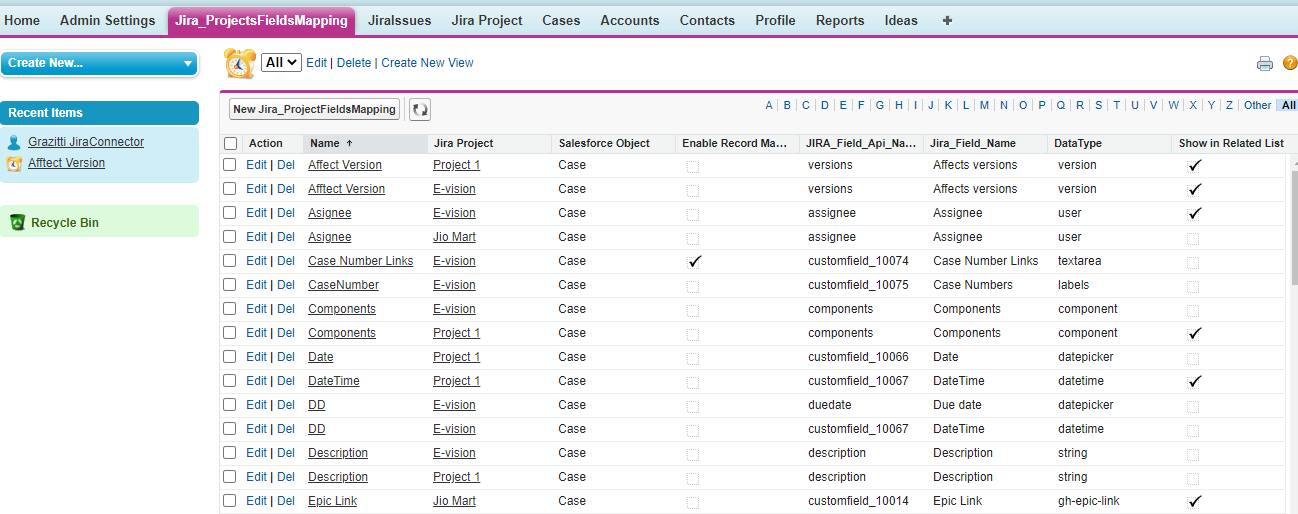
Step 3: You can select/deselect the 'Show in Related List’ option for every field. Fields for which the checkbox is enabled will be visible under the related Jira list.
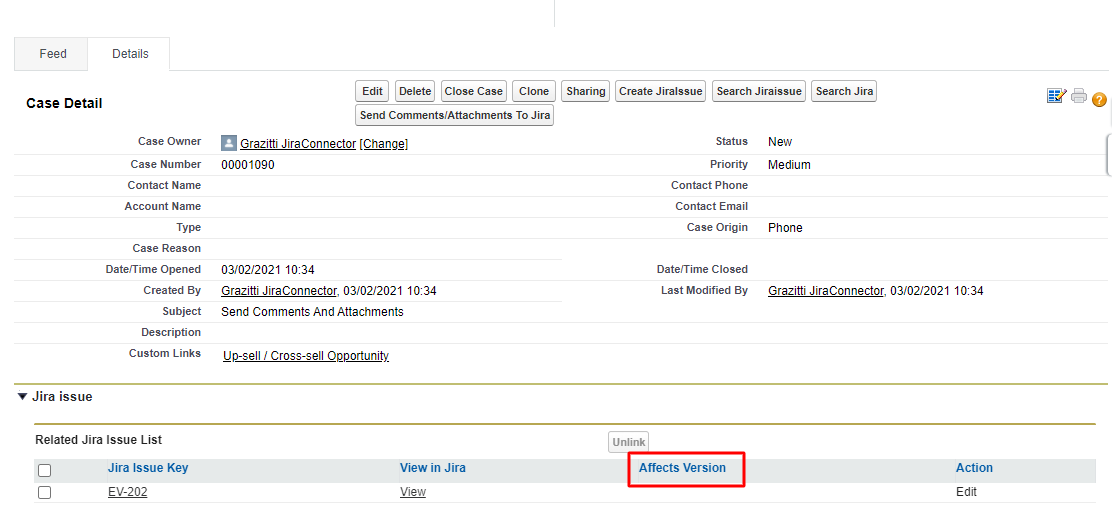
For example, ‘affect version’ is a Jira field on the E-Vision project that we want to showcase on the related Jira list.
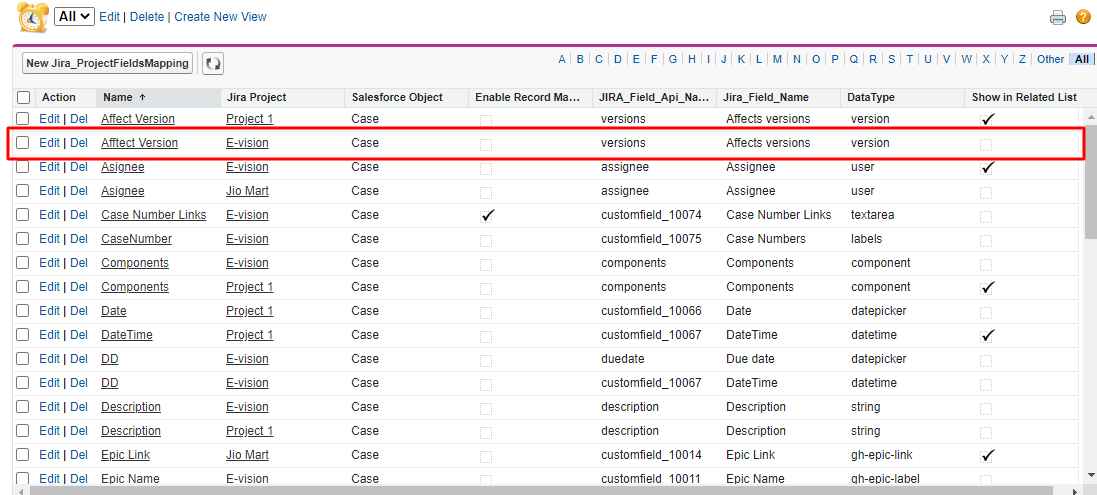
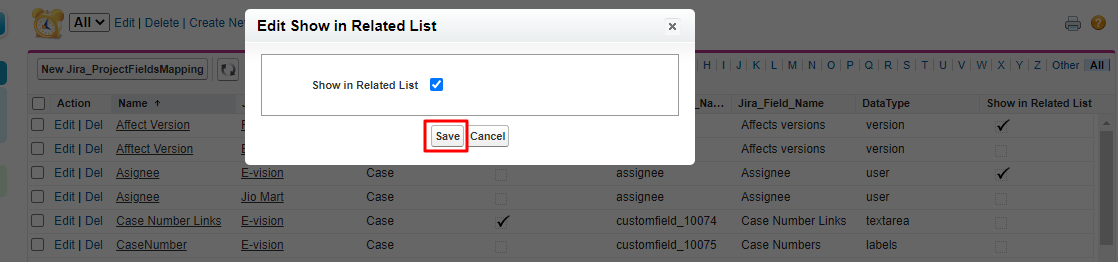
Click the ‘Show in Related List’ box for the ‘Affect Version’ field for the E-Vision project. A pop- up dialog box will appear. Select the checkbox and Save .
Once saved, you will be able to view the field added on the Related list of a Jira record as in the screenshot below.