Feedback
Field Configuration
Published Date: 05-08-2024
Read Time:
From the ‘Fields Configuration’ sub-tab under Admin Settings, fields for both Jira and Salesforce instances can be configured.
How to configure the fields?
Step 1: Select the object(s), whose fields are to be mapped with the Jira fields.
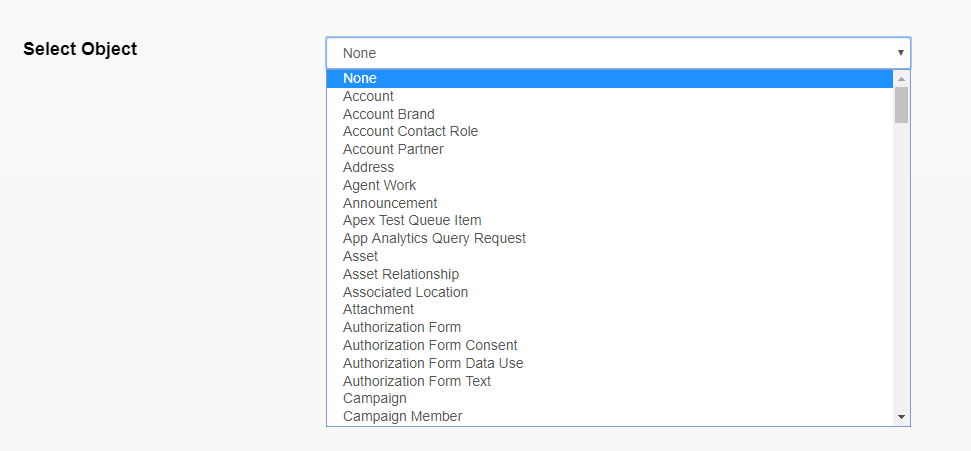
Once the object(s) is/are selected, it will be visible as in the below screenshot. The users can also remove the selected objects (if required).

Step 2: Choose a Jira Project.

Step 3: Based on selected Jira project, a list of mandatory Jira fields will appear. Users can ‘edit’ the labels of the Jira Fields. Only the names used in the labels for Jira fields will appear on the Jira creation page on the Salesforce instance.

Step 4: Users can also map the Jira fields with the Object fields and it is completely optional. If incase Jira field is mapped to the Case field, then the case field will be prepopulated with the value of the Jira field.
Some other permission checks that can be applied to the fields are:
Read-only: This option is only applicable if the users choose the Salesforce object field for mapping with the Jira field. Fields for which read-only is enabled cannot be edited in the Salesforce instance. Users can only view these fields.
Reporting: If reporting is enabled for the fields, data associated with the fields can be fetched with the help of Salesforce reports. For some fields reporting feature is pre-enabled like:
- Status
- Summary
- Description
- Priority
- Labels
- Assignee
Reporting can be enabled only once the field mapping is saved.
Step 5: Users can map other Jira fields available for the project to the case field and also have the option to mark the fields mandatory on Jira detail page ‘by checking ‘Required’ box on the fields.
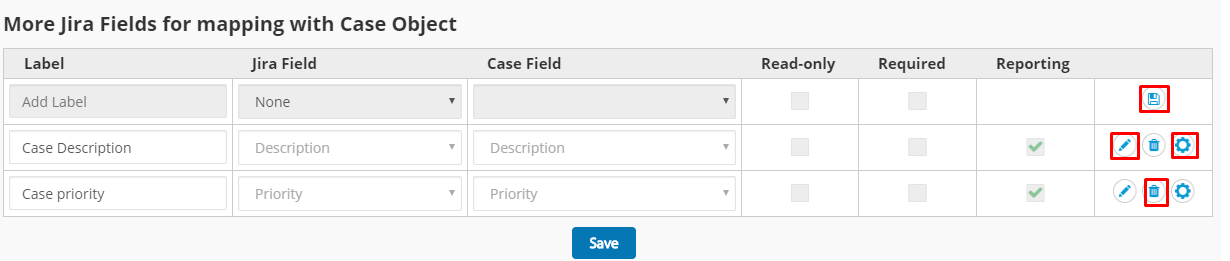
The fields can be saved and deleted by clicking on the respective icons available. Also, changes can be made to the fields by clicking ‘Settings’.
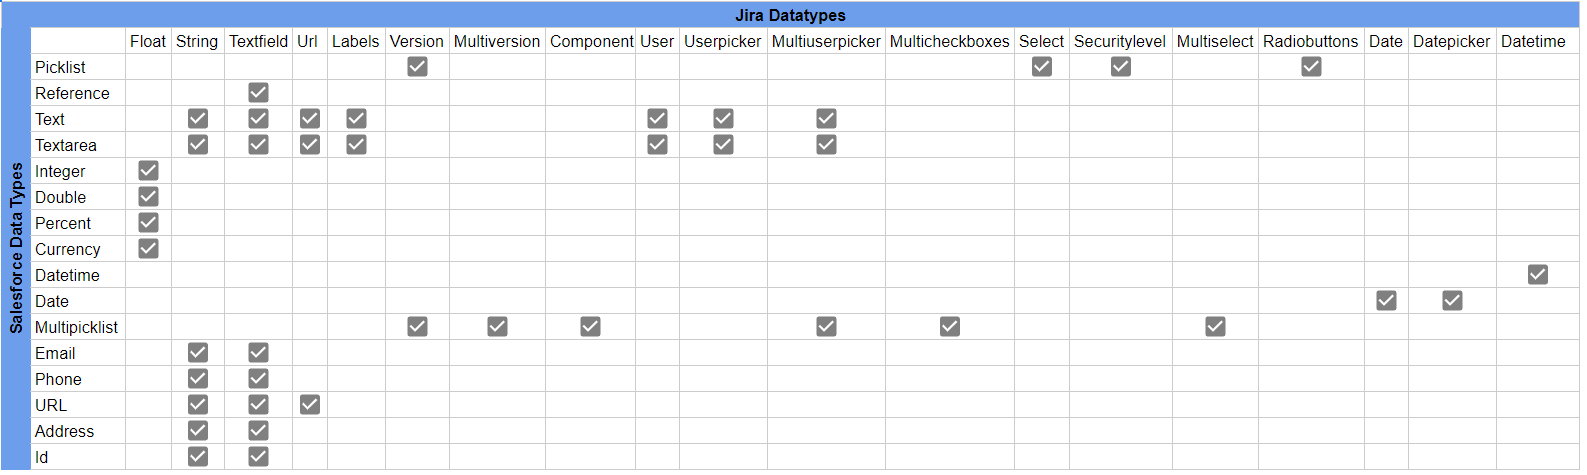
Salesforce and Jira Datatypes
Settings
Further actions can be performed on the fields with the help of ‘Settings’.

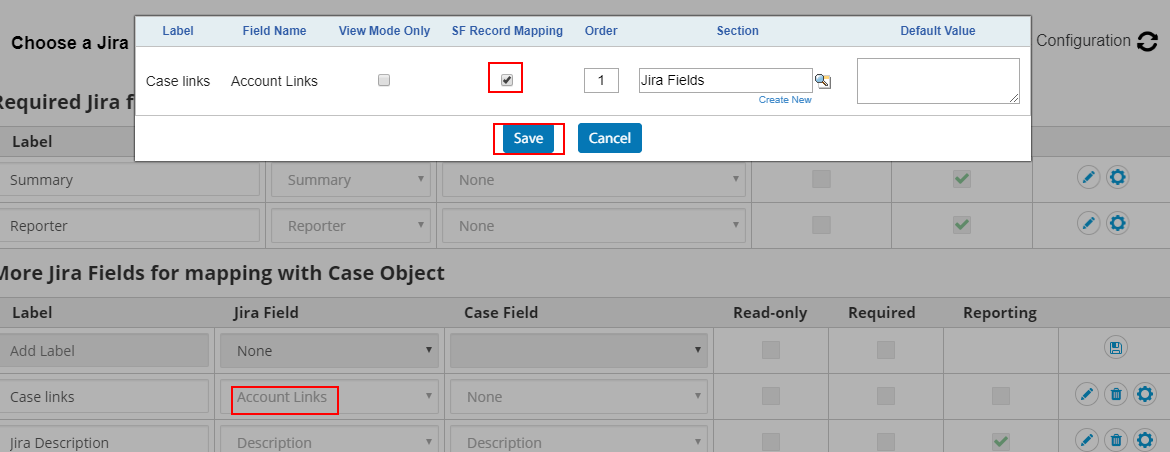
Upon clicking, a dialog box appears. Refer to the screenshot below

- Label: The label is decided by the user for the Jira field. The label name appears on the create Jira detail page on Salesforce instance.
- Field Name: Name of the Jira Field.
- View Mode Only: If enabled, users can only view the value in the Jira field in the Salesforce instance but can’t edit them.
- Default Value: To give some default values to the mapping if they are not mapped with Salesforce object fields.
- Order: Users can set the order in which the field should appear in the sections.
- Sections: Fields can be arranged in different sections on the create Jira page in Salesforce. Also, users can create new sections by clicking ‘Create New’. The below screenshot shows the new section view.

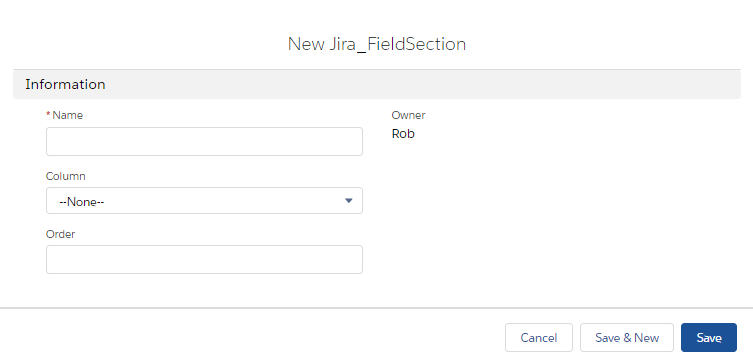
Fields of New section
- Name: Enter the name of the view.
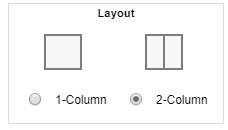
- Column: Users can choose between ‘1-column’ and ‘2 -column’ view.
- Order: The order of fields under the New view can be defined.

SF Record Mapping: This is useful in cases where users want to provide some extra information related to Salesforce records on Jira which cannot be achieved via mapping. SF Record mapping provides an option to showcase the Salesforce record detail page, which can be opened from Jira using an encrypted link.
This needs to be configured for usage. The following configurations need to be activated.
- Setting up Custom Settings.
- Dedicate the Jira field which will store the links (This field can be different for each project).
- Creation of Detail Page.
- Fieldset to show Salesforce details.
Setting up Custom settings
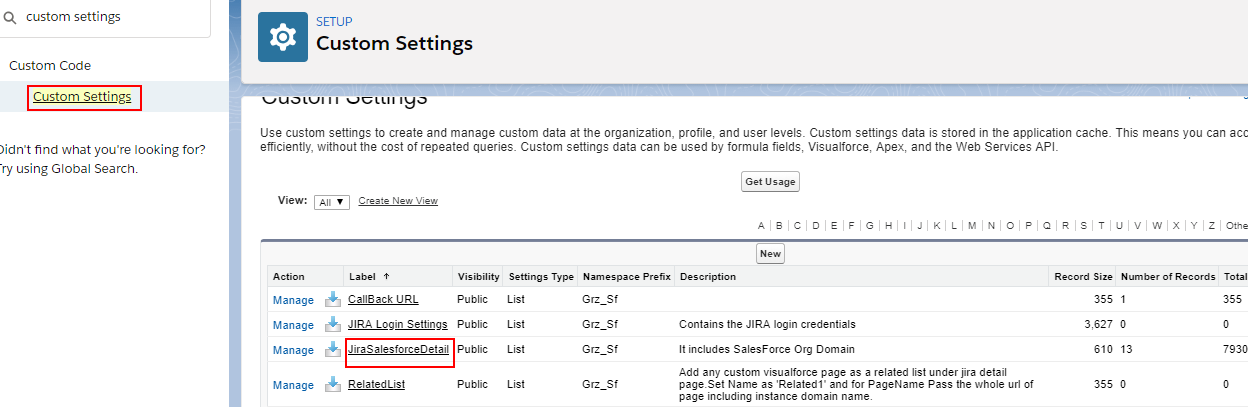
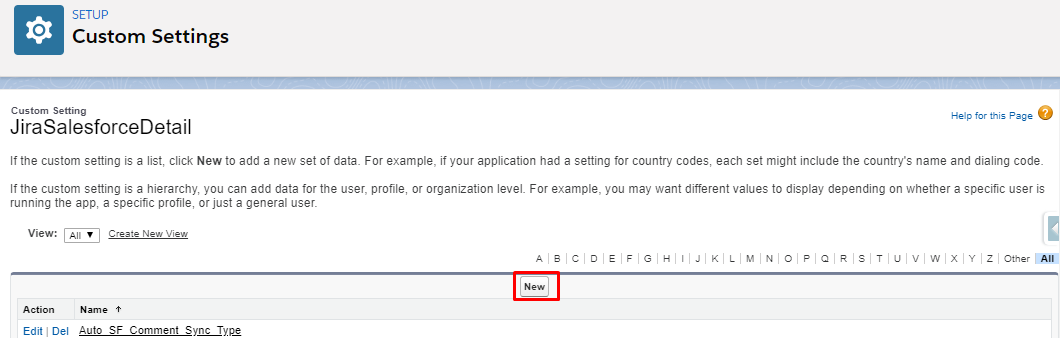
Step 1: From ‘Setup’, search custom settings in the ‘Quick Find’ box and click ‘Custom Settings’ from search results. Click ‘JiraSalesforcedetail’.
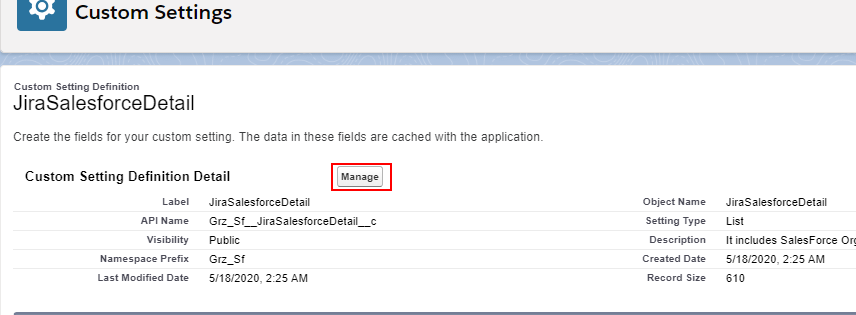
Step 2: Click ‘Manage’.
Step 3: Click ‘New’.
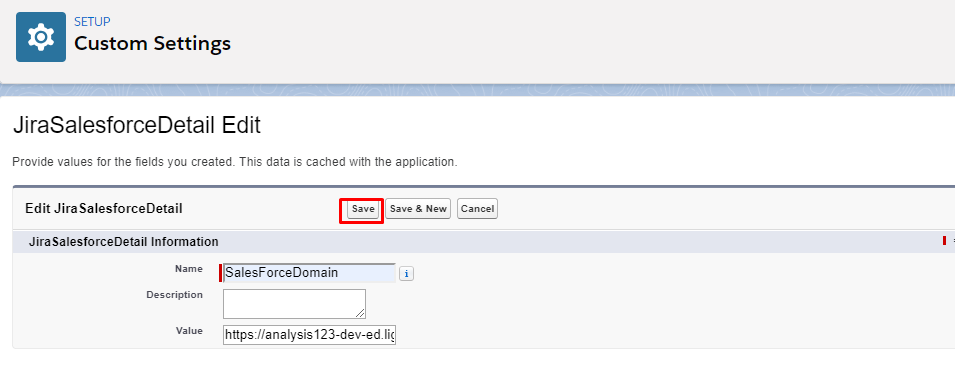
Step 4: Fill in the record details. Enter ‘SalesForceDomain’ in the ‘Name’ field. Fill the description and in the ‘Value’ field, insert the ‘Salesforce Instance URL’.
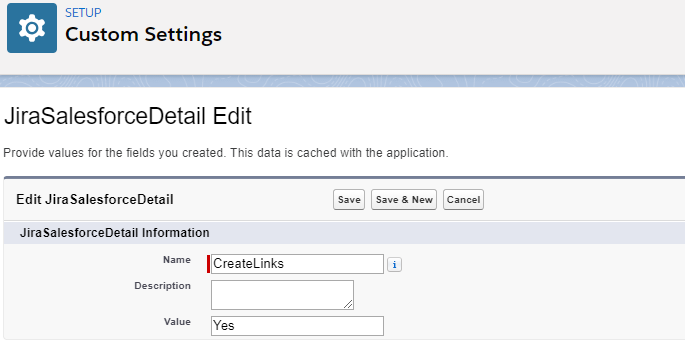
Step 5: Create another record in ‘JiraSalesforecDetail’.
Step 6: Enter ‘CreateLinks’ in the ‘Name’ field and in the ‘Value’ field, enter ‘Yes’ or ‘No’.
- ‘Yes’ to create links.
- ‘No’ to sync record names only.
Step 7: Click ‘Save’.
Step 8: Create one more record under ‘JiraSalesforceDetail’.
Step 9: Enter ‘Timestamp’ in the ‘Name’ field. Fill the description and add the time duration for which the link will remain active on Jira instance in the ‘Value’ field. If the link is not linked within the set time limit, it gets expired and a new link gets generated automatically while clicking on the ‘View Jira’ link on the object-related list.
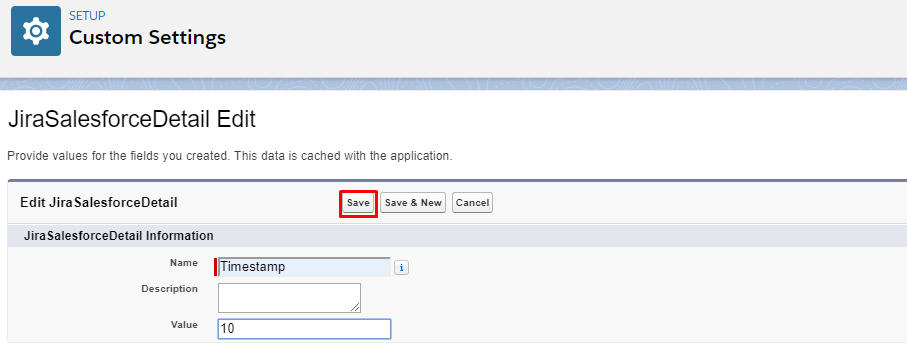
Step 10: Click ‘Save’.
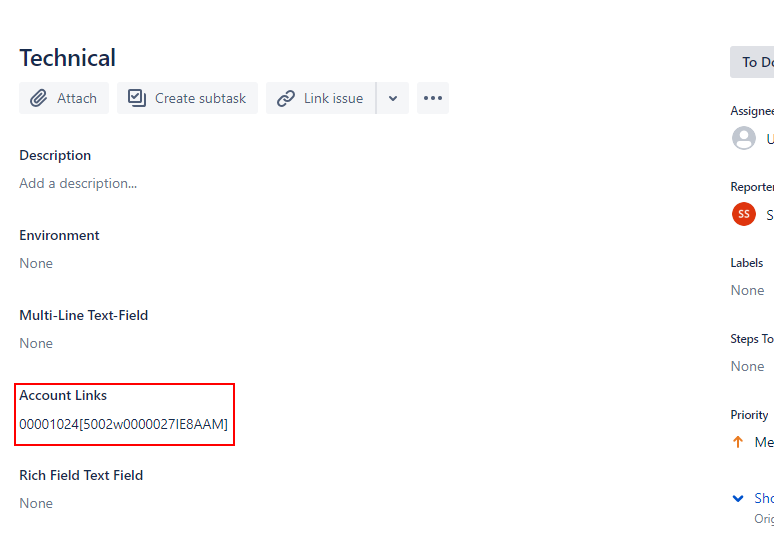
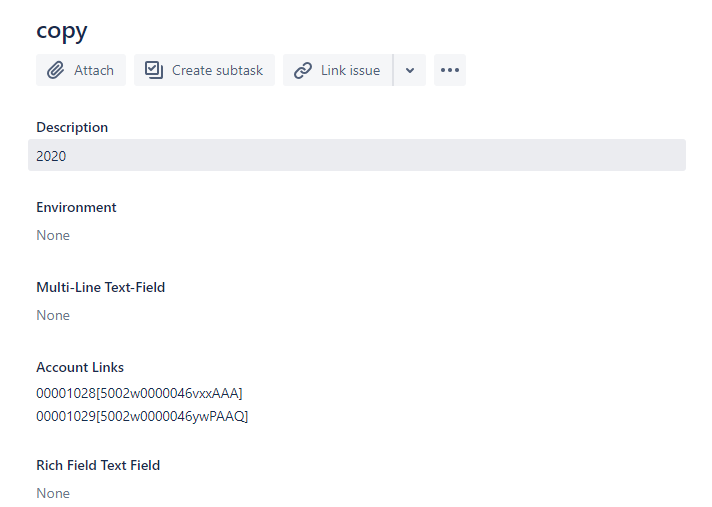
Dedicating Jira Field: A Jira field is dedicated for storing links that direct from Jira to the Salesforce detail page. This field can be different for each project. For example in the below screenshot, the Accounts link (Jira Field) is the dedicated field.
Creating Field Set
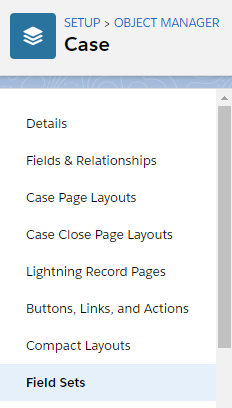
Step 1: From ‘Object Manager’, search the object for which fieldset is to be created. Once you selected the object, Click ‘Field Sets’ from sub-tab. In the below screenshot, the case object is selected.
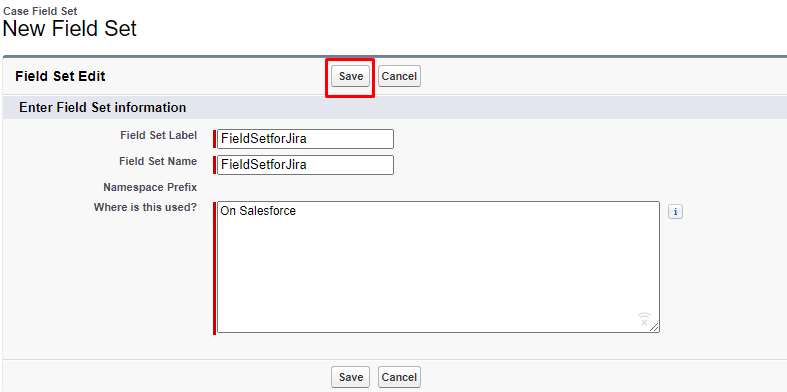
Step 2: Create a new fieldset.
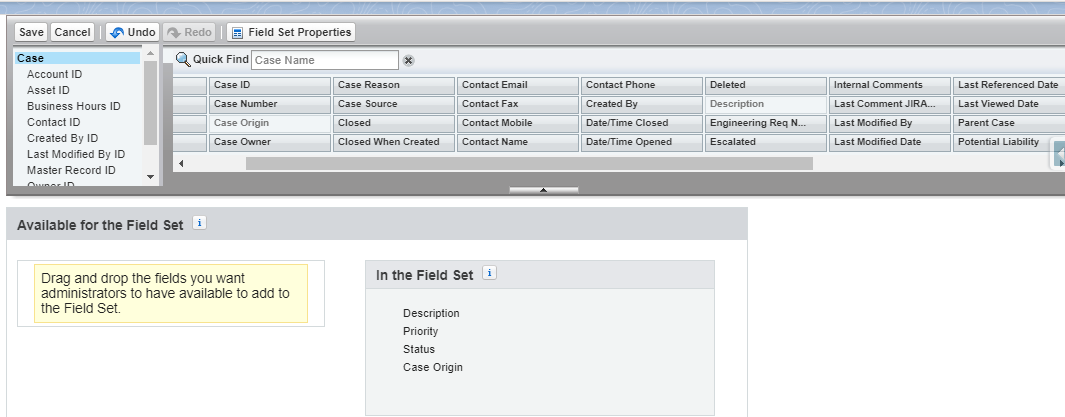
Step 3: Drag and drop the field from the palette into the fieldset section and click ‘Save’.
Creation of Detail Page
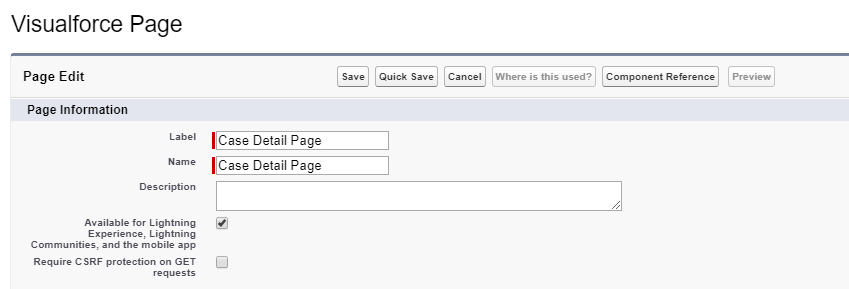
Step 1: Go to setup. In the ‘Quick Find’ search box, search ‘Visualforce Pages’. Click on it from sub-tab.
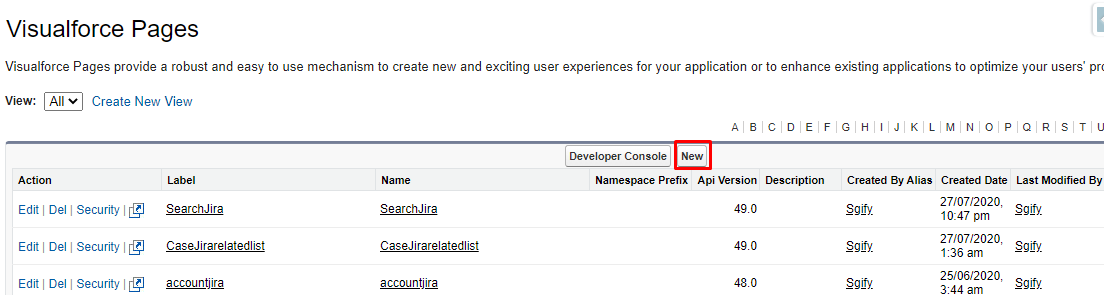
Step 2: Enter ‘CaseDetailPage’ in the label field and the name will be autopopulated. Check the box next to ‘Available for Lightning Experience, Lightning Communities, and the mobile App’.
Step 3: Paste the below Apex code in the ‘Visualforce Markup’ section.
<apex:page standardController="Case" showHeader="false" sidebar="false">
<apex:form >
<apex:pageBlock title="{!Case.CaseNumber}" >
<apex:pageBlockSection title="Detail" >
<apex:repeat value="{!$ObjectType.Case.FieldSets.FieldsetforJira}"  var="f">
<div style="width:30%;font-weight:bold;float:left" >{!f} </div>
<div style="width:70%;float:left">{!Case[f]} </div>
</apex:repeat>
</apex:pageBlockSection>
</apex:pageBlock>
</apex:form>
</apex:page>

Step 4: Click ‘Save’.
Viewing the salesforce details via clicking on the link ( Incase create link value is yes).
Step 1: On the Jira instance, click ‘view’ next to the field (on which Salesforce mapping is enabled). The view link will remain active only for the time set in the timestamp record and get expired once the time limit is over. Users get the warning message when the link gets expired. The link gets renewed automatically.

Step 2: Salesforce record Detail screen appears containing the fields defined while creating the fieldset.

Viewing the salesforce Record Name and Id on Jira (In case create link value is No).
In case an admin has configured value of ‘Create Link’ custom setting to ‘No’, then on the Jira instance, only the object name and object ID can be viewed.