
 Feedback
Create Jira Button
Published Date: 05-08-2024
Read Time:
Creating a new Visualforce page for ‘CreateJIRA’ button.
Step 1: From ‘Setup’, enter ‘Visualforce’ In the ‘Quick Find’ Search box. Click ‘Visualforce Pages’ from search results. 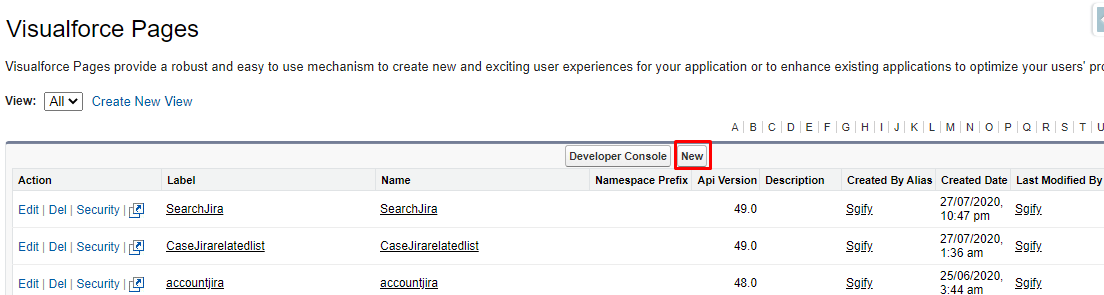
Step 2: Click ‘New’.
Step 3: Enter ‘Create Jira’ in the ‘Label’ field and the ‘Name’ field will be autopopulated.
Step 4: Make sure to check the box next to ‘Available for Lightning Experience, Lightning Communities, and the Mobile app’.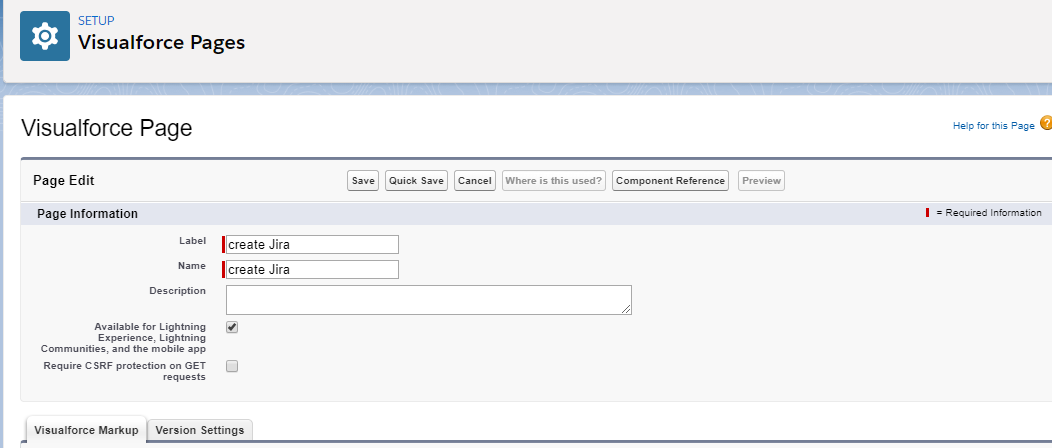
Step 5: Paste the given Apex code in the ‘Visualforce Markup’ section.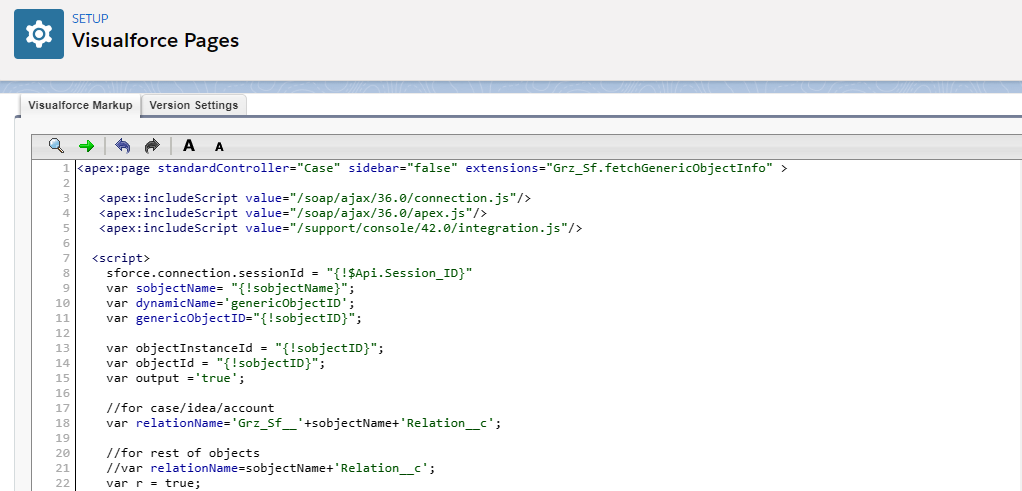
Look for the comments in code
//for case/idea/account object
var relationName='Grz_Sf__'+sobjectName+'Relation__c';
//for rest of objects
var relationName=sobjectName+'Relation__c';
<apex:page standardController="Case" sidebar="false" extensions="Grz_Sf.fetchGenericObjectInfo" >

   <apex:includeScript value="/soap/ajax/36.0/connection.js"/>
   <apex:includeScript value="/soap/ajax/36.0/apex.js"/>
   <apex:includeScript value="/support/console/42.0/integration.js"/>

  <script>
    sforce.connection.sessionId = "{!$Api.Session_ID}"
    var sobjectName= "{!sobjectName}";
    var dynamicName='genericObjectID';
    var genericObjectID="{!sobjectID}";

    var objectInstanceId = "{!sobjectID}";
    var objectId = "{!sobjectID}";
    var output ='true';

    //for case/idea/account
    var relationName='Grz_Sf__'+sobjectName+'Relation__c';

    //for rest of objects
    //var relationName=sobjectName+'Relation__c';
    var r = true;
    var RelationType = sforce.connection.query("SELECT Id, Name, Grz_Sf__Description__c, Grz_Sf__Value__c FROM Grz_Sf__JiraSalesforceDetail__c where name ='Relationship_Type' Limit 1");

    records = RelationType.getArray("records");
    var relation=records[0].Grz_Sf__Value__c ;
    var stringQuery = 'SELECT Id FROM Grz_Sf__JiraRelationship__c where '+ relationName +' = \'' +objectInstanceId + '\' limit 1';
    var objectJiraRelation = sforce.connection.query(stringQuery);
    var  Relrecords = objectJiraRelation.getArray("records");
    var valid= sforce.apex.execute("Grz_Sf.ValidationChecker","checker",{objectId :objectInstanceId });
   if(output == 'false'){

        r = false;
        ret = false;
        alert('Your free Sync limit is over. Please contact [email protected] for increasing Limit');
   }else if(valid!=''){
        alert(valid);
        r=false;
        ret = false;
    }else{
       if(relation == 'OCOJ' && Relrecords.length>0 && Relrecords[0].Id !=null){
            r=false;
            ret = false;
            alert( sobjectName +' already Linked to JIRA.');
        }else if(relation != 'OCOJ' && Relrecords.length>0 && Relrecords[0].Id !=null ){
            if( Relrecords.length>0 && Relrecords[0].Id !=null){
                r = confirm( sobjectName + ' already Linked to JIRA. Do you want to create a new Jira Issue?');
                if(!r && sforce.console.isInConsole()){
                    ret = false;
                    returntoObject();
                }
            }
        }
    }
    if(r){
        var openSuccess = function openSuccess(result) {
        }
         var closeSubtab = function closeSubtab(result) {
            var tabId = result.id;
            sforce.console.closeTab(tabId);
        }
         var Createsubtabs = function Createsubtabs(result) {
             var pids=result.ids[0];
             var sids=result.ids[result.ids.length-1];
             if(pids==sids){
                 sforce.console.getEnclosingPrimaryTabId(CreateTabIdagain);
            }else{
                sforce.console.getEnclosingPrimaryTabId(CreateJiraTab1);
                sforce.console.getEnclosingTabId(closeSubtab);
            }

        }
         var CreateTabIdagain = function CreateTabIdagain(result) {
             var ids=result.id;
             sforce.console.openPrimaryTab(ids,'/apex/Grz_Sf__EditAddJiraIssue?'+dynamicName+'='+objectId , true);
        }
        var CreateJiraTab = function CreateJiraTab(result) {
            var ids=result.id;
            sforce.console.getSubtabIds(ids,Createsubtabs);
        }
        var CreateJiraTab1 = function CreateJiraTab(result) {
            var ids=result.id;
            sforce.console.openSubtab(ids,'/apex/Grz_Sf__EditAddJiraIssue?'+dynamicName +'='+objectId , true,'Create Jira', null, openSuccess, 'salesforceSubtab');
        }
        if (sforce.console.isInConsole()){
            sforce.console.getEnclosingPrimaryTabId(CreateJiraTab);
        }else{
            window.open('/apex/Grz_Sf__EditAddJiraIssue?genericObjectID='+objectId ,"_self","");
            window.focus();
        }
    }else {
        var getsubtabs = function getsubtabs(result) {
            var pids=result.ids[0];
            var sids=result.ids[result.ids.length-1];
            if(pids==sids){
                sforce.console.getEnclosingPrimaryTabId(showTabIdagain);

            }else{
                sforce.console.closeTab(sids);
            }
        }
        var showTabIdagain = function showTabIdagain(result) {
            var ids=result.id;
            sforce.console.openPrimaryTab(ids,'/'+objectId , true);
        }

        var showTabId = function showTabId(result) {
            var ids=result.id;
            sforce.console.getSubtabIds(ids,getsubtabs);
        }

        if (sforce.console.isInConsole()){
            sforce.console.getEnclosingPrimaryTabId(showTabId);
        }else{
            var theme = "{!$User.UIThemeDisplayed}";
            if(theme == 'Theme4d' ){
                sforce.one.navigateToSObject(objectInstanceId );
            }else{
                location.href='/'+objectInstanceId ;
            }
        }

    }
    function returntoObject(){
        var openSuccess = function openSuccess(result) {
        }
        var closeSubtab = function closeSubtab(result) {
            var tabId = result.id;
            sforce.console.closeTab(tabId);
        }
        var CreateJiraTab = function CreateJiraTab(result) {
            var ids=result.id;
            sforce.console.openSubtab(ids,'/'+objectId , true, + sobjectName + 'Detail', null, openSuccess, 'salesforceSubtab');
            sforce.console.getEnclosingTabId(closeSubtab);
        }

        var getsubtabs = function getsubtabs(result) {
            sforce.console.getEnclosingPrimaryTabId(showTabIdagain);
        }

        var showTabId = function showTabId(result) {
            var ids=result.id;
            sforce.console.getEnclosingPrimaryTabId(CreateJiraTab);
        }
        sforce.console.getEnclosingPrimaryTabId(showTabId);
    }

  </script>

</apex:page>
Step 6: Click ‘Save’.

Creating the ‘Create Jira’ Button
Step 1: Go to the ‘Object Manager’ and search the object on which the ‘Create Jira’ button has to be added. Click on the object. For example in the below screenshot, ‘Create Jira’ button is to be added on the Case object.
Step 2: From the object ‘Details’ page, click ‘Buttons, Links, and Actions’.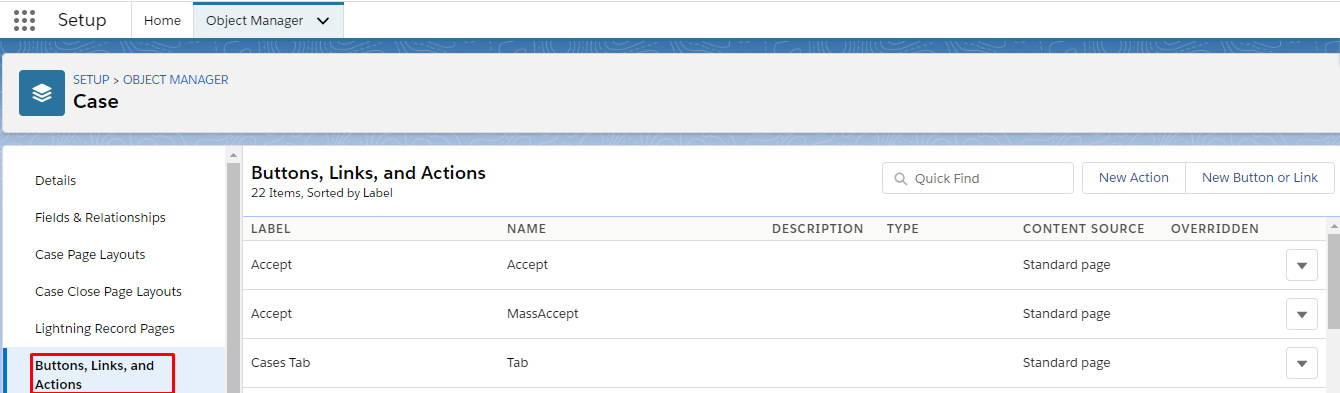
Step 3: Click ‘New Button or Link’.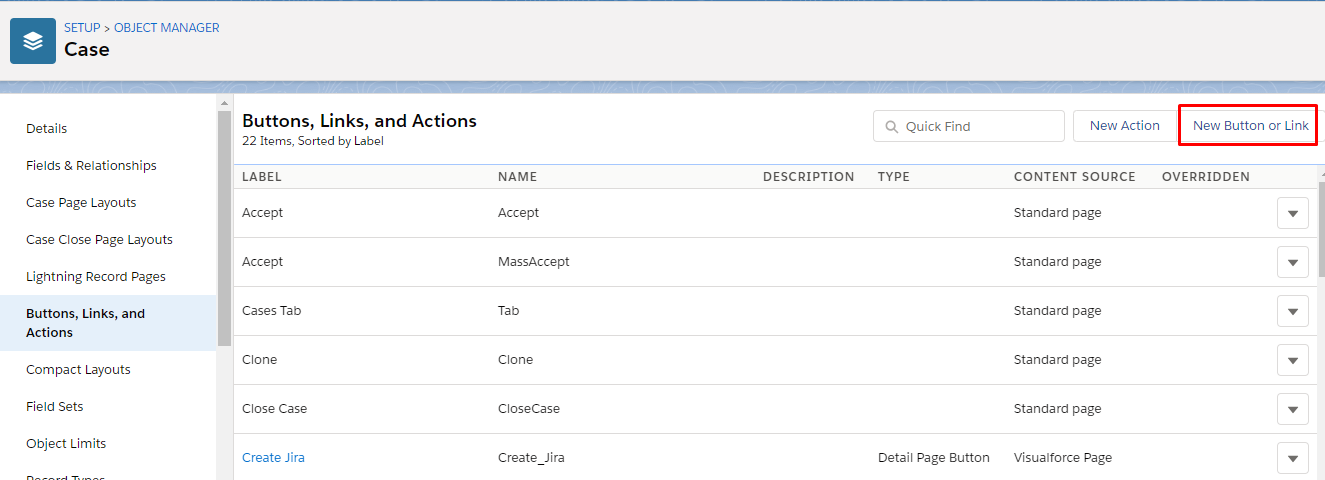
Step 4: Fill in the required details. Enter ‘ Create Jira’ in the ‘Label’ field and the ‘Name’ field will be autopopulated. For other fields, the details would be as below:
- Display Type: Detail Page Button
- Behavior: Display in the existing window with the sidebar
- Content Source: Visualforce Page
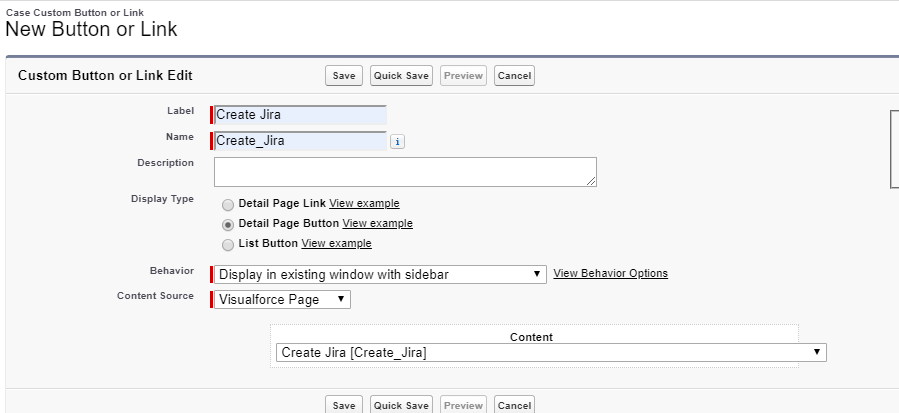
Step 5: Clik ‘Save’.
Adding the ‘Create Jira’ button to the Object Page layout
Step 1: On the details section of the object, click on the page layout sub-tab (For example in the below screenshot, ‘Case Page Layout’ is selected as the button is added on the ‘Case’ object).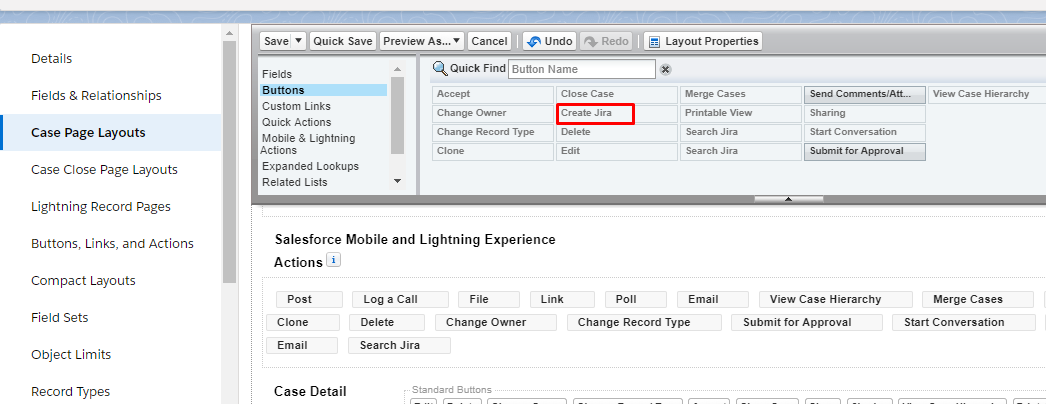
Step 2: Click on the buttons in the Palette. Drag the ‘Create Jira’ button into the Case details button Section. This button will be placed as a Custom button in this section.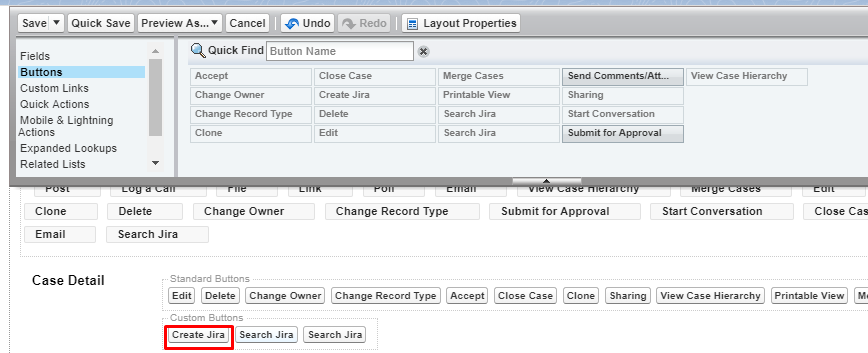
Adding ‘Create Jira’ button in Lightning Experience
Click on the ‘Mobile and Lightning Actions’ in the Palette and drag the ‘Create Jira’ button to the ‘Salesforce and Lightning Experience Actions’ section.
And finally, click ‘Save’.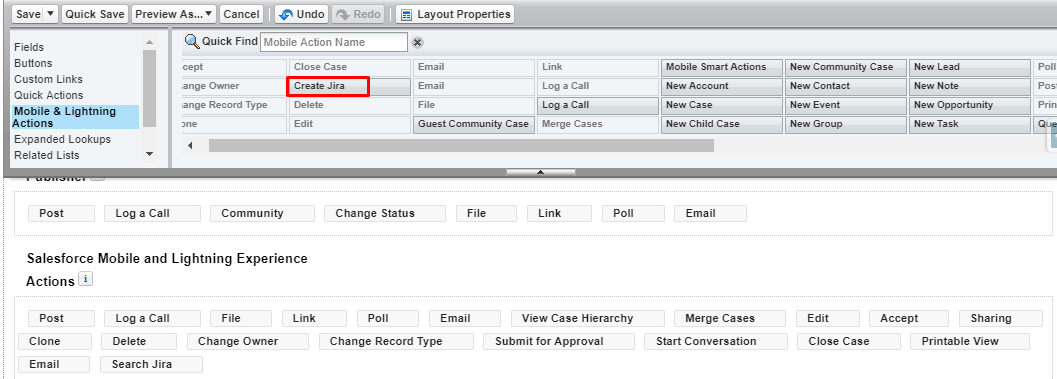
Creating Jira using ‘Create Jira’ Button
Step 1: Click ‘Create Jira’ on the object detail page. For example in the below screenshot, Jira is created for Case object.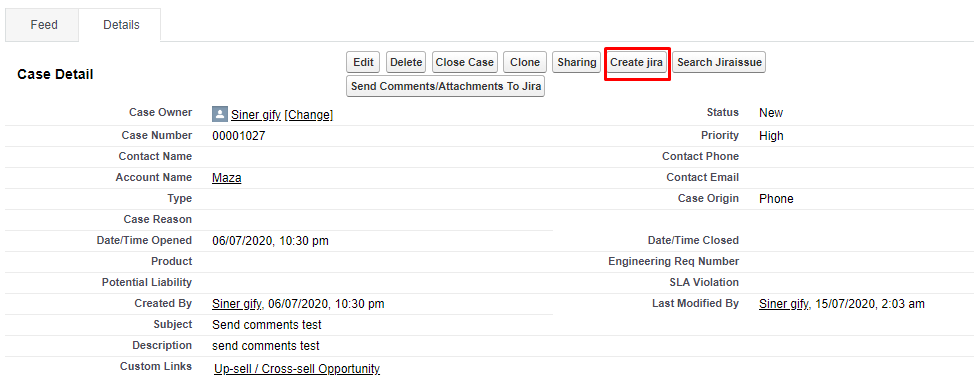
Step 2: Fill in the details on the Jira detail page and click ‘Save’.
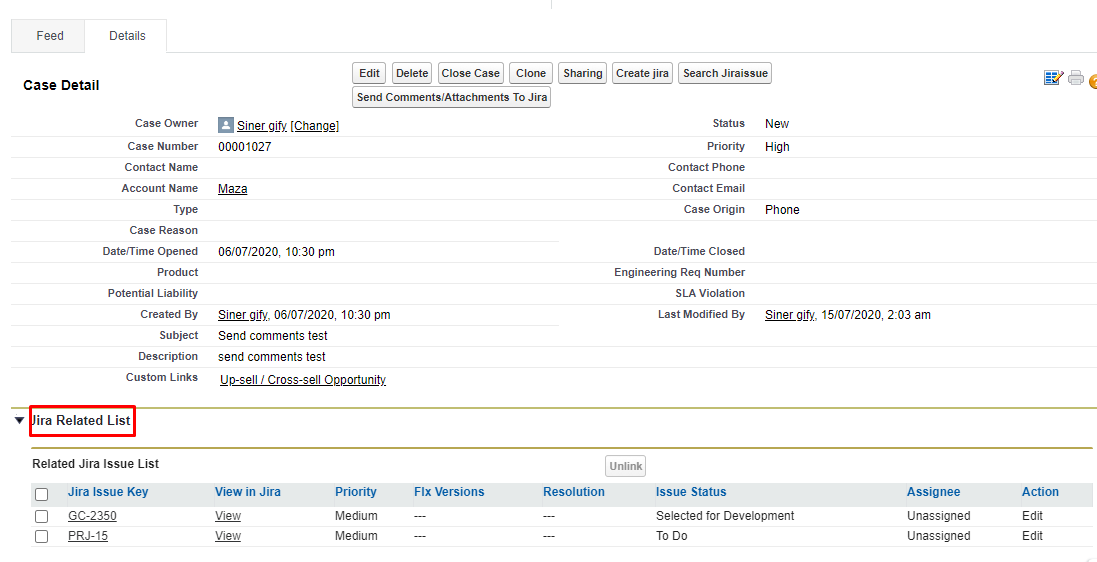
Step 3: The newly created Jira issue will appear in ‘Related Jira Issue List’.


